I am so excited and happy to reveal the long-awaited project ever, I put all my efforts to make my Dream kitchen, It took more than 2 months along with lots of research, hard work and stress (everything) behind the biggest renovation so far…!!
This is not sponsored post, I have done almost everything all my self with help of my husband. However, I had to hire a contractor for our backsplash. I could n’t tell you details right now…I promise I will tell you each and everything step by step in coming weeks……Did I tell you… it’s not completed yet … our dishwasher is on its way …but I couldn’t wait for another couple of weeks for that, so please ignore that black ugly dishwasher at this moment….. I am so sorry for making you guys wait for long too…..Are you ready??
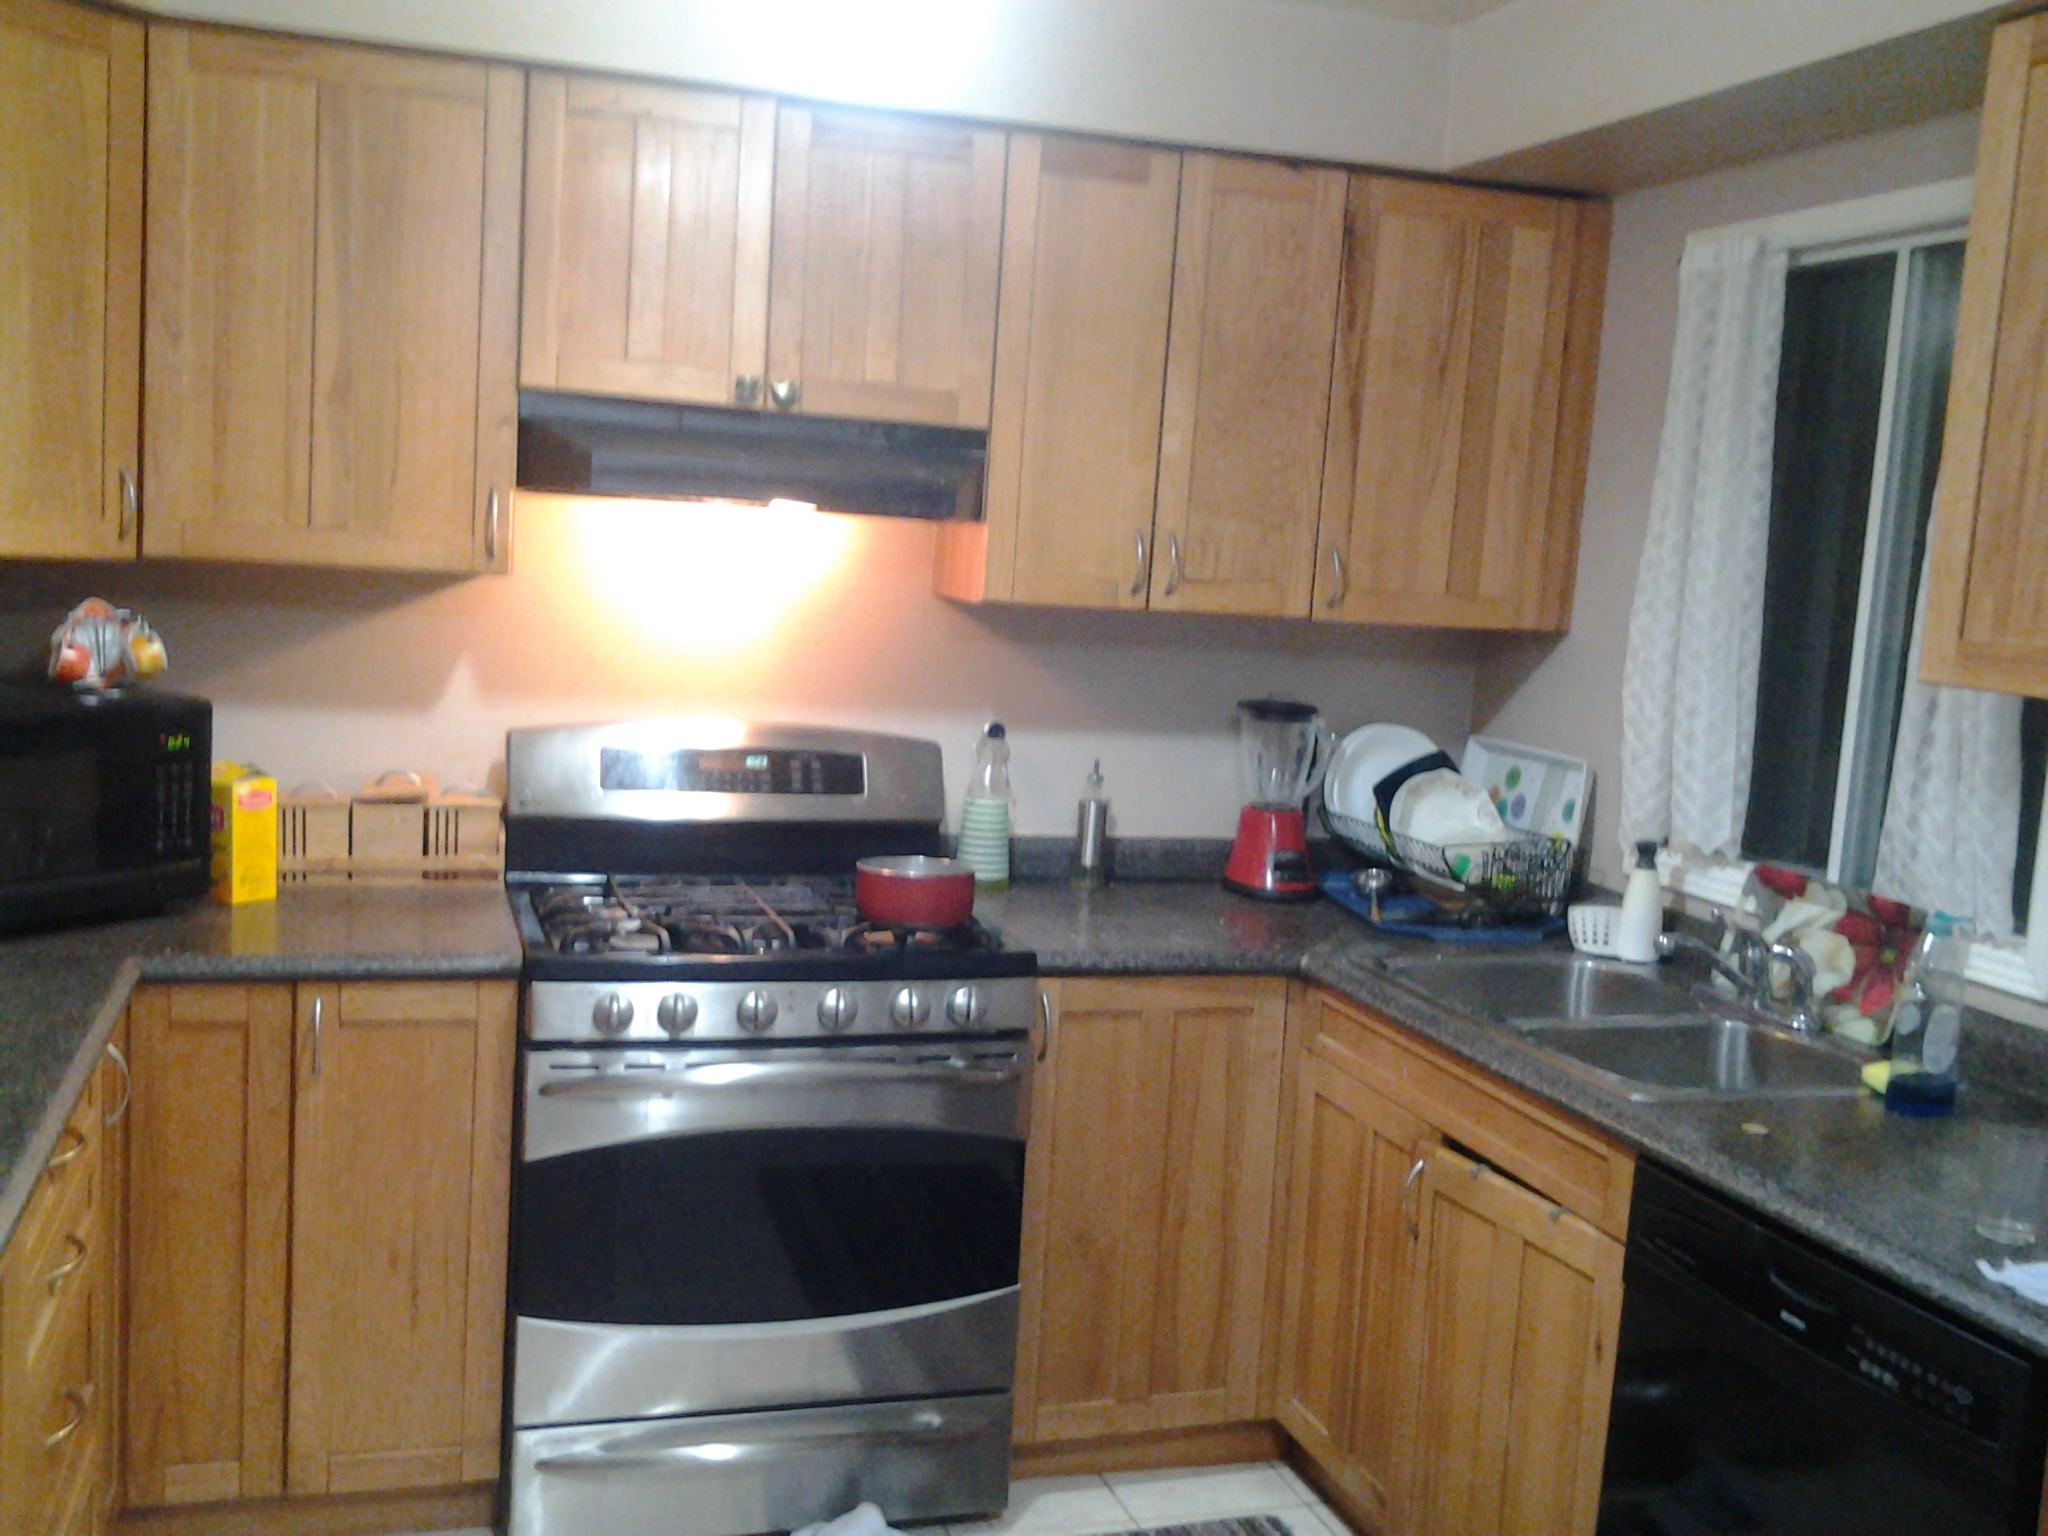
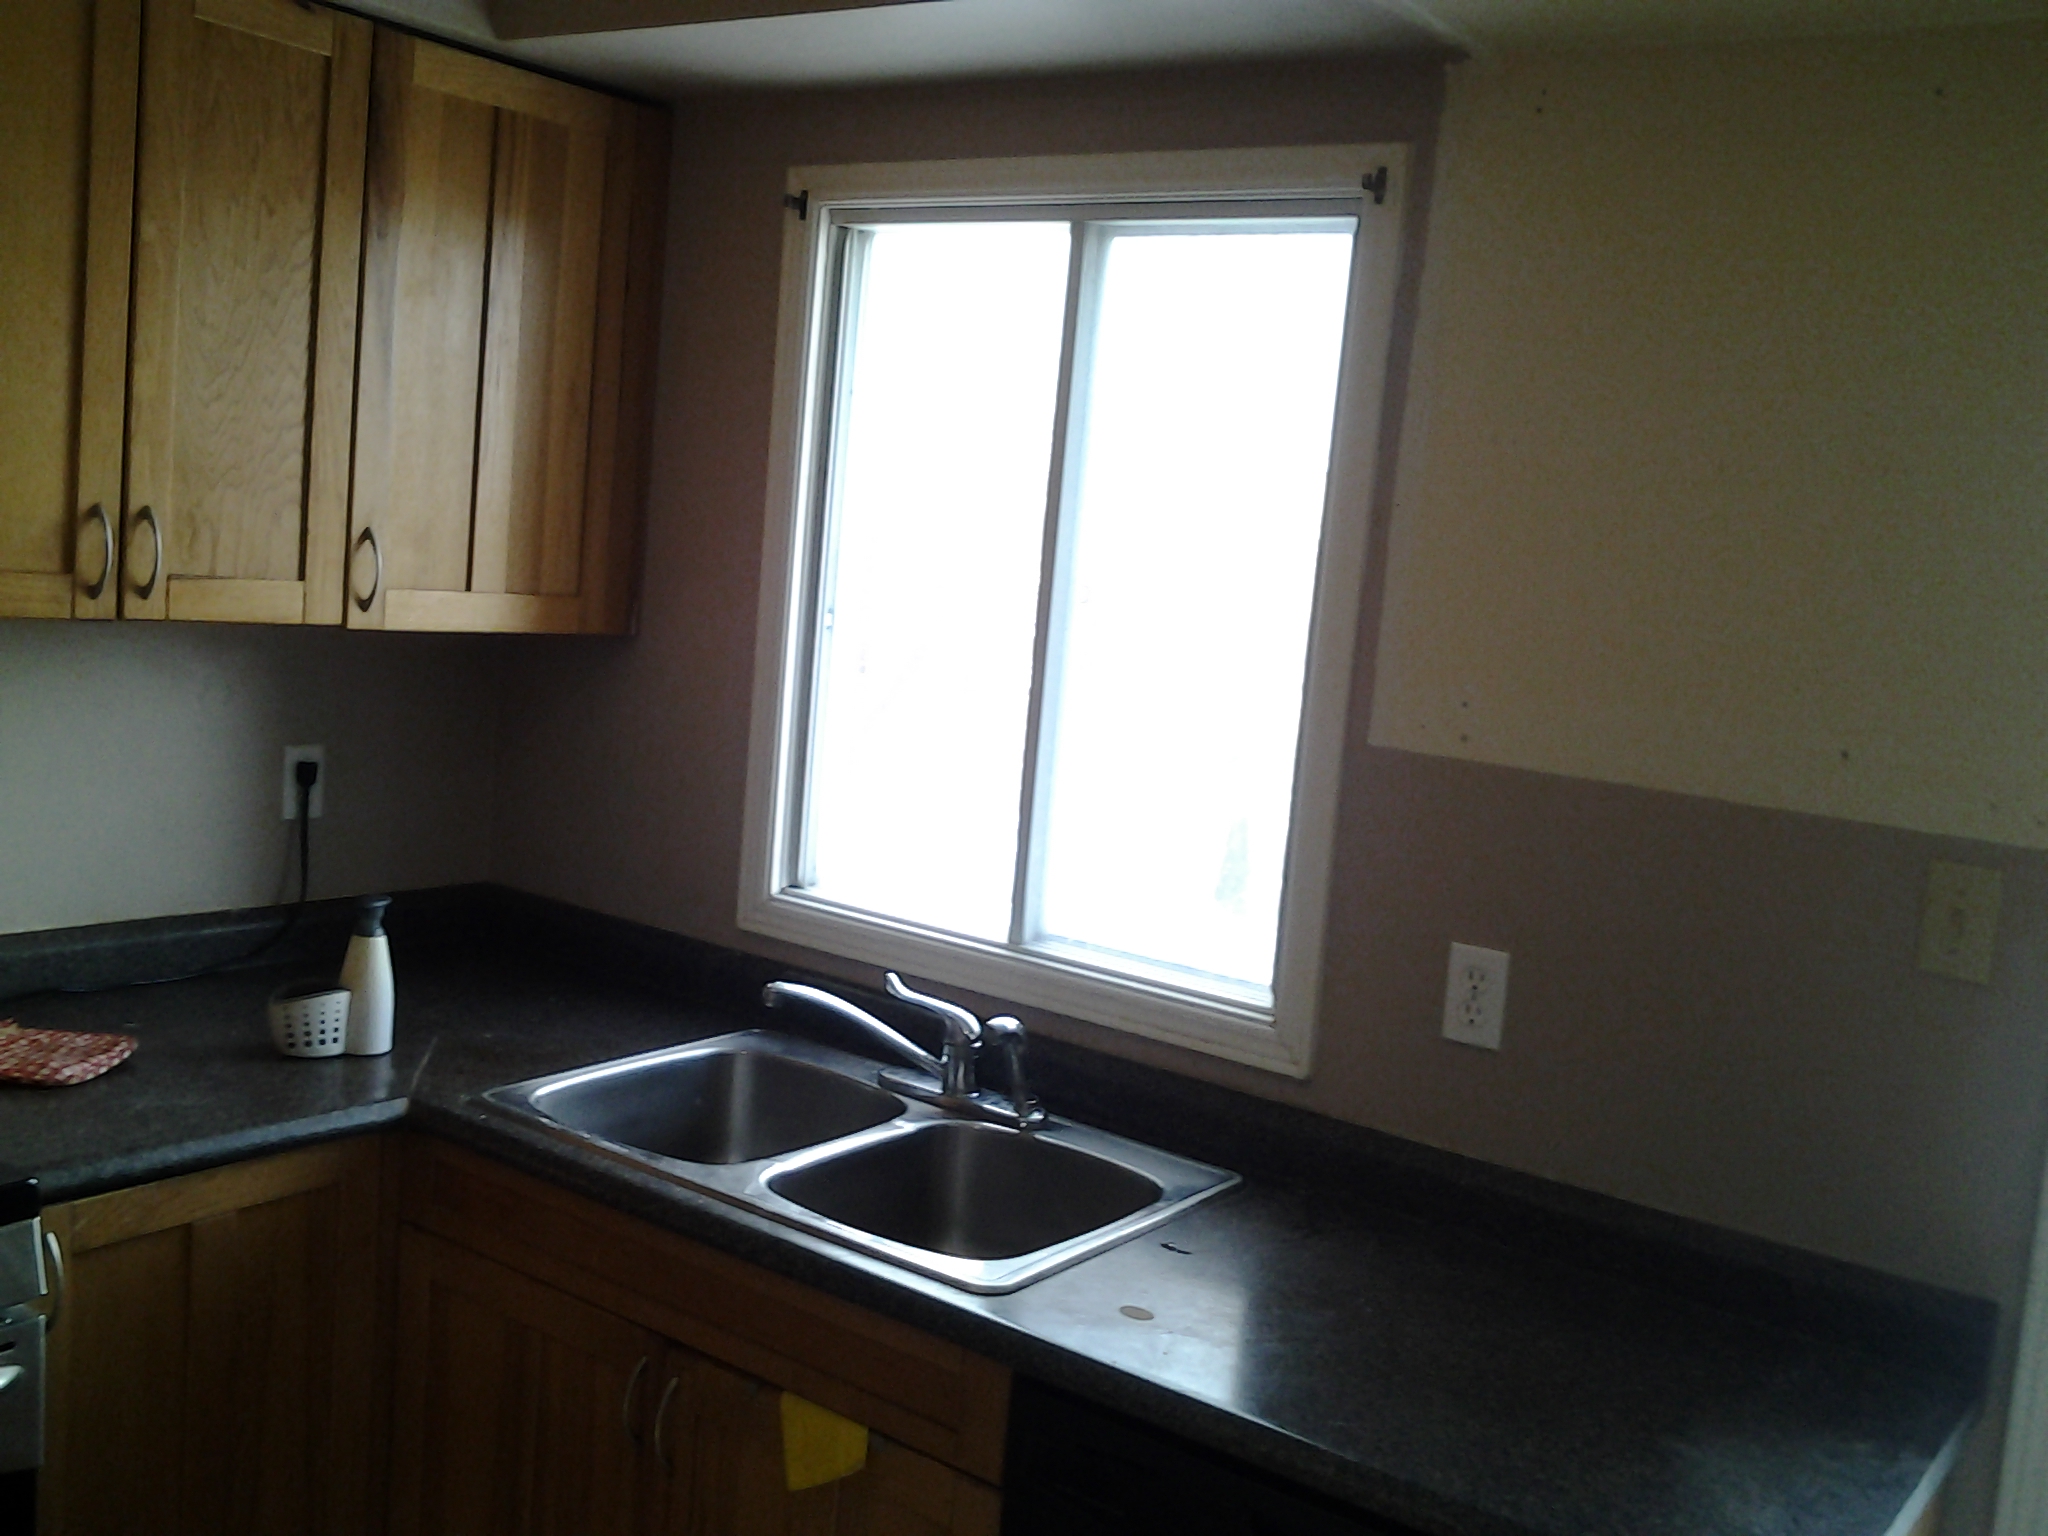
let’s start with the Before, I shared a few days ago…
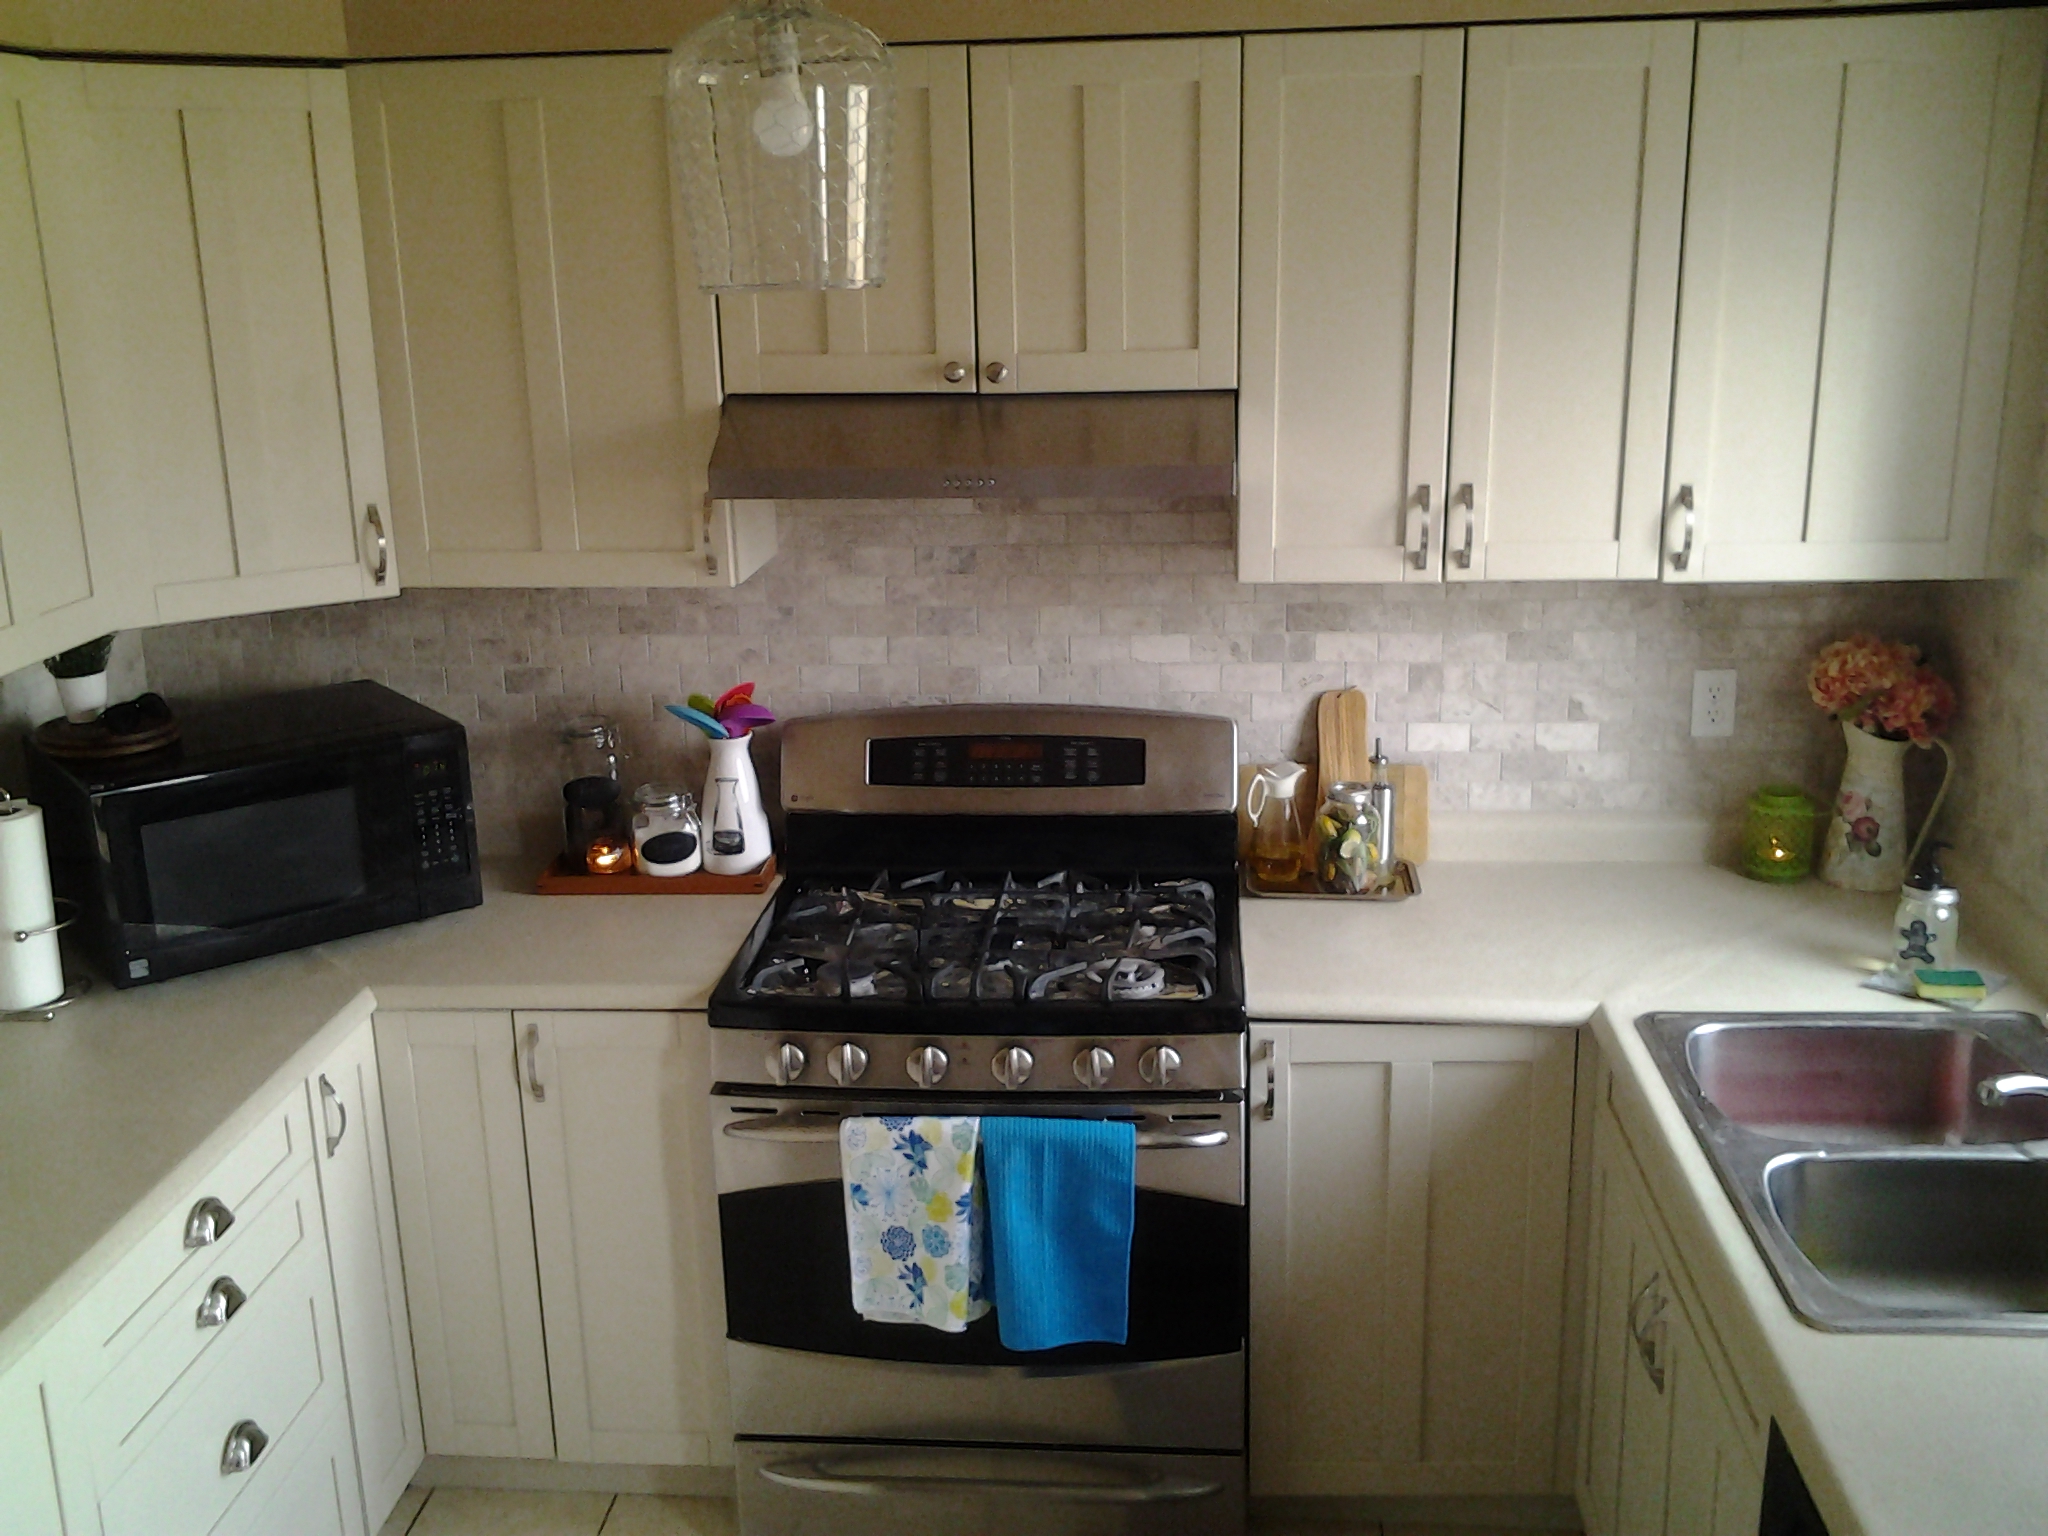
and the final result…
Another before,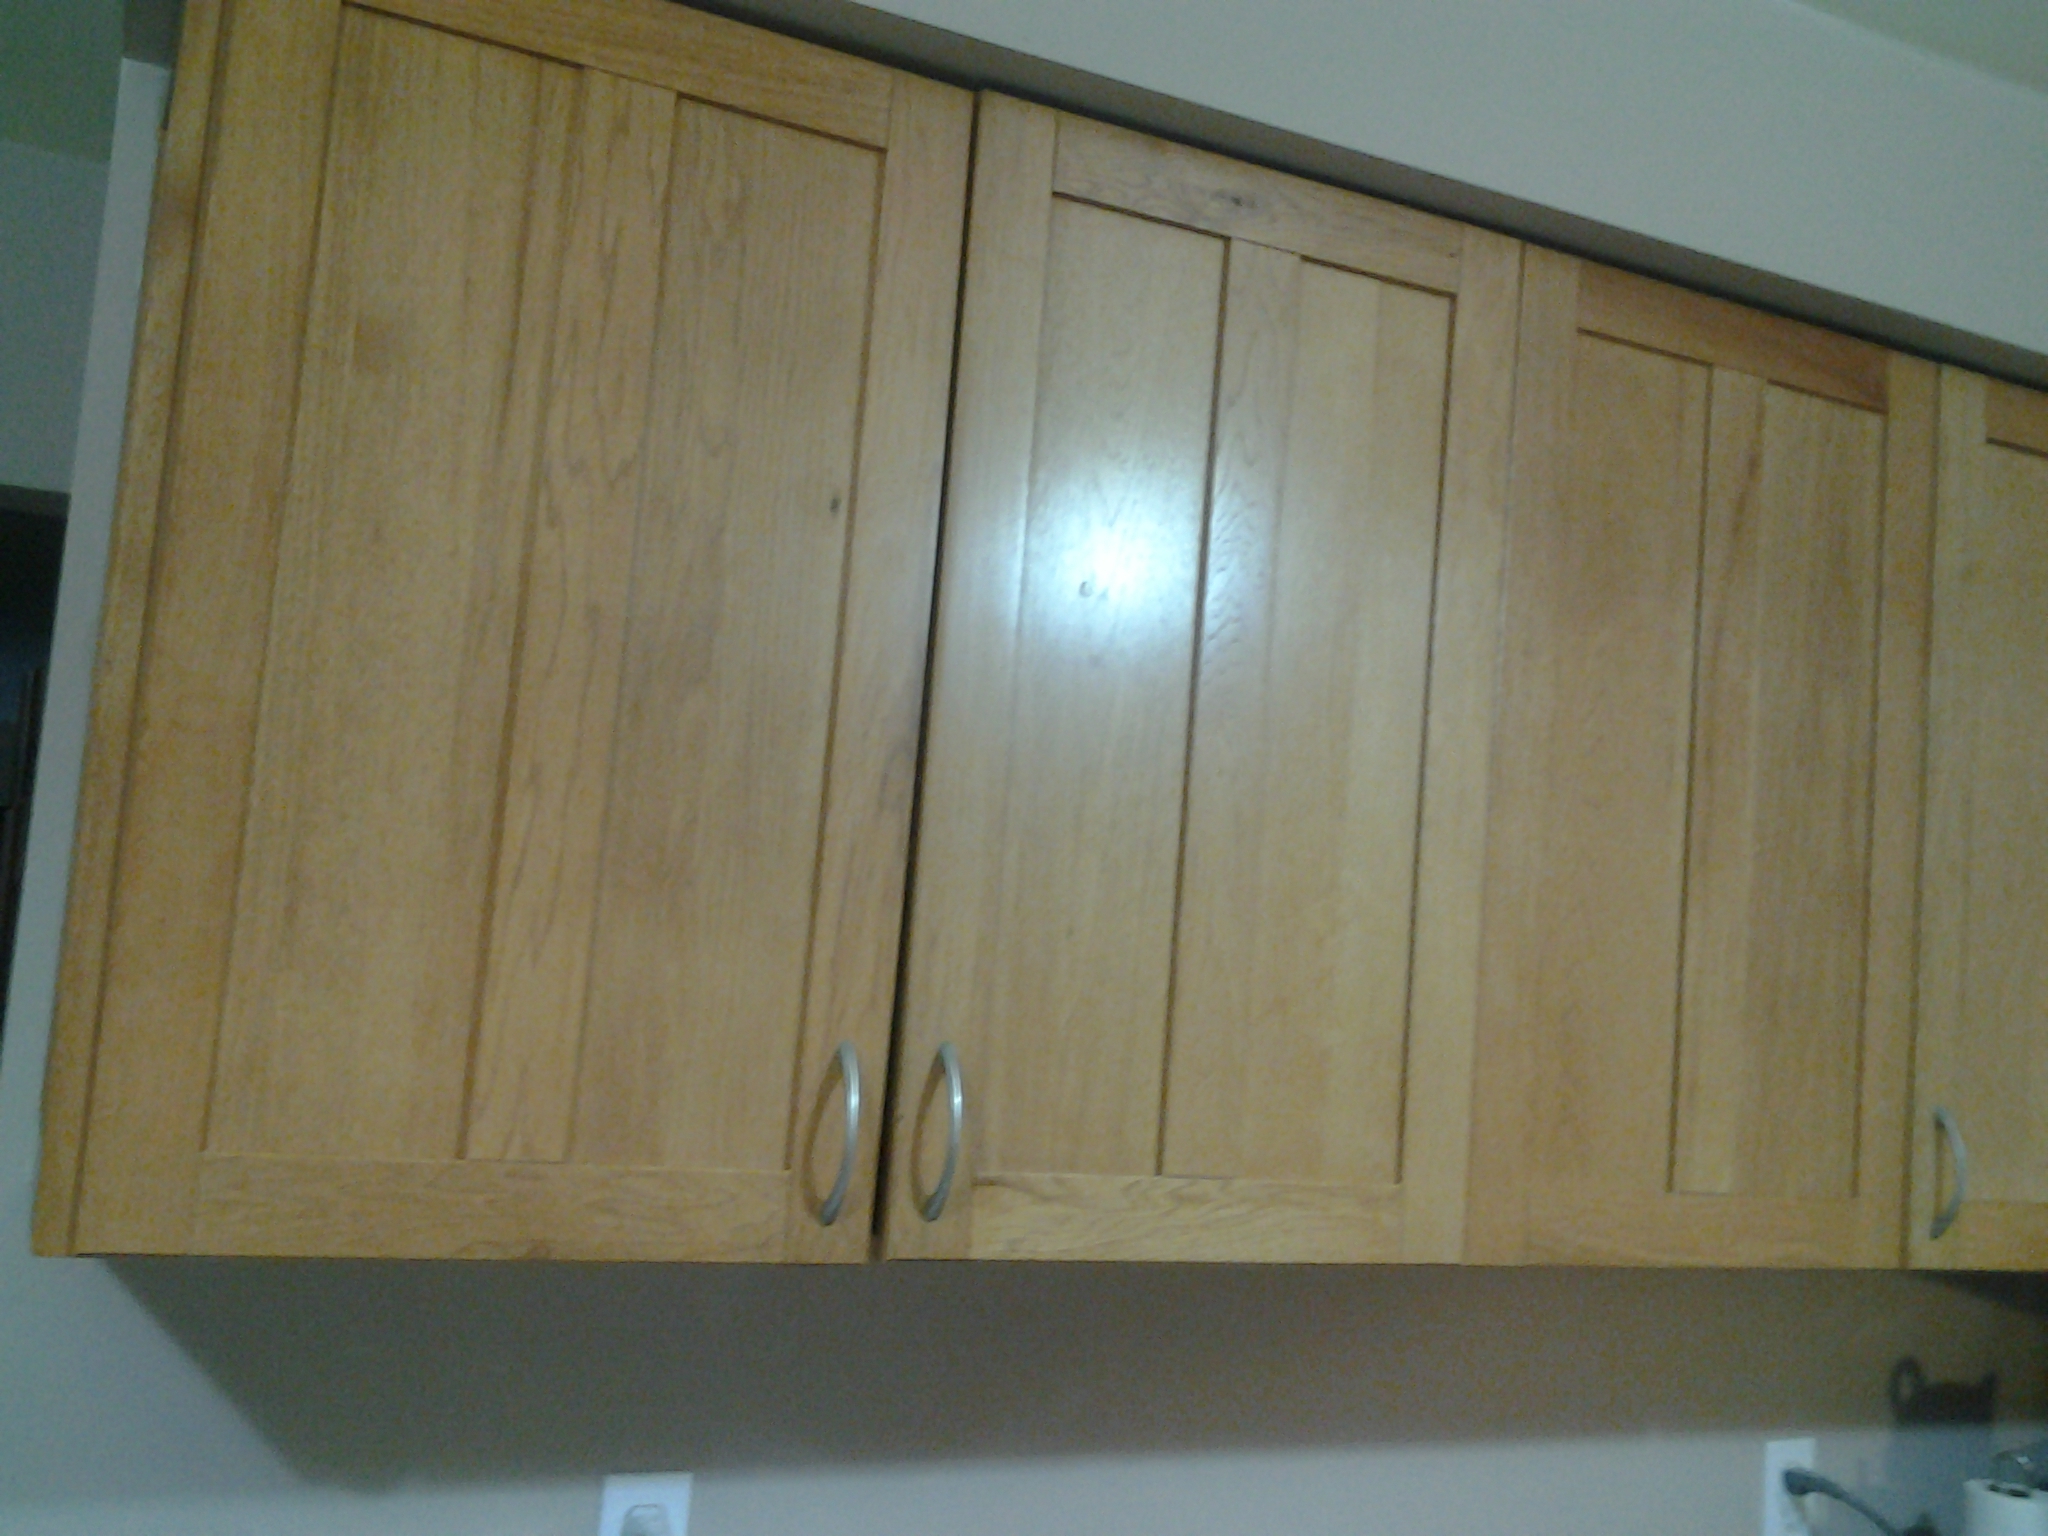
Here is after,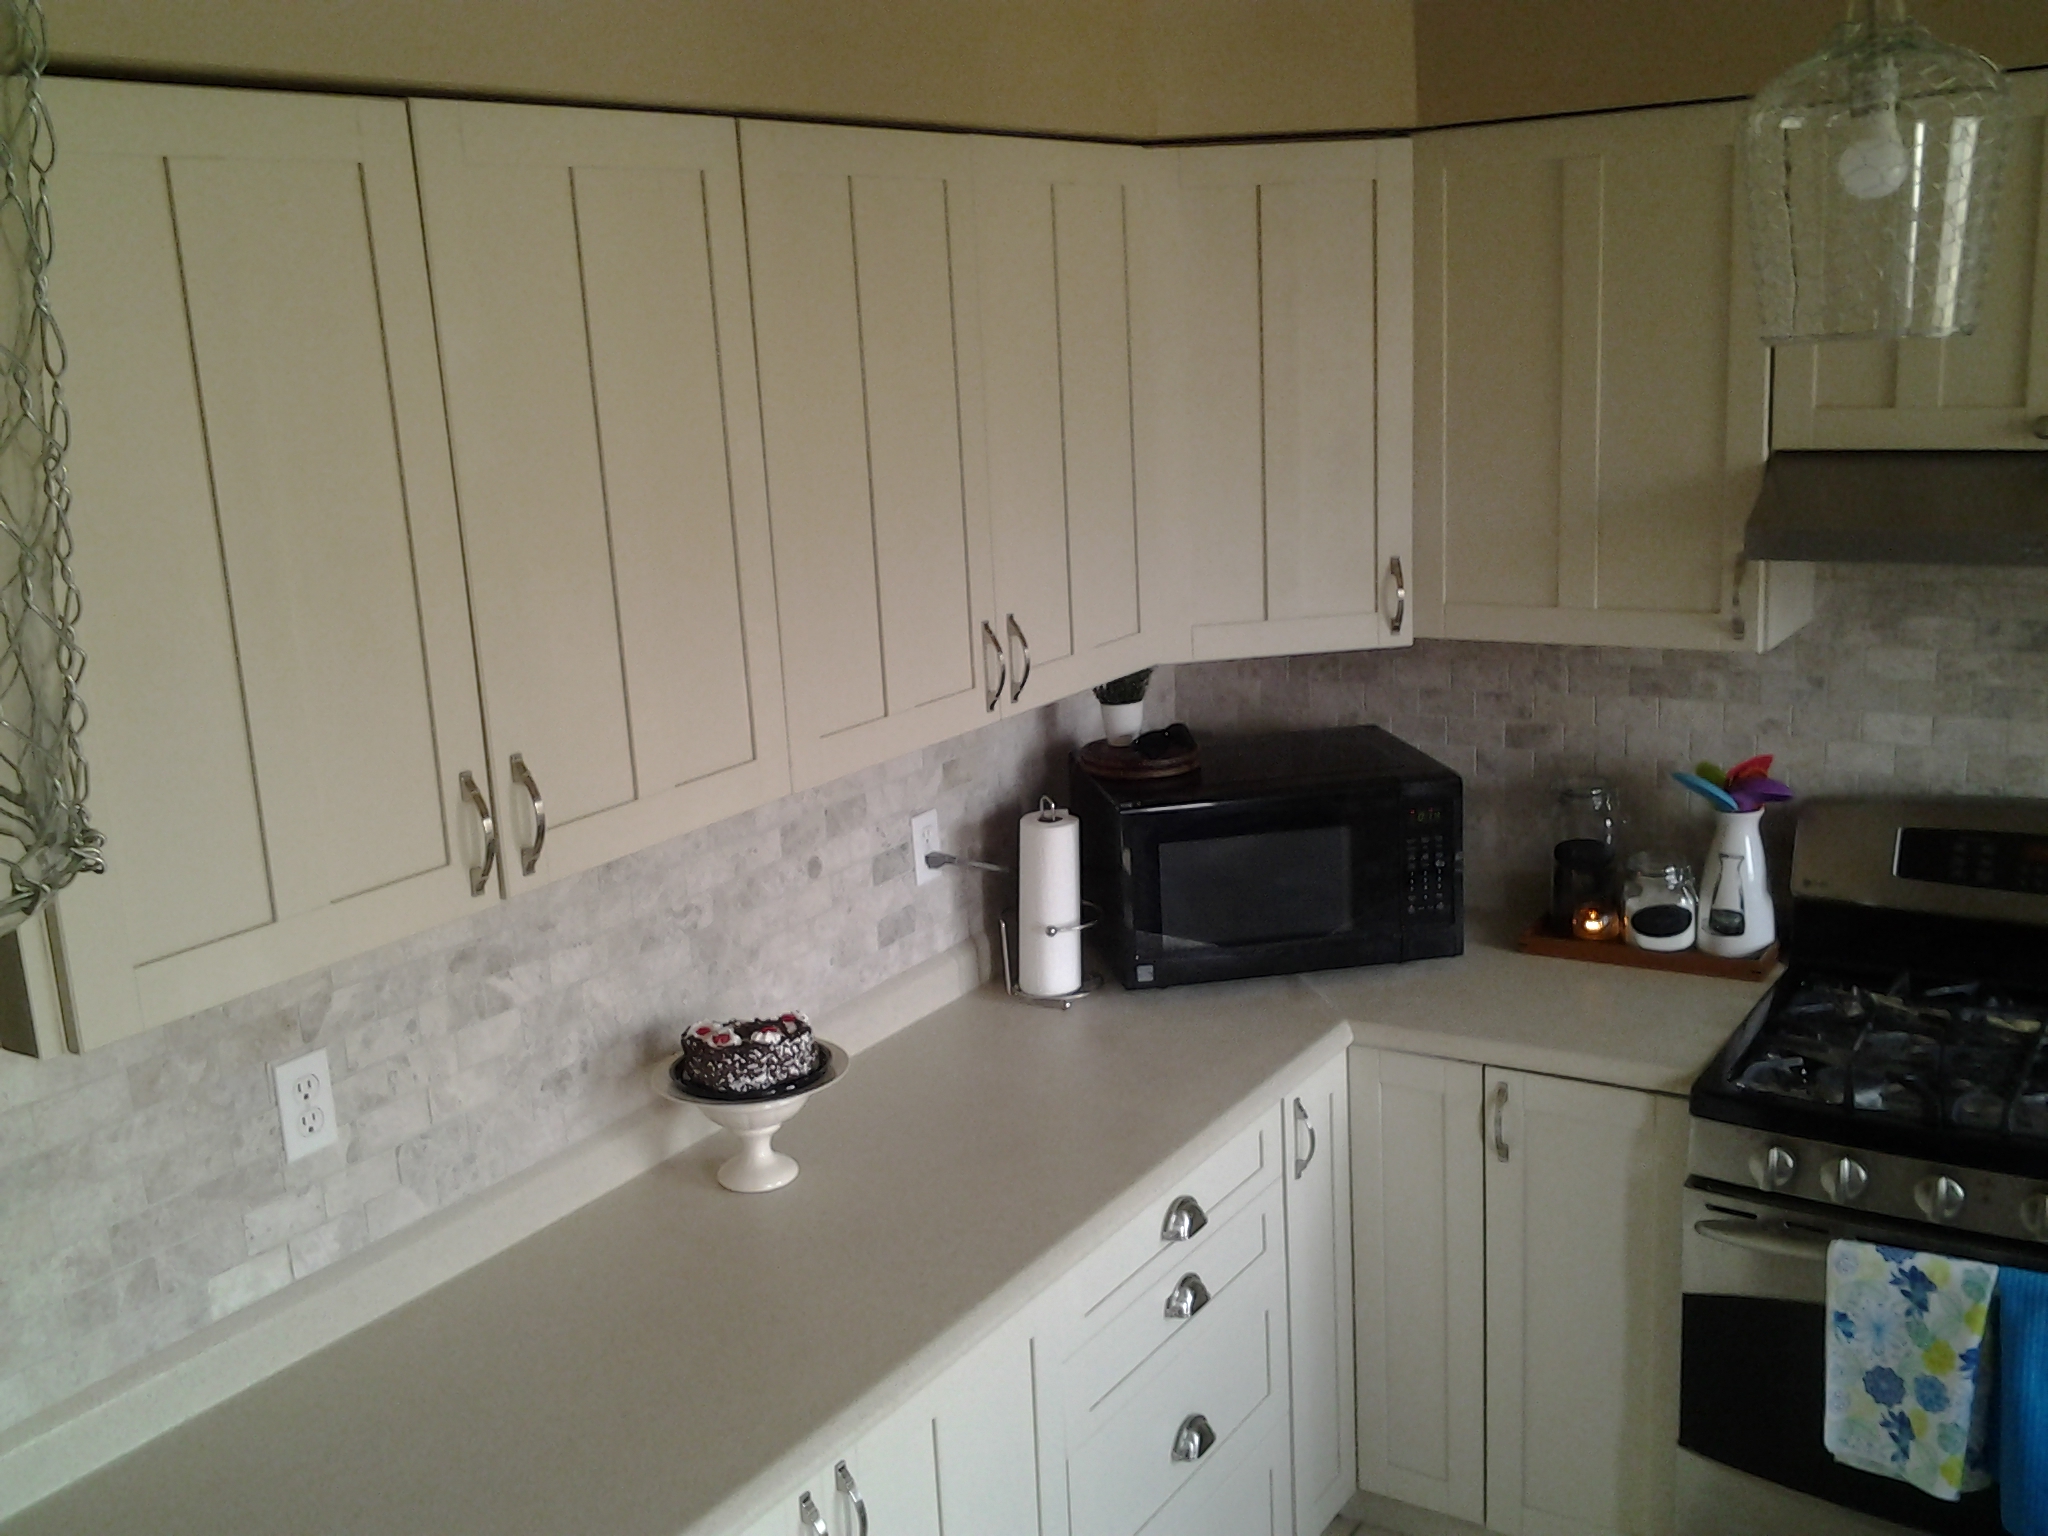
There are lots of choices for everything, it was really hard to decide what will look good in my kitchen. Initially, back splash was not on our “To Do” list but I always wanted it.
here is after,

I fall in first sight love when I saw these Marble subway tiles. I wanted to DIY but didn’t take any chance just because they are super heavy and thick, second, you simply can’t “undo” it..so better to hire somebody if you are unsure to DIY like me. I am glad we hired a professional…I love it after the grouting is done.
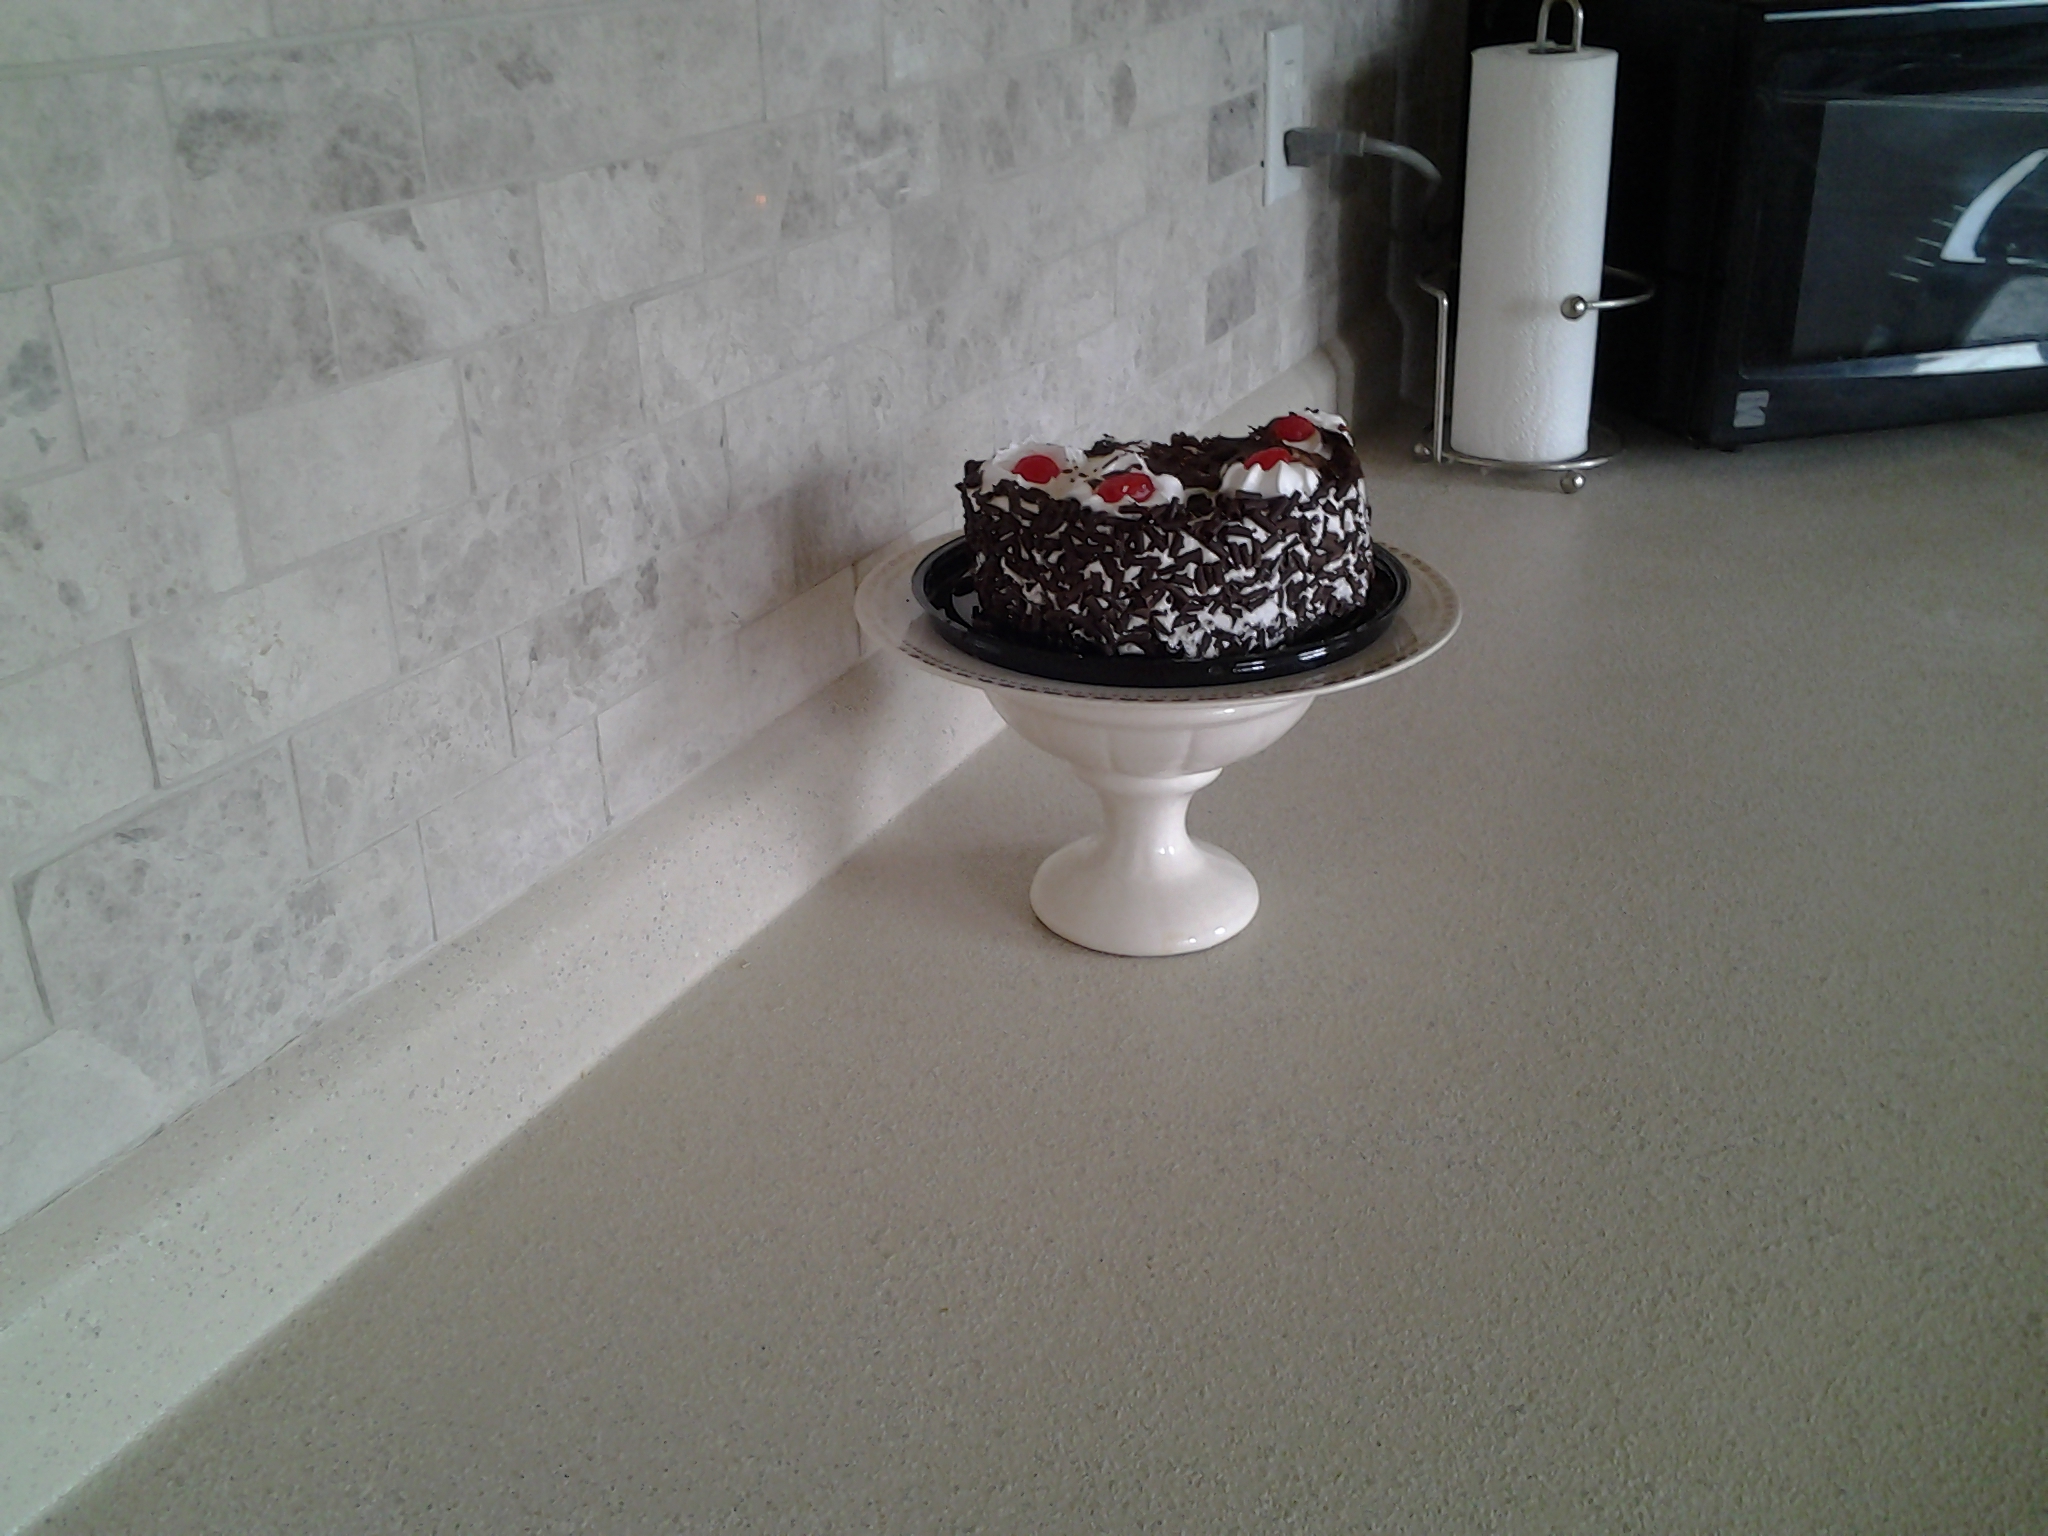
It’s more in Taupe shades than in grey in real…

Next, I need to change the counter-top, I had that black laminate countertop. It looks odd once my back splash is installed and I wanted to change it too ..I love Granite but that’s really out of the budget, I wouldn’t change it and keep it as it is until and unless I didn’t find the much cheaper option of “Stone Coating”.I love the result..you can see how it look ….in between, I DIY this cake stand.
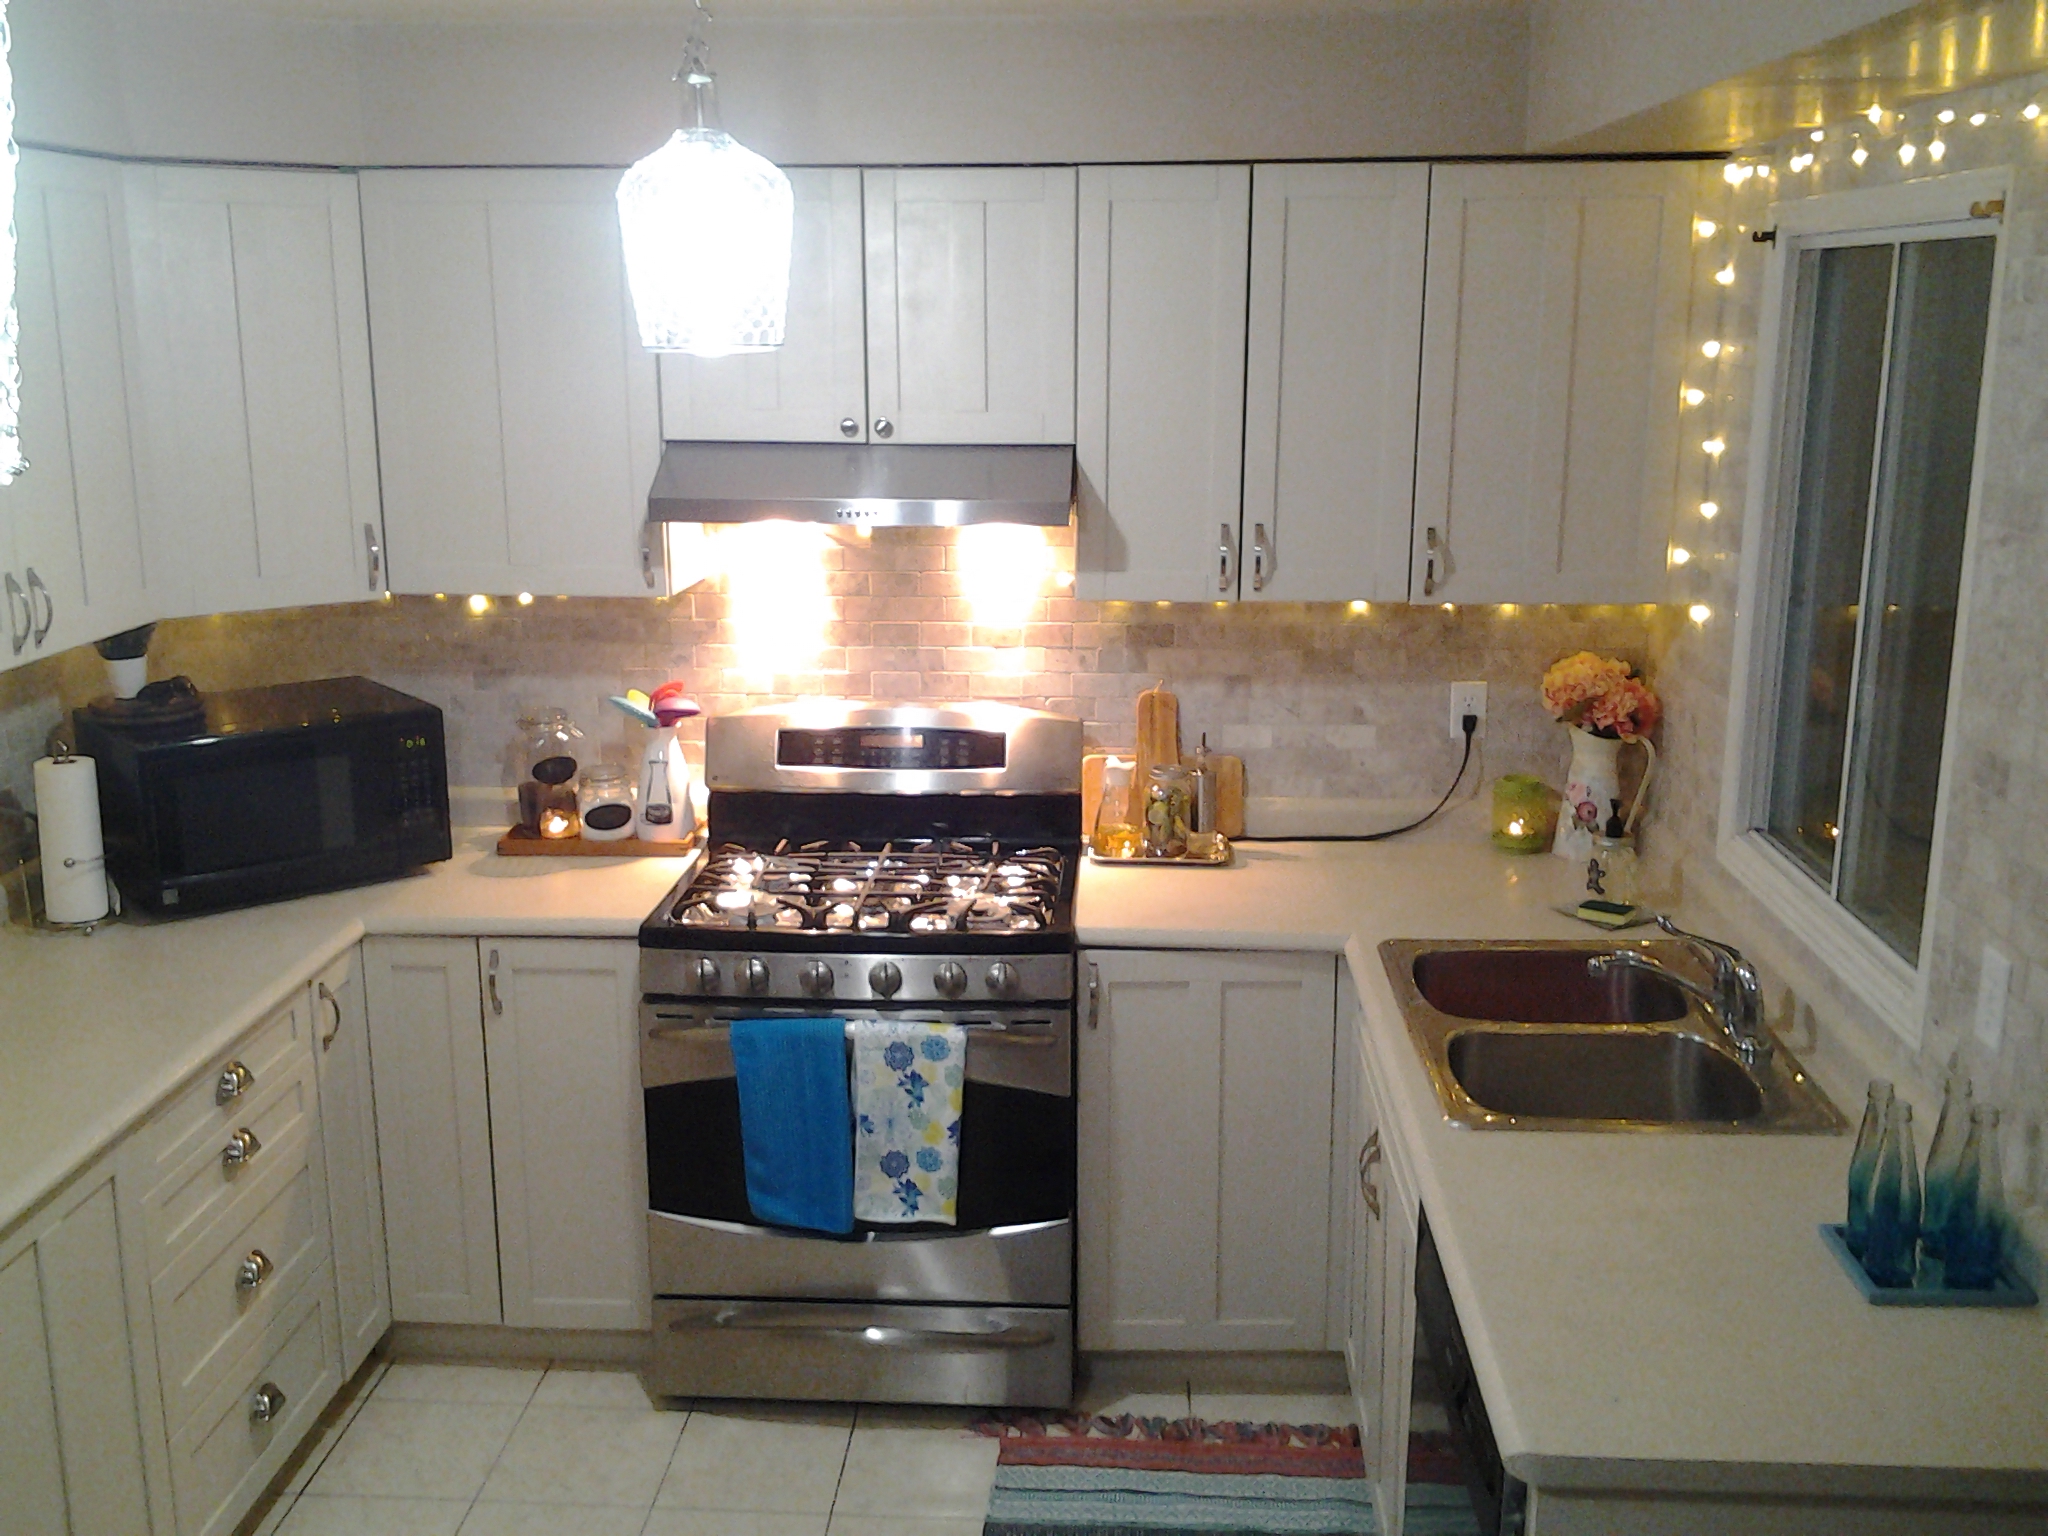
Last(not actually) but not least, that took my most of the time …Yes…I painted my kitchen cabinets. It was oak but in pretty good shape…I sanded,2x primed and painted 3-4 coats of Benjamin Moore Advance, waited so much to let them dry. All you need patience but it really worth to wait.
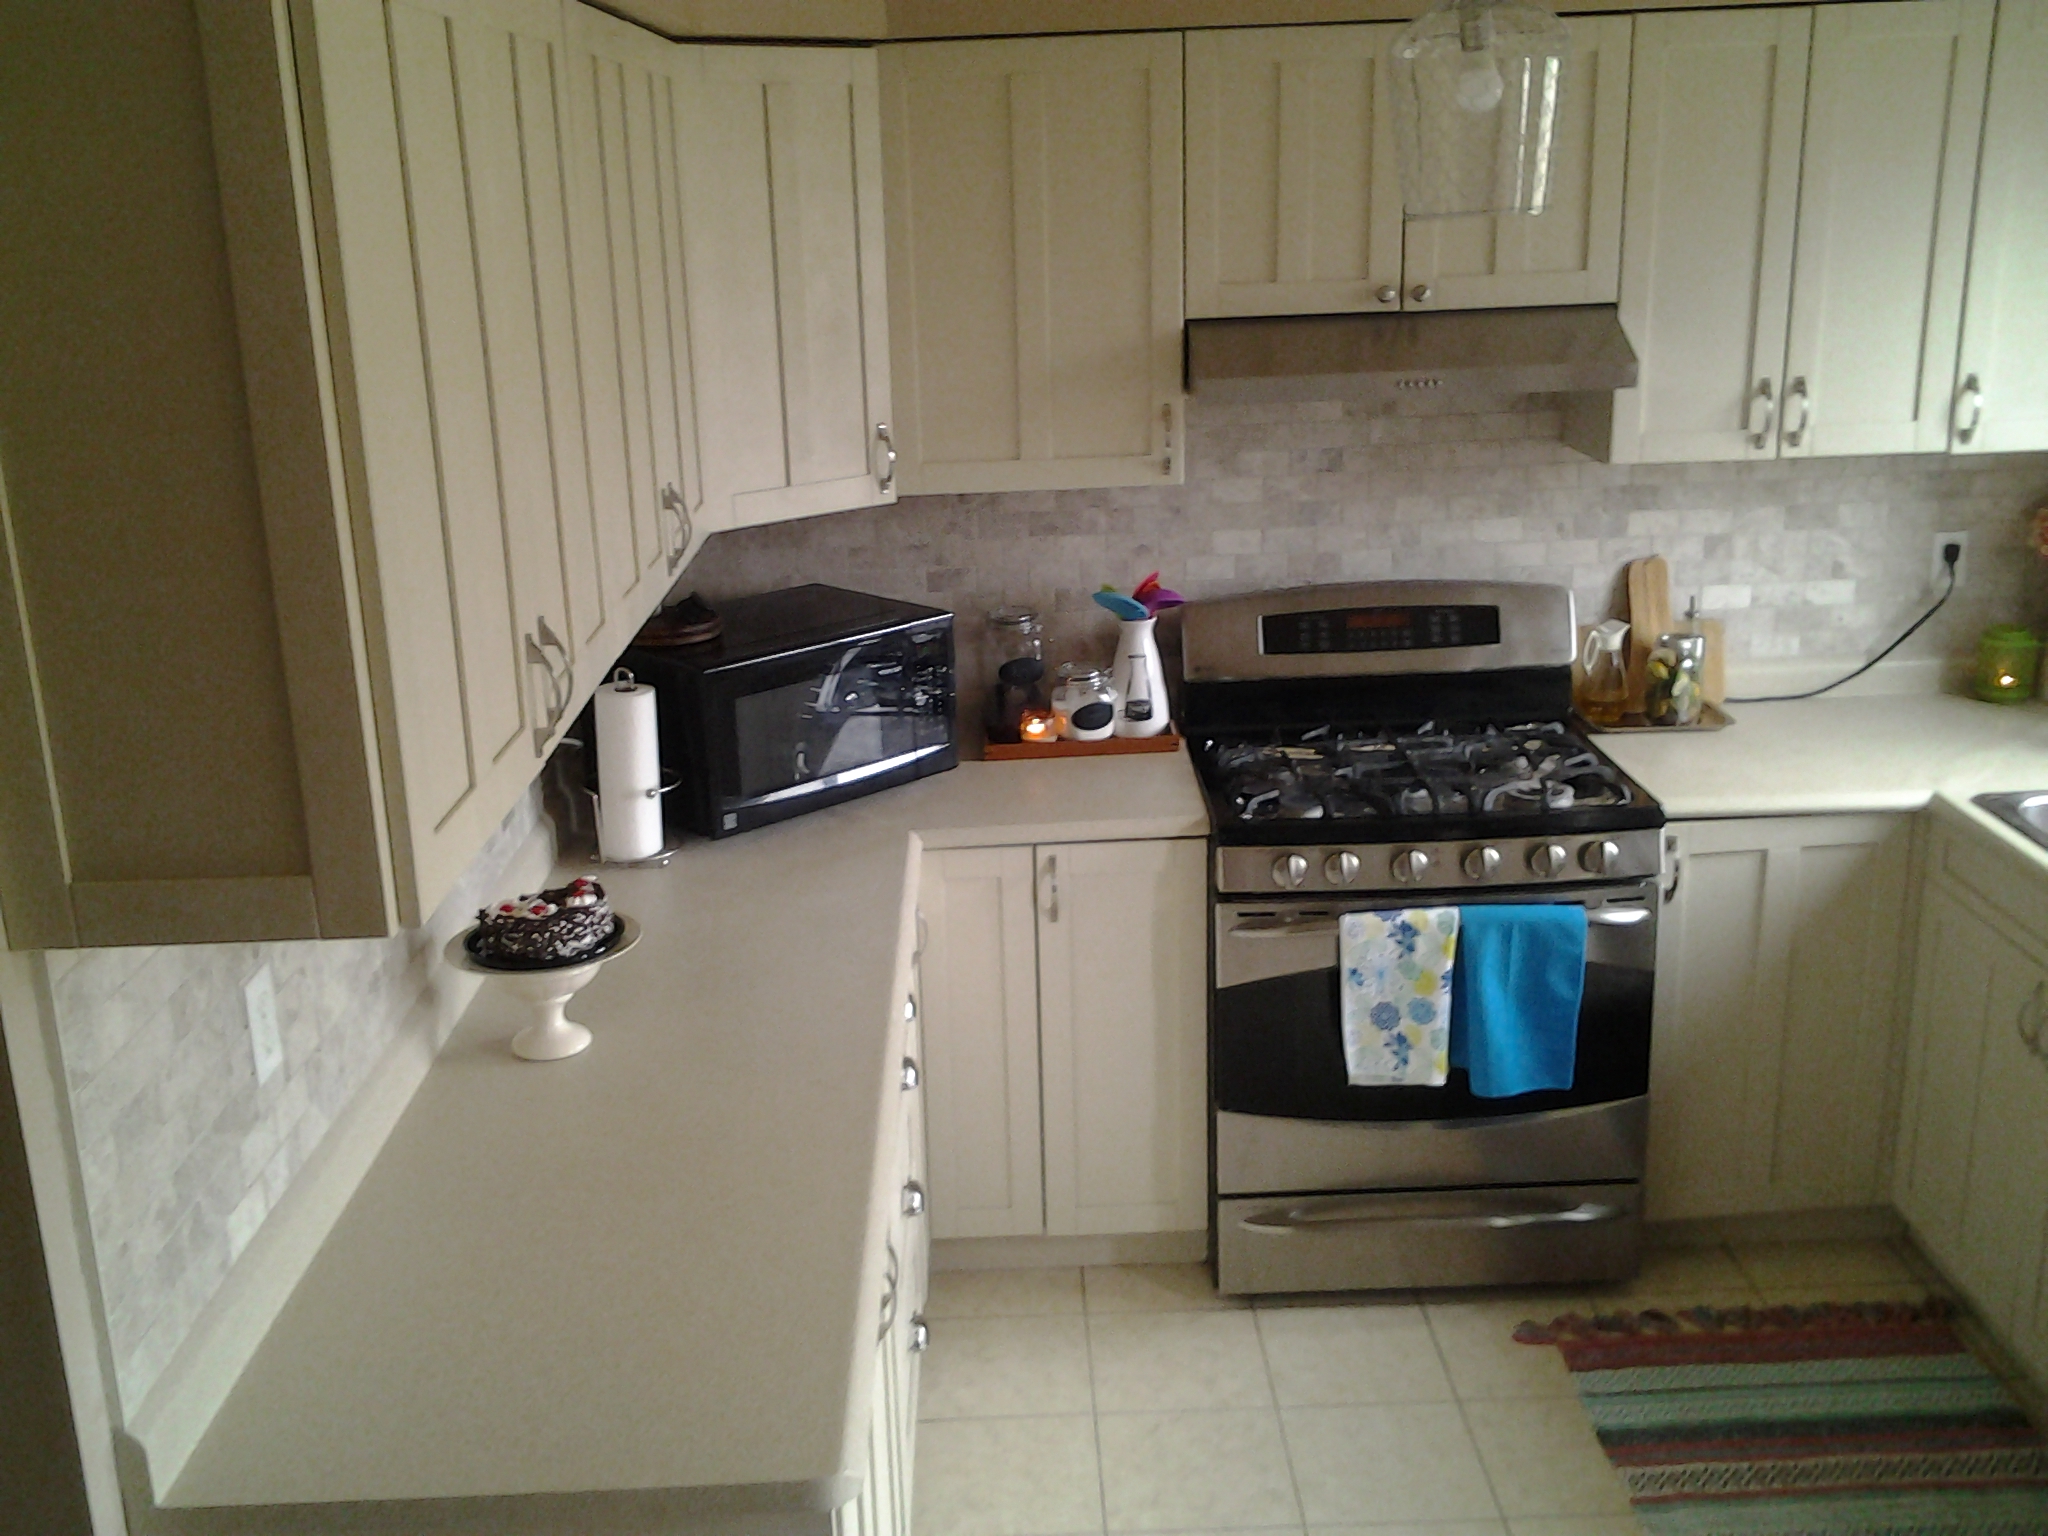
I changed all hardware, again I used 3 different types of hardware in my cabinets and drawers.Can you guys spot them.??.my stove top cabinets has Brushed Nickel knobs, the rest of the cabinets has BN handles and my drawers has BN pulls.
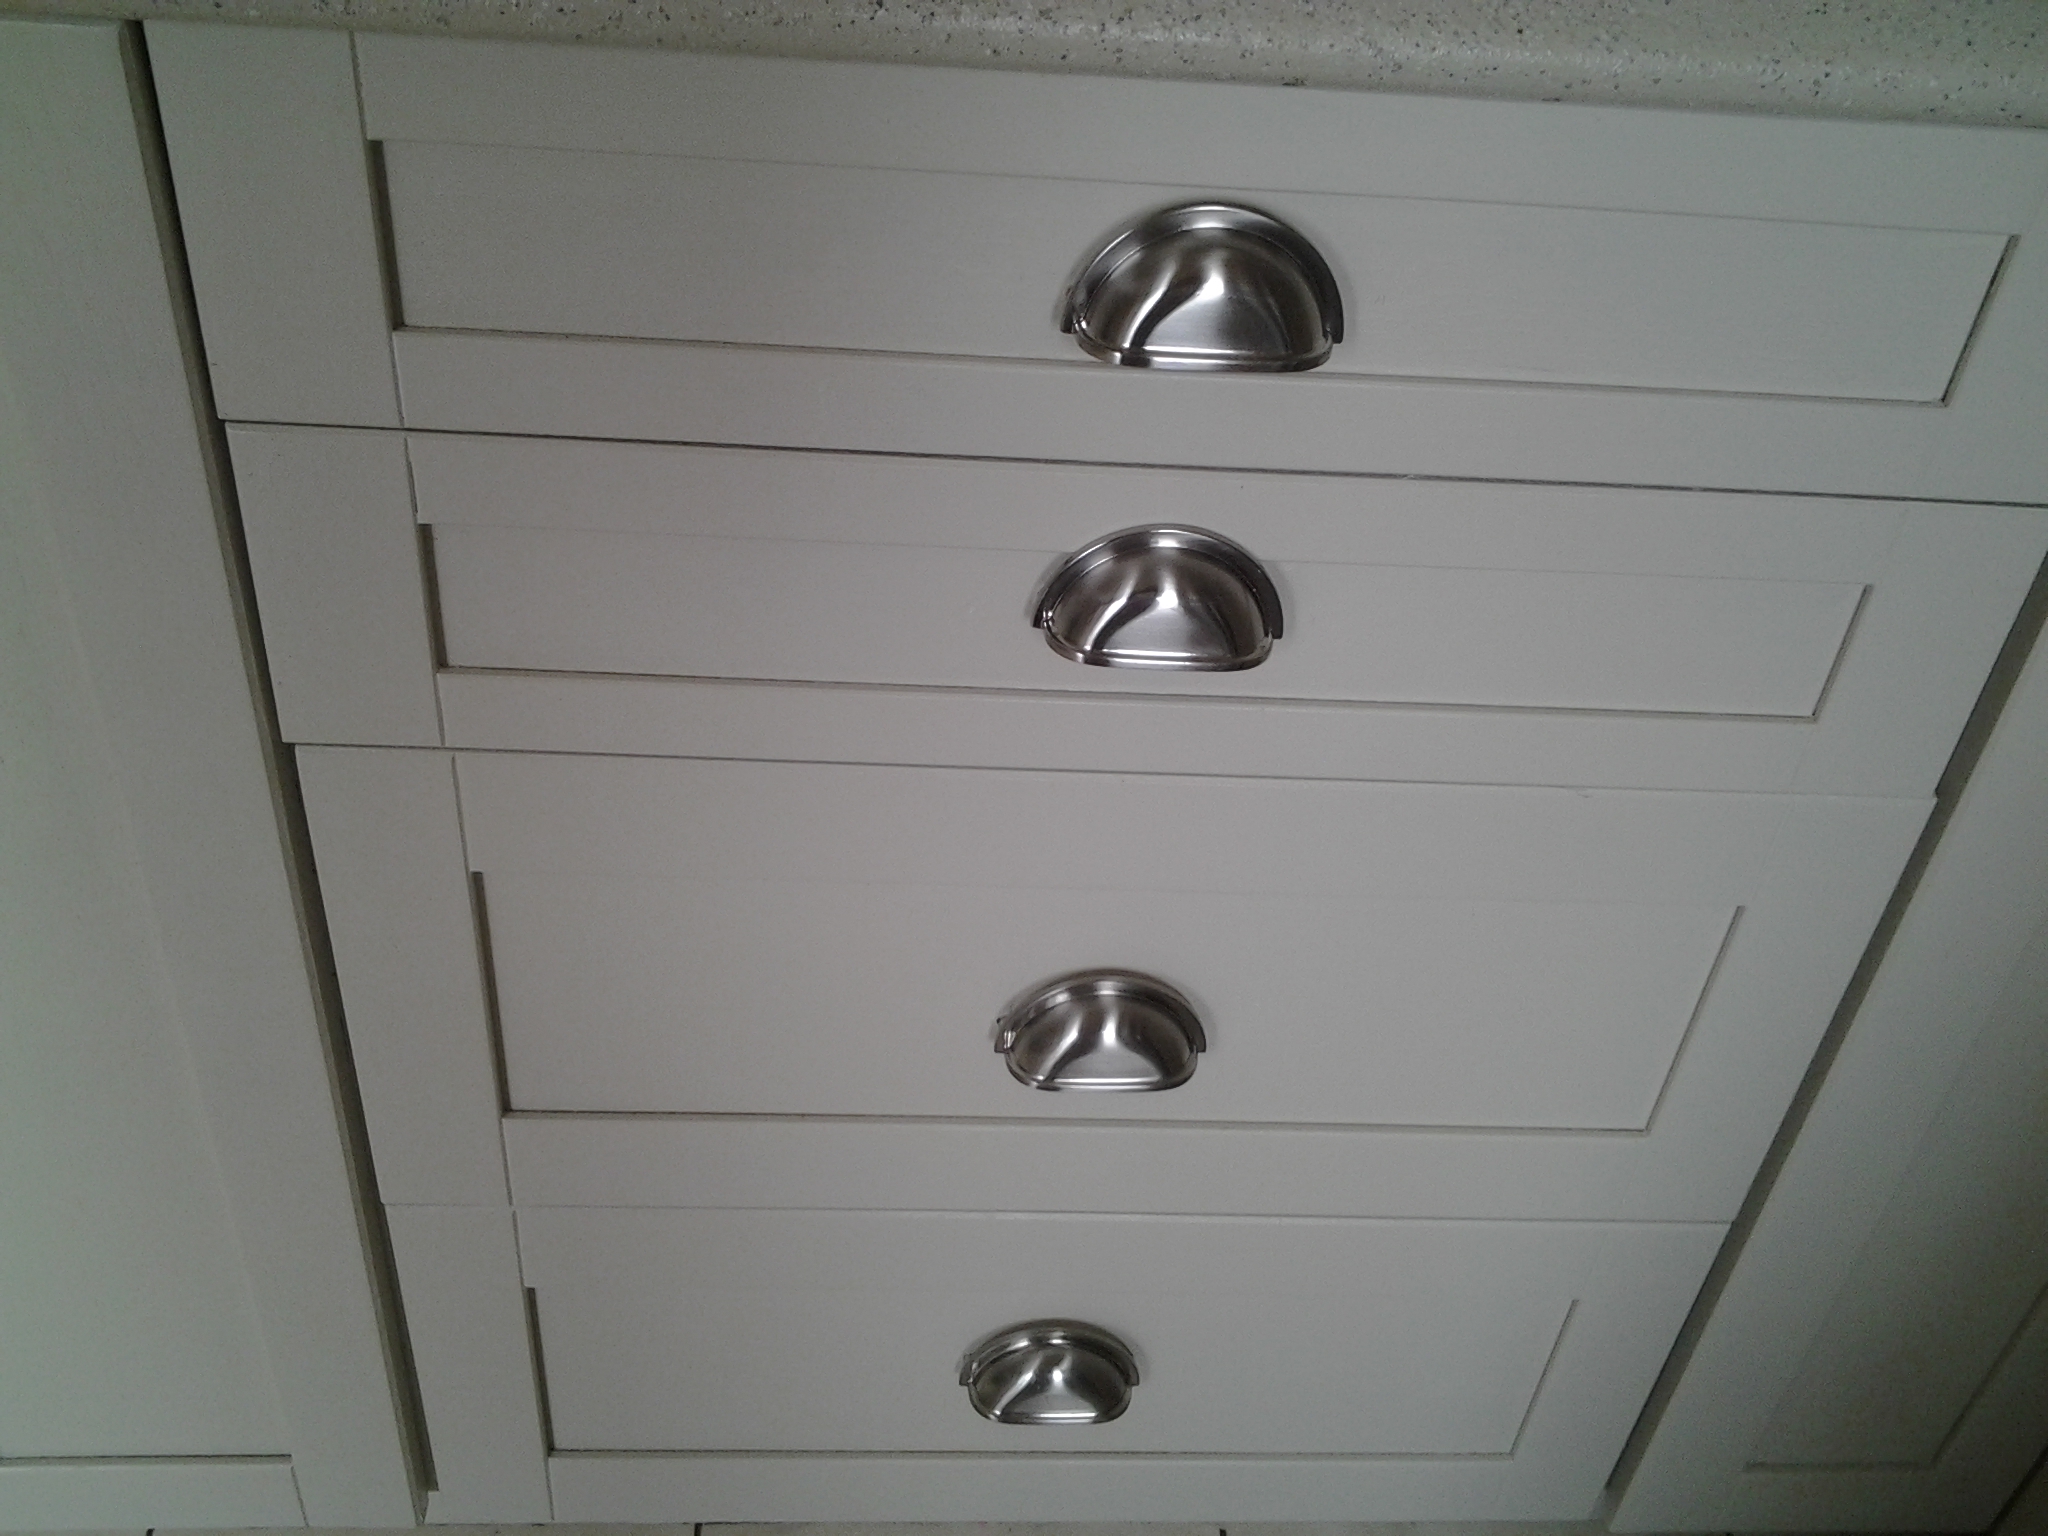
I had to wood filling for drawers pulls because the size was different (again, details later).
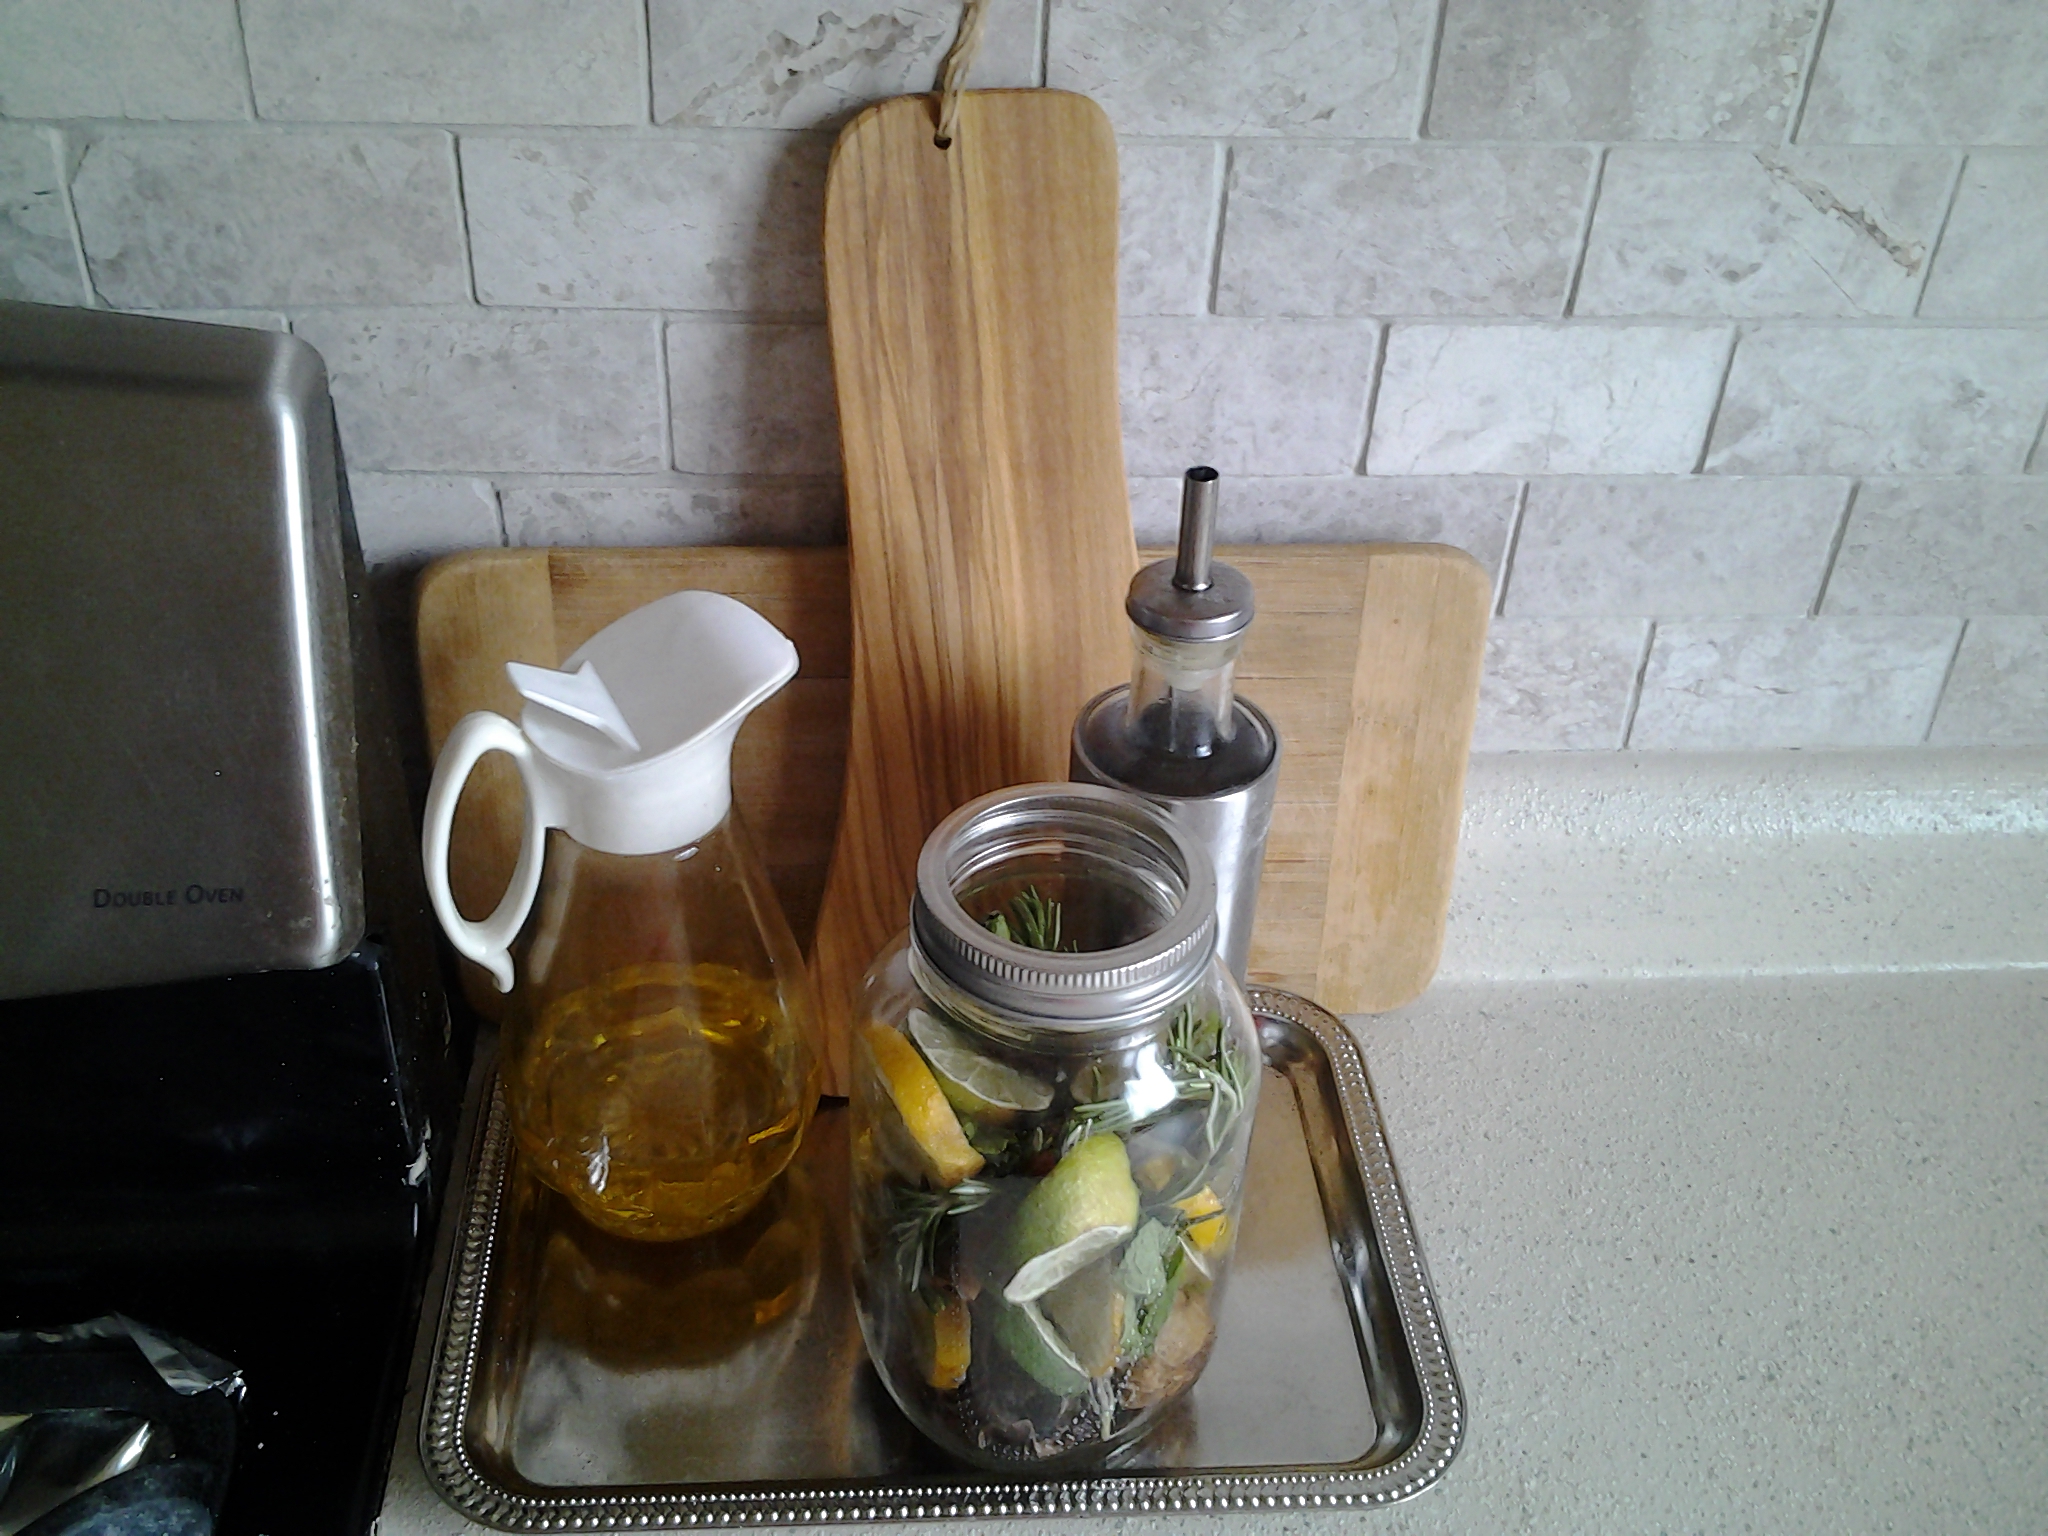
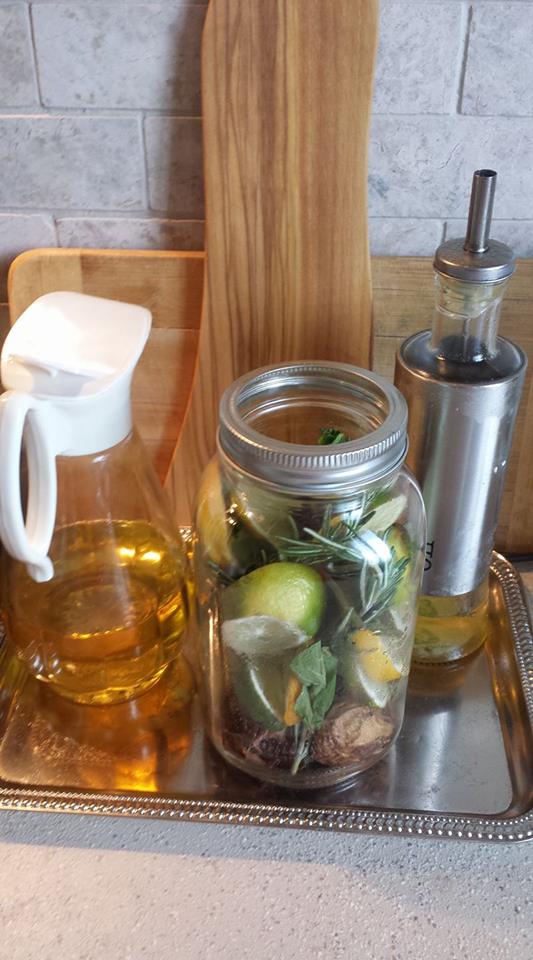
This Dollar Tree tray keeps my counter-top clean from oil etc and I DIY Mason jar ” stove potpourri”.I used some wooden boards from Winners and glass decor to complete it. A little jug is perfect for cooking oil.
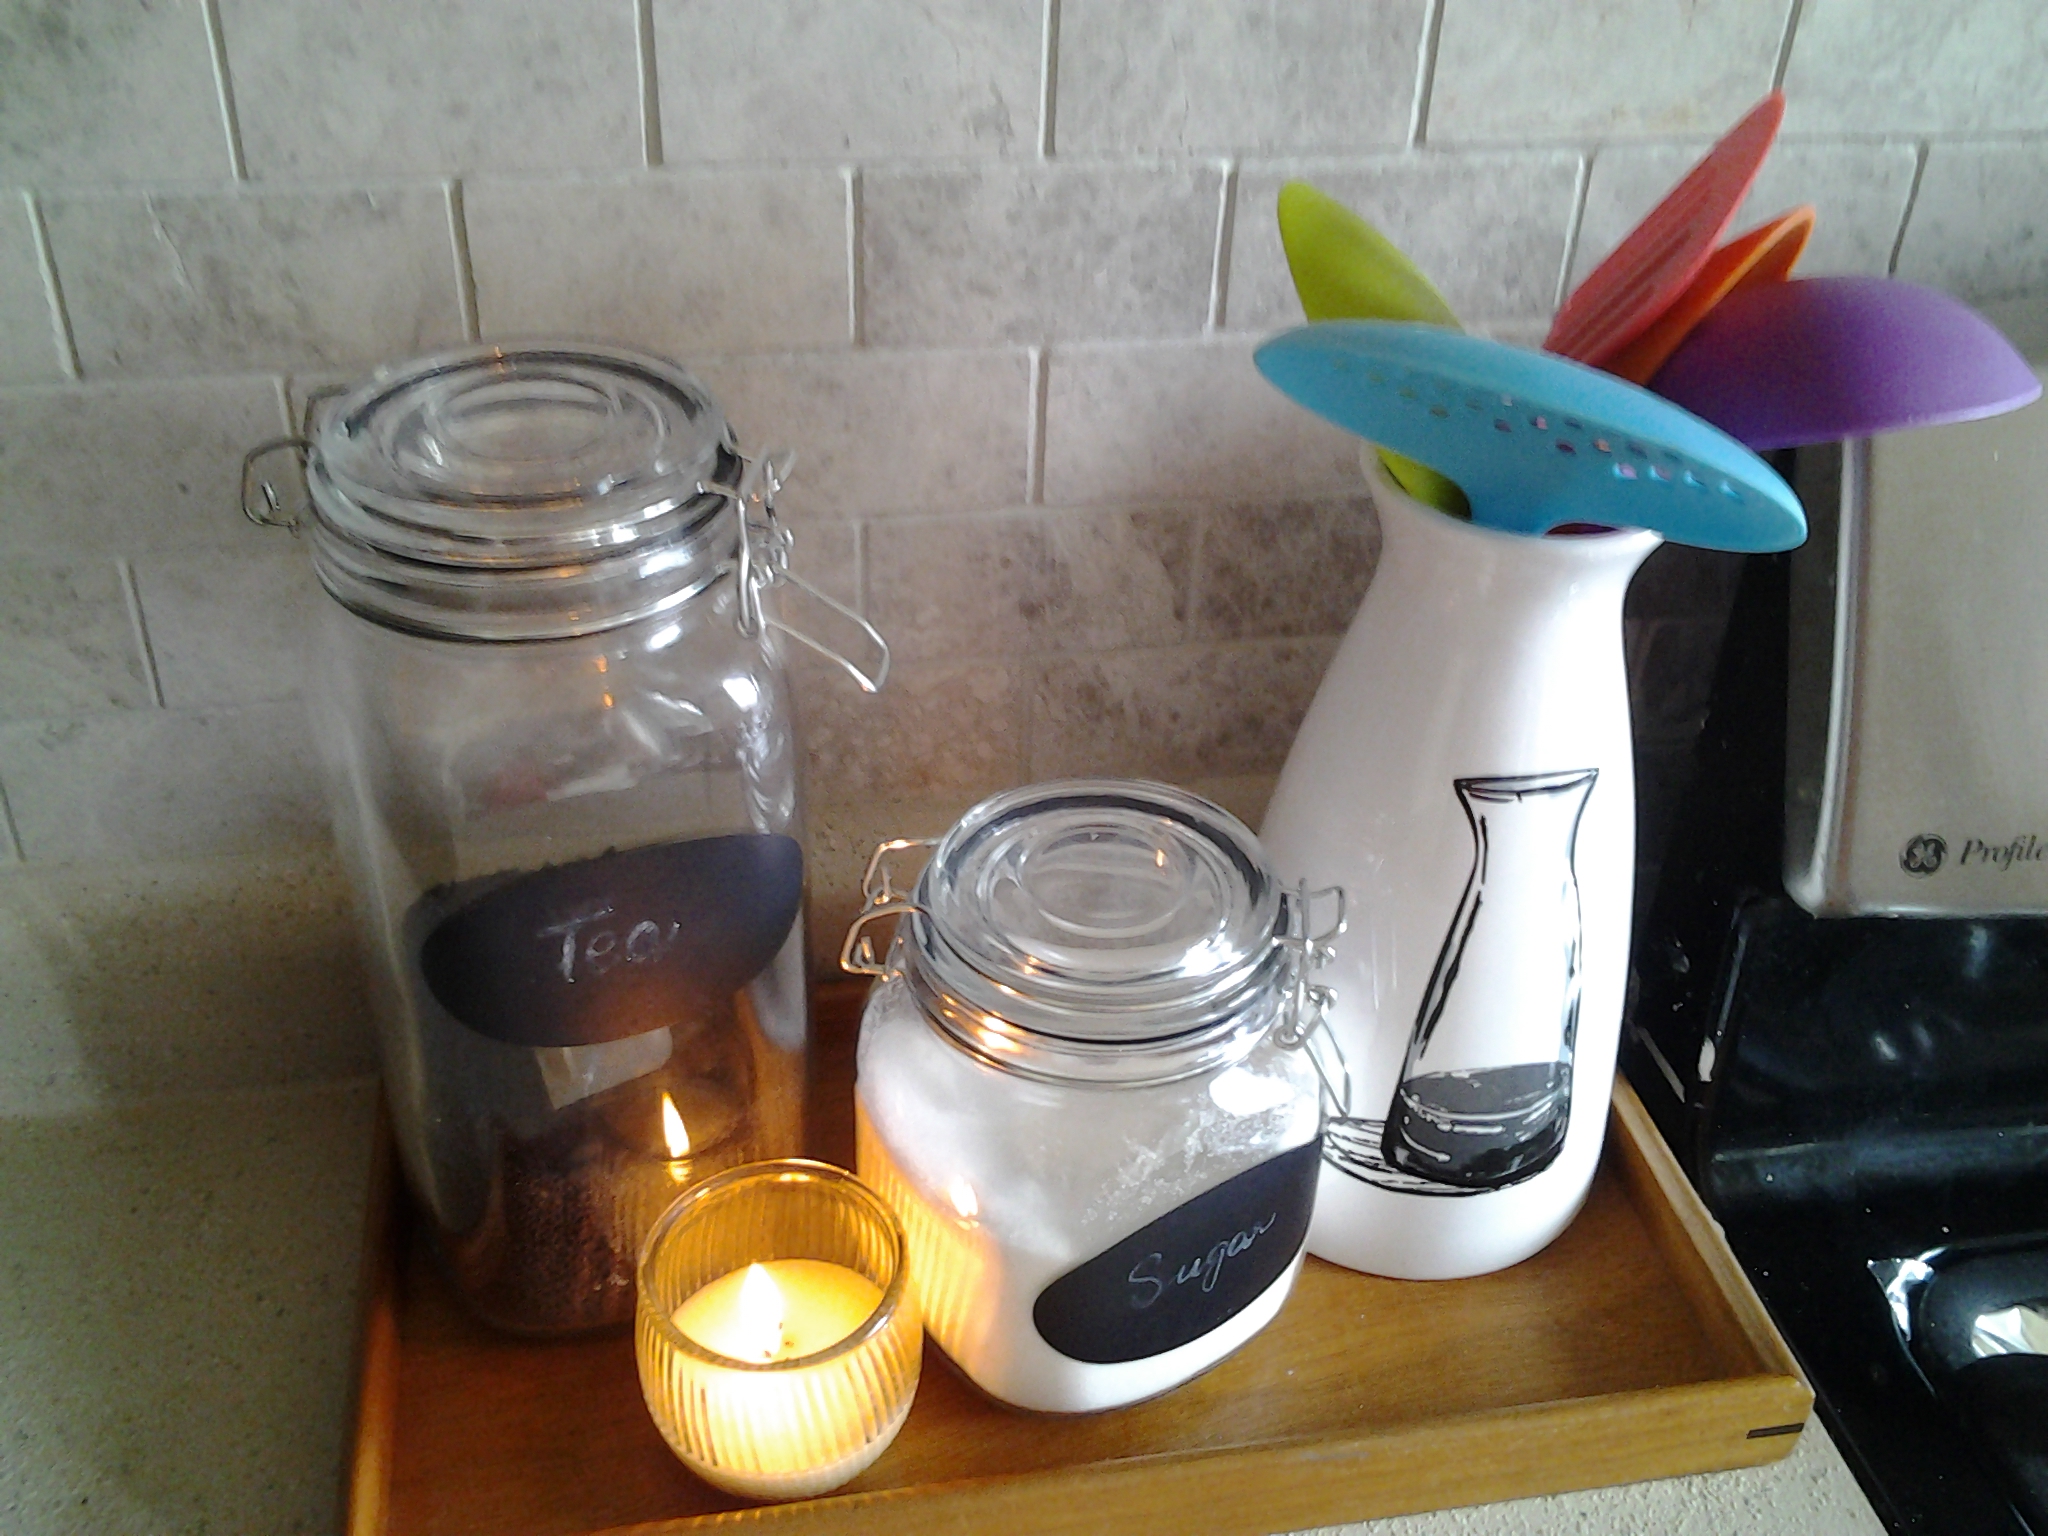
On the other side of the stove, I used a wooden tray and my frequently used items.I bought these Chalkboard Tea and sugar jars from Home Sense, a utensil holder from Avon with colorful utensil set and a vanilla candle from Home Sense…it smells nice when I lighten it up.
I have removed the cabinet from the wall, to have this marble subway tiles up to the ceiling and I am so happy with the result..this wall is waiting for a makeover.
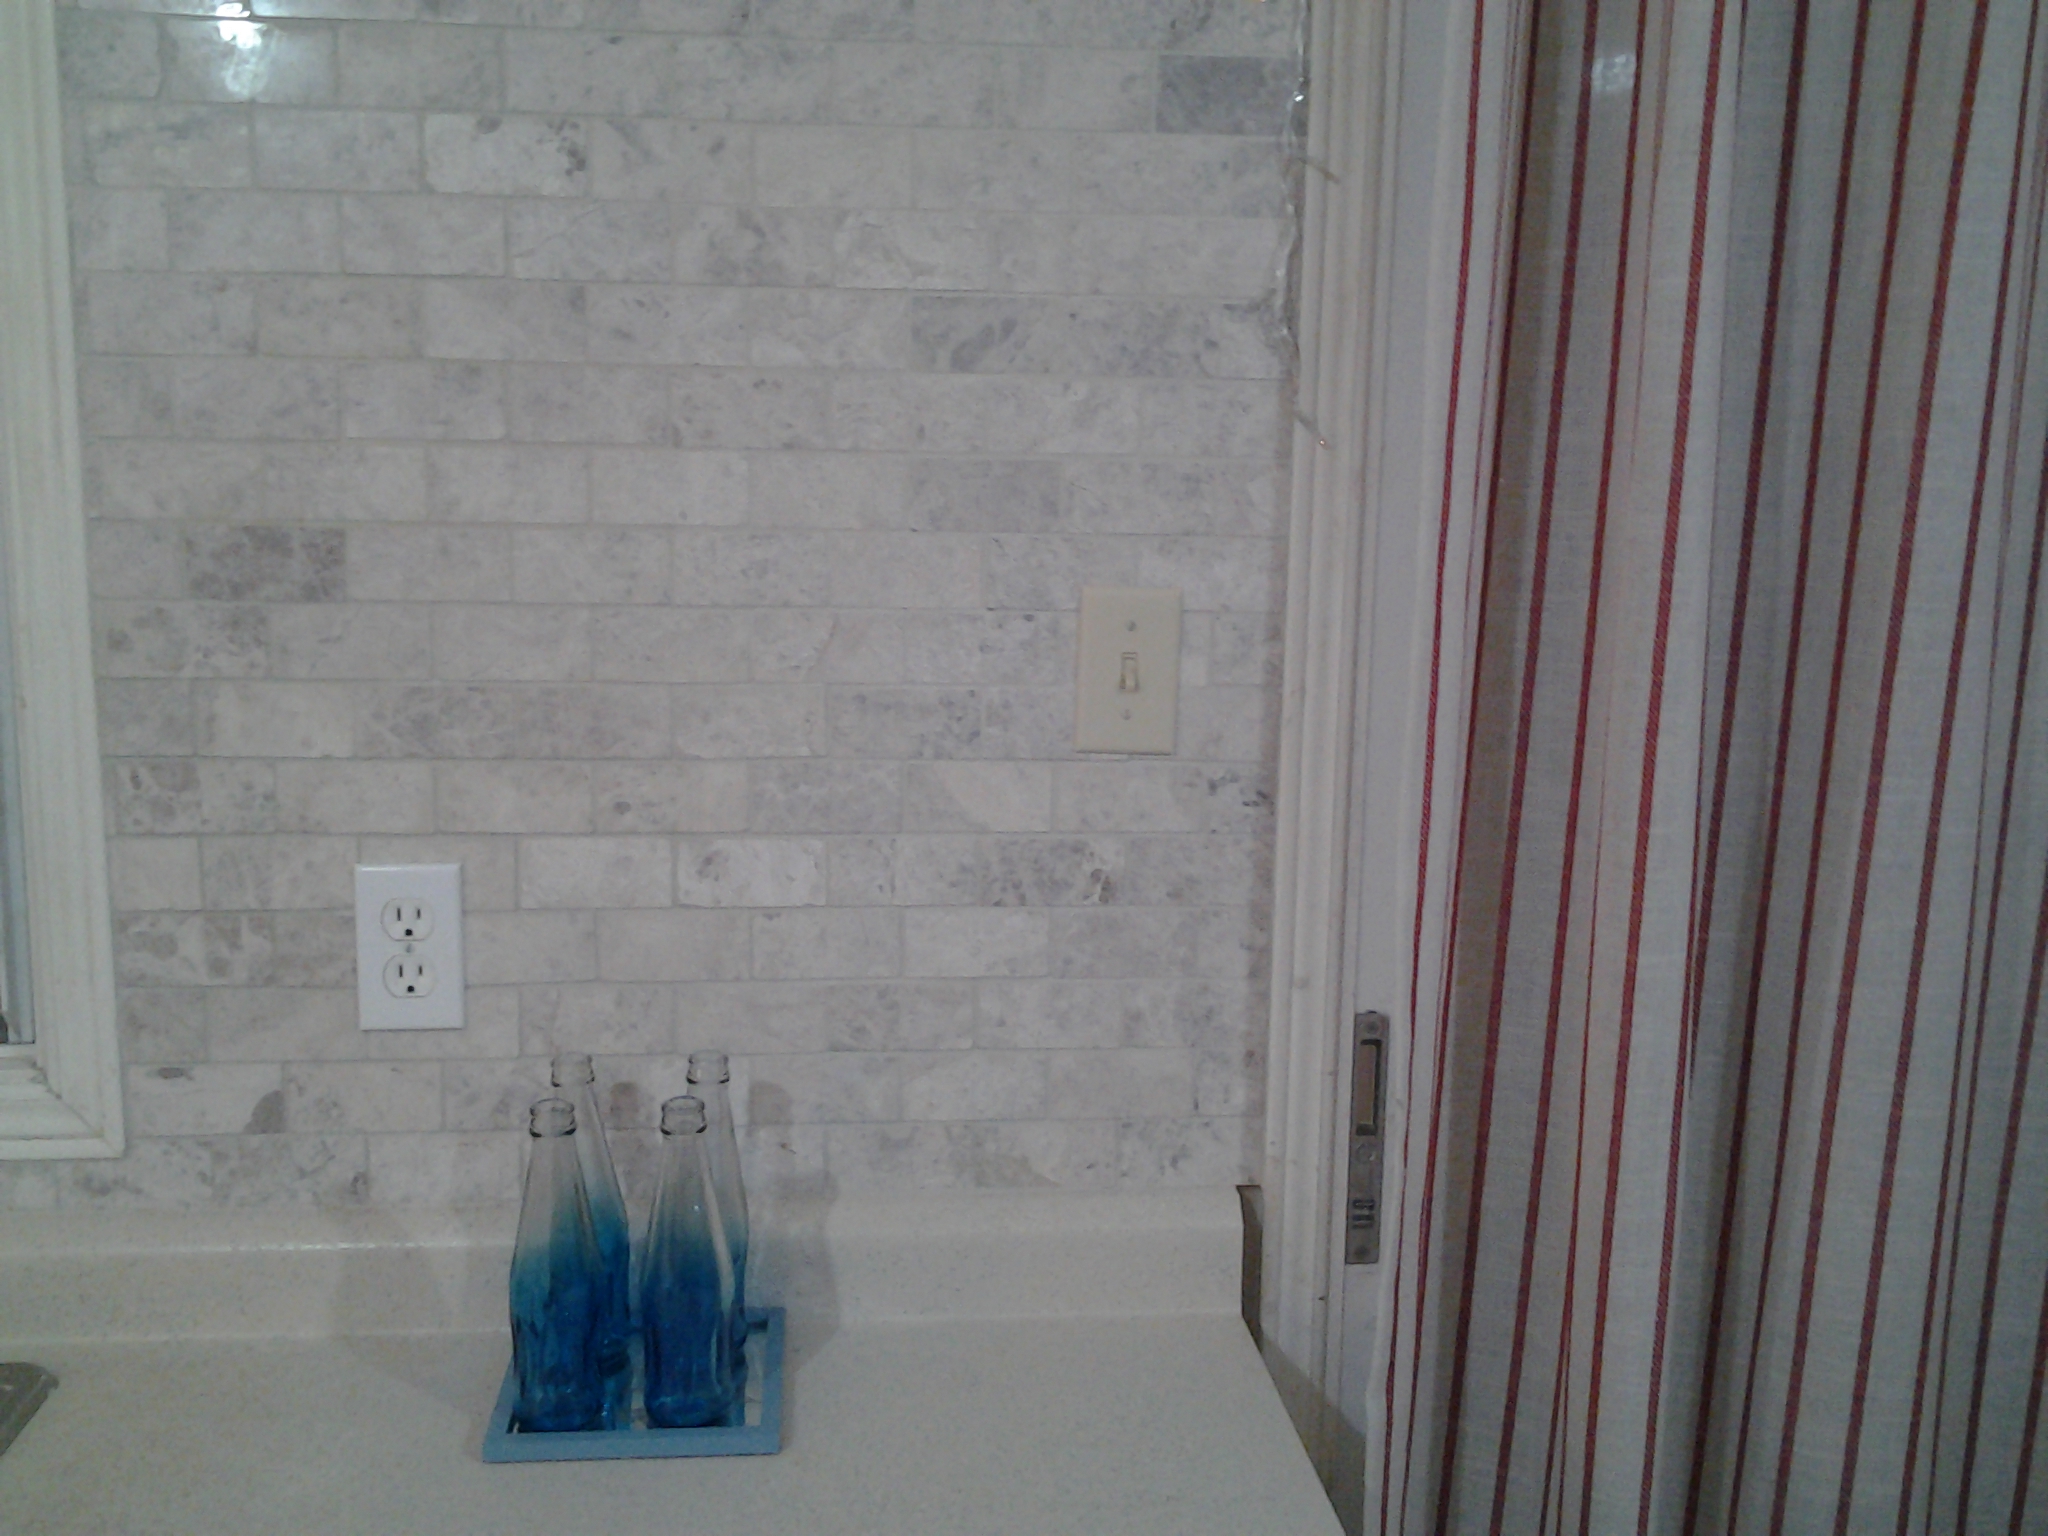
These blue Retro bottles are so cute but I couldn’t find the tray/holder I really looking for, so I used one of my old set of mirror art. It matches perfectly with these small glass bottles.

Both bottles and mirror are from Avon.
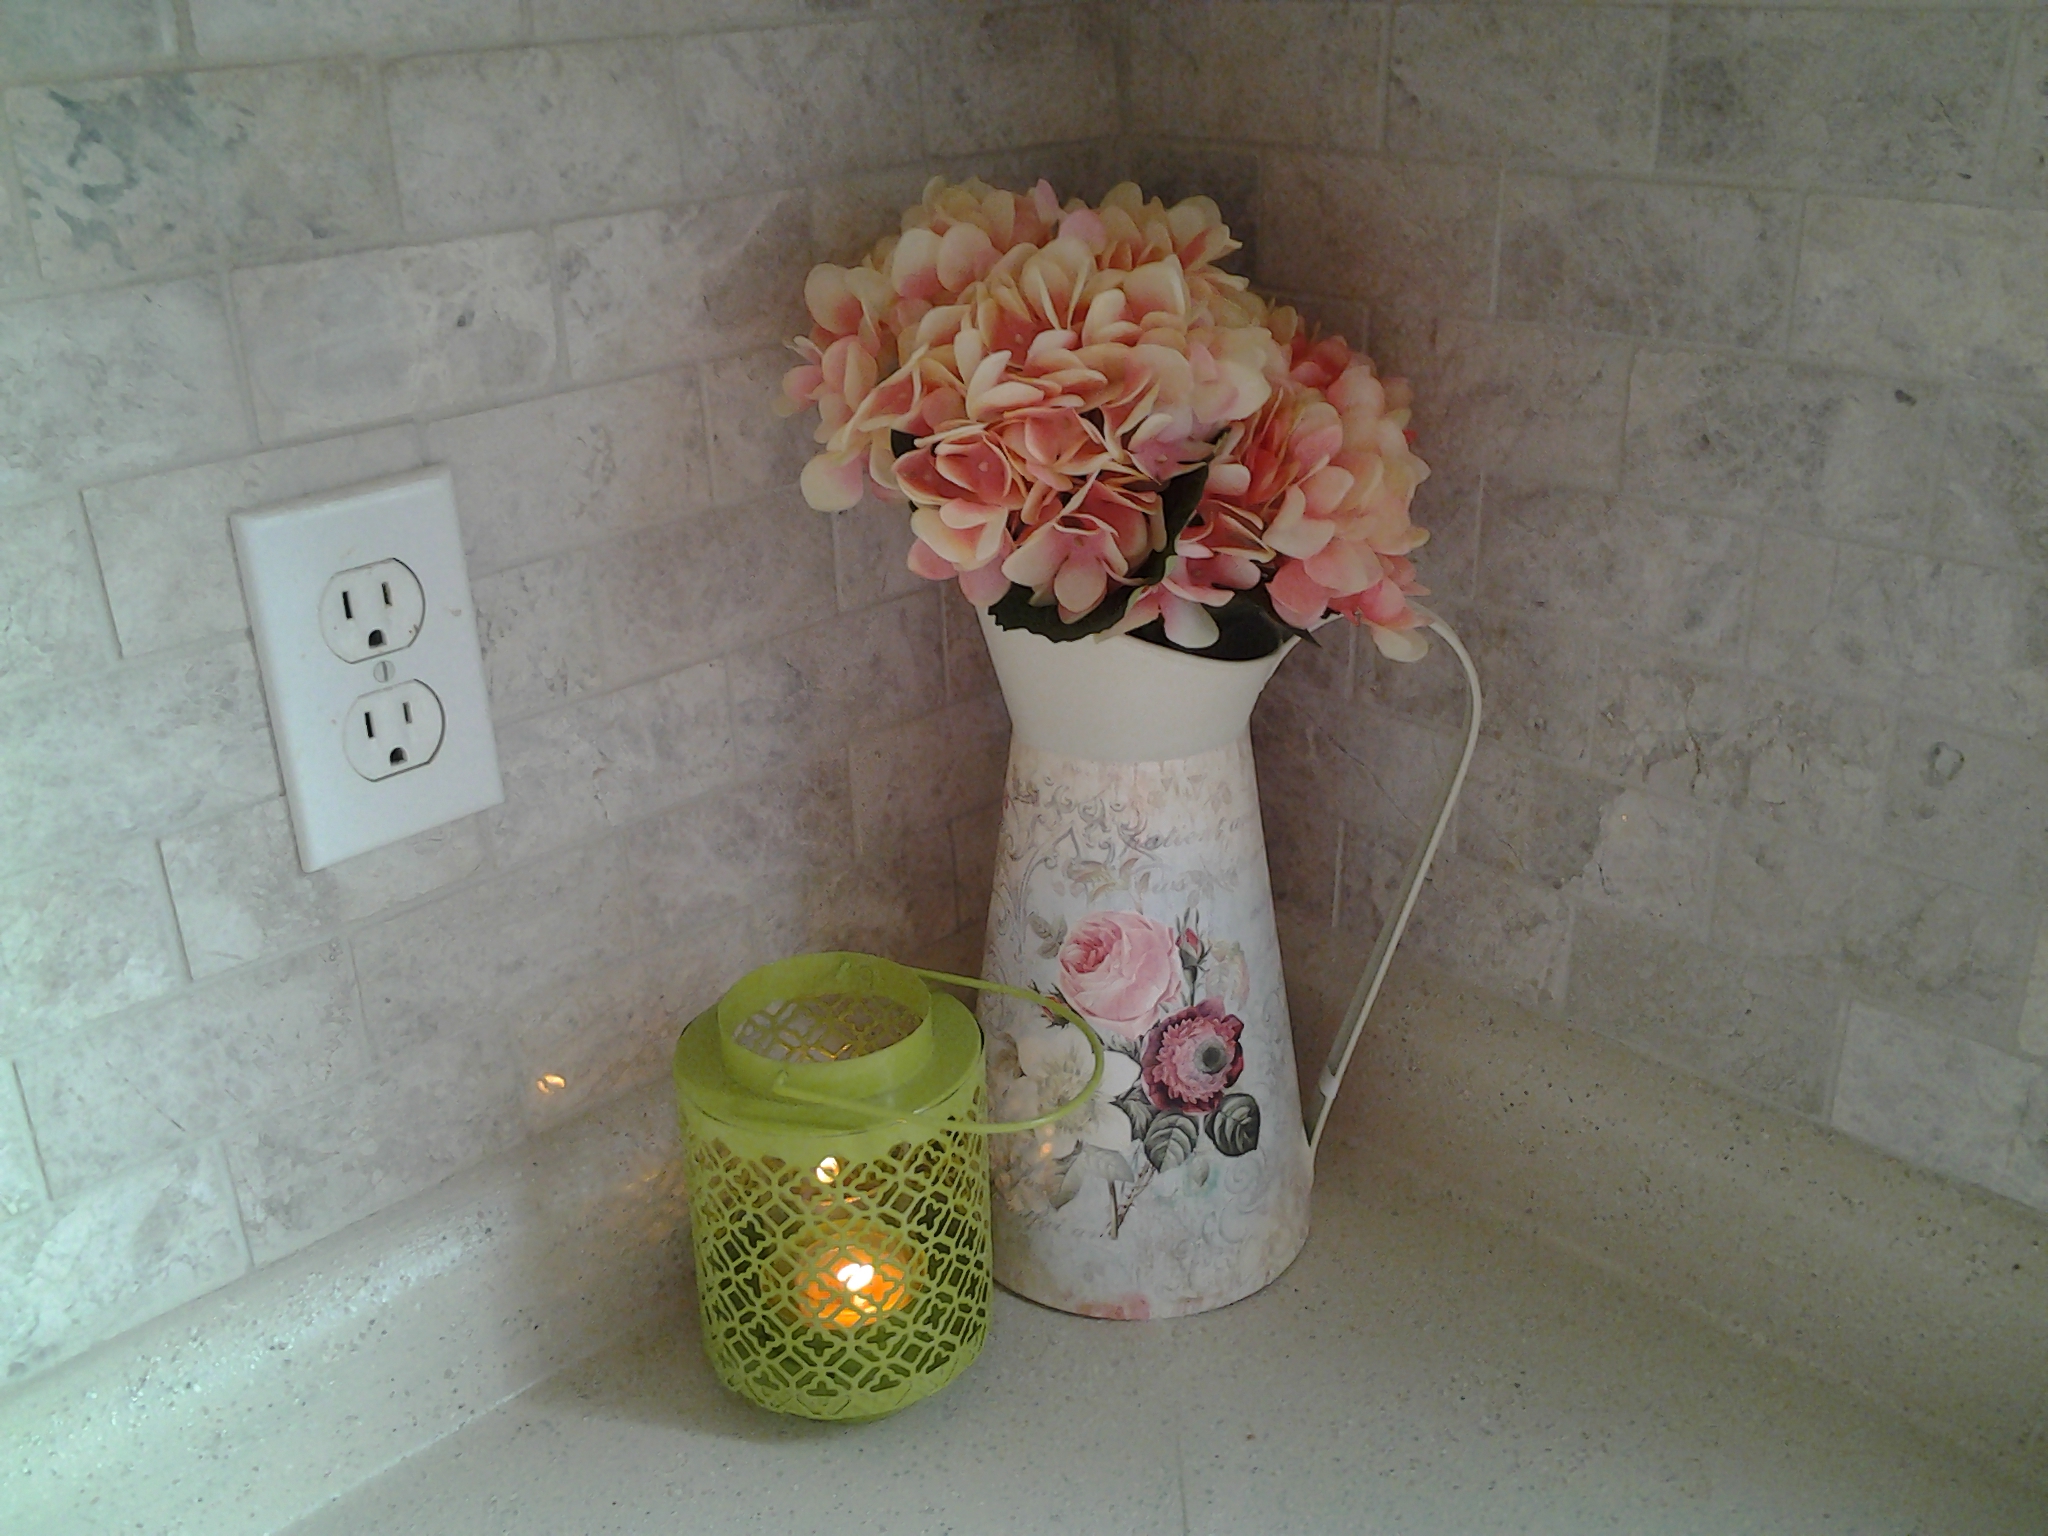
I simply removed the dish rack and I have no plans to use one since I am waiting for my dishwasher to come. This tall chic flower jug and flowers are from Burgundy.
These flowers are fake but look real.

This green candle holder is “Target” short-term stay in Canada and I really missed that store.

I couldn’t resist buying the dish soap dispenser and dish.The smell of gingerbread makes my mood on.
On microwave I placed this wooden fold-able tray from Pakistan gifted by my dear khala, this faux plant is from Dollarma.

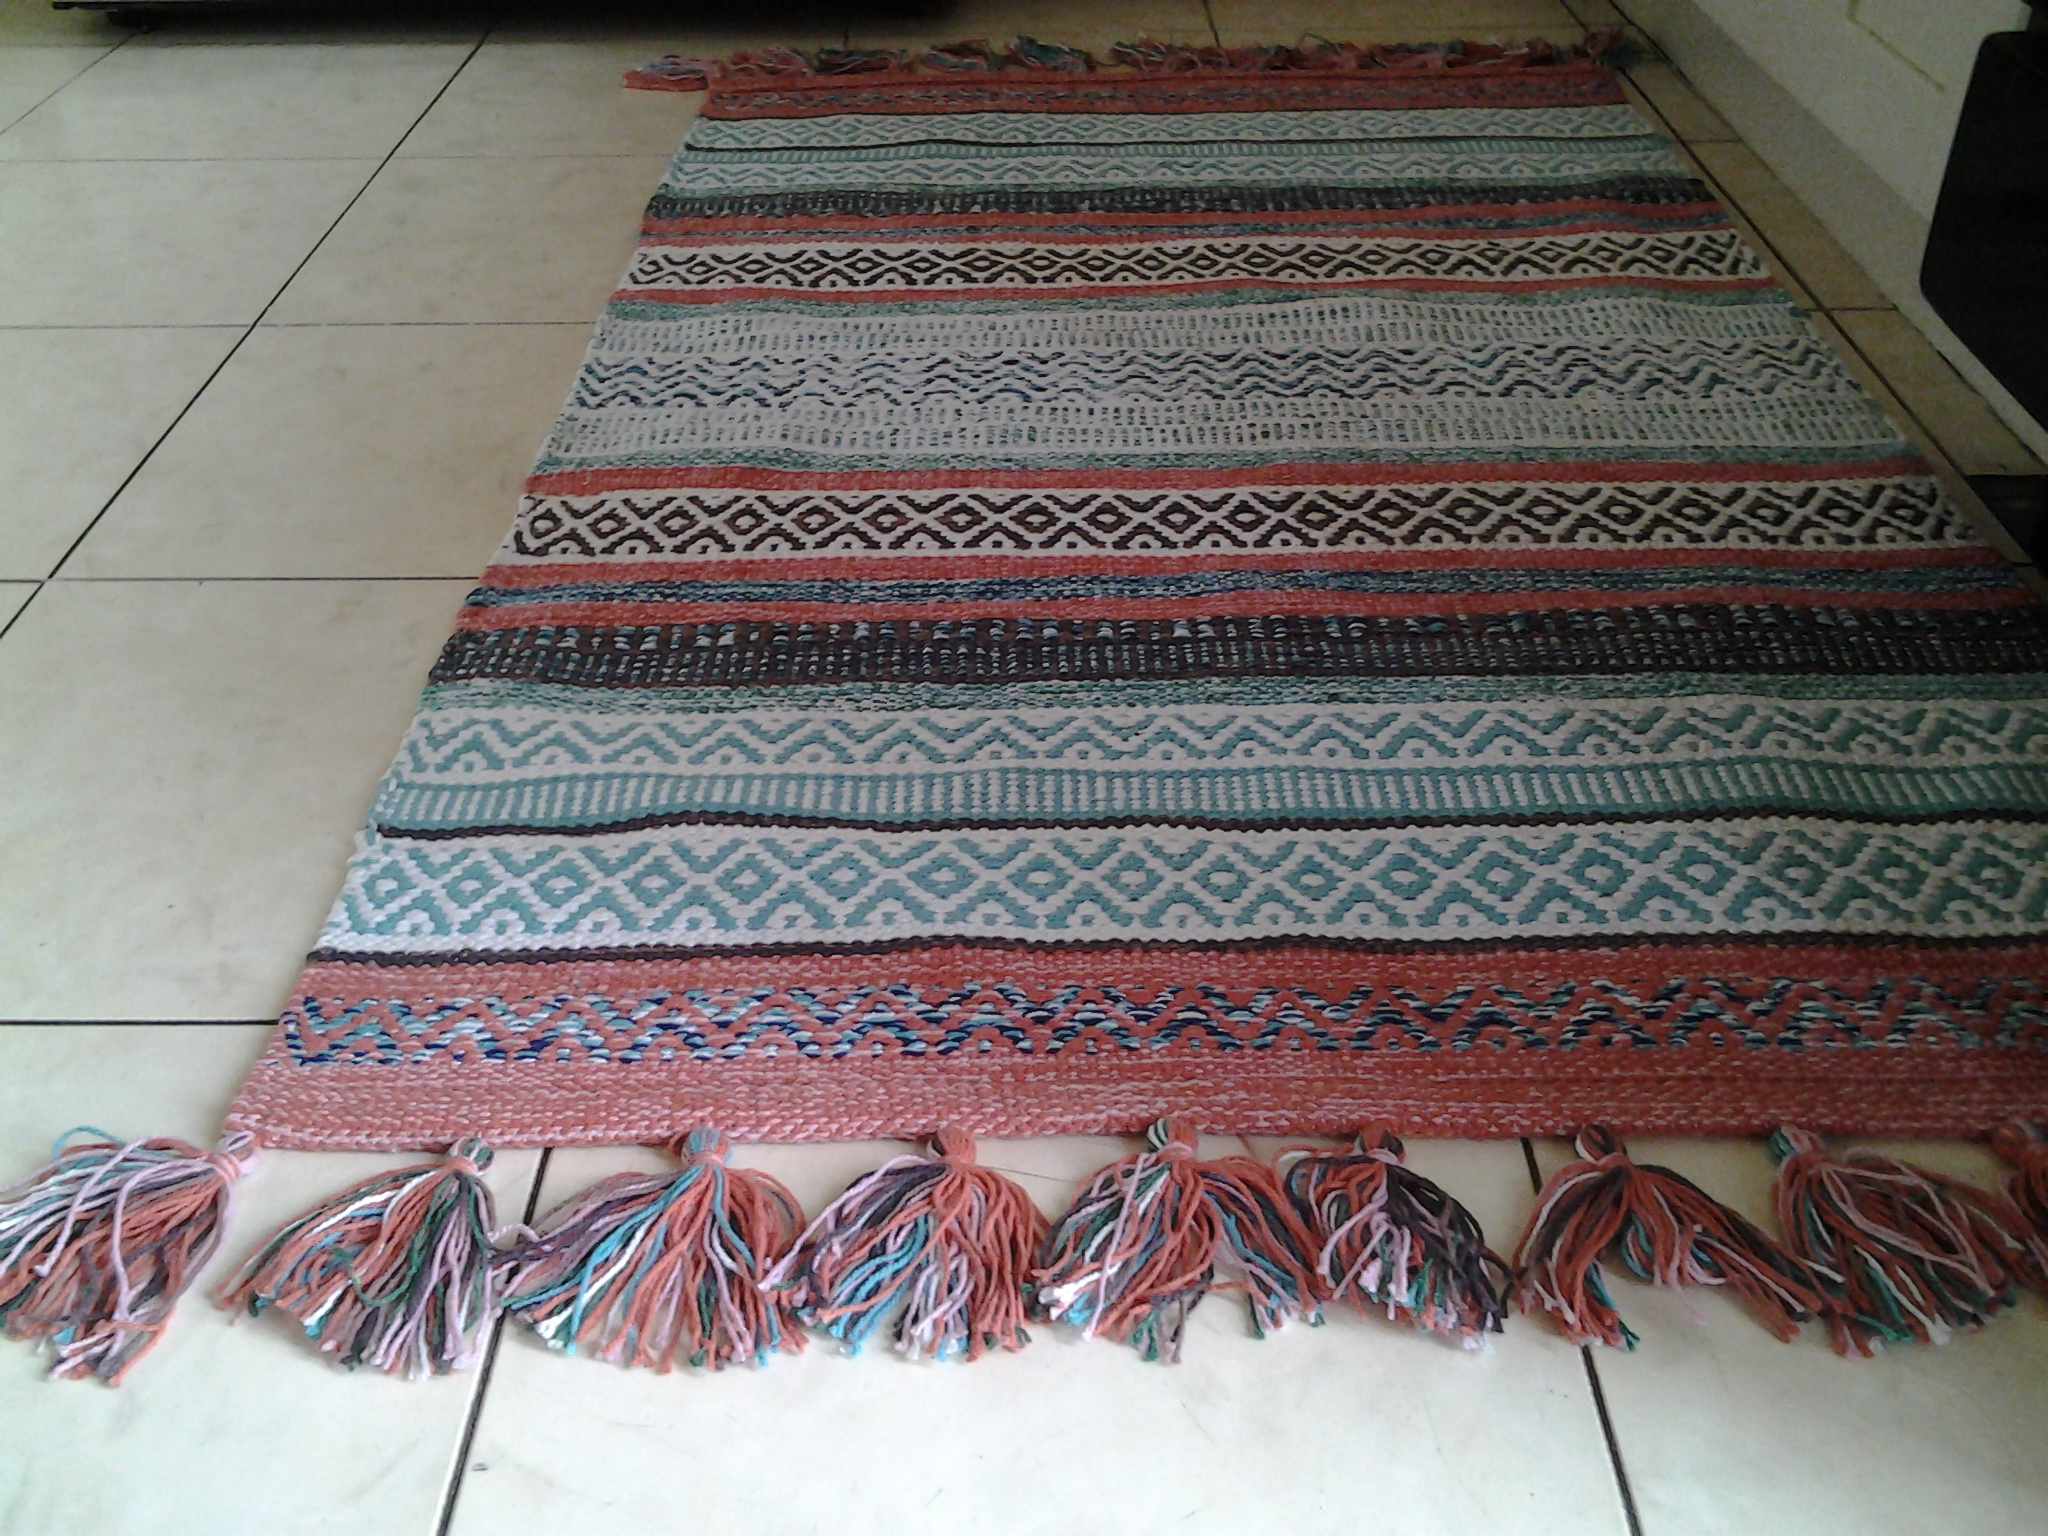
This accent rug is from “Home Sense”, it matches the decor and love the tussles.
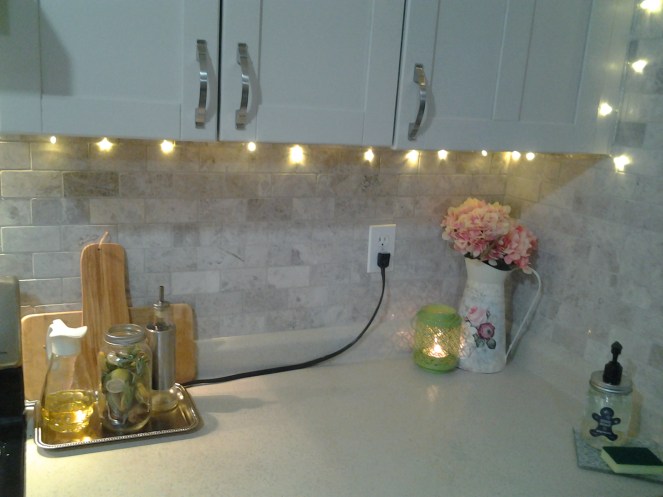
I also changed the light fixtures, After a long search online and in-store finally bought this set from “Home Sense “. I am so pleased with the result, I was so scared before I started it but trust me if I can do it you can do it too, all you need is patience…I won’t say it easy …but hard work that worth!!…the new tiles, clean countertop and new cabinet colour make you love it.
I will tell the details of DIY and process of Renovation (selection/confusion/ failures etc)in separate posts in coming weeks. If you need to know more please leave a message in comments.

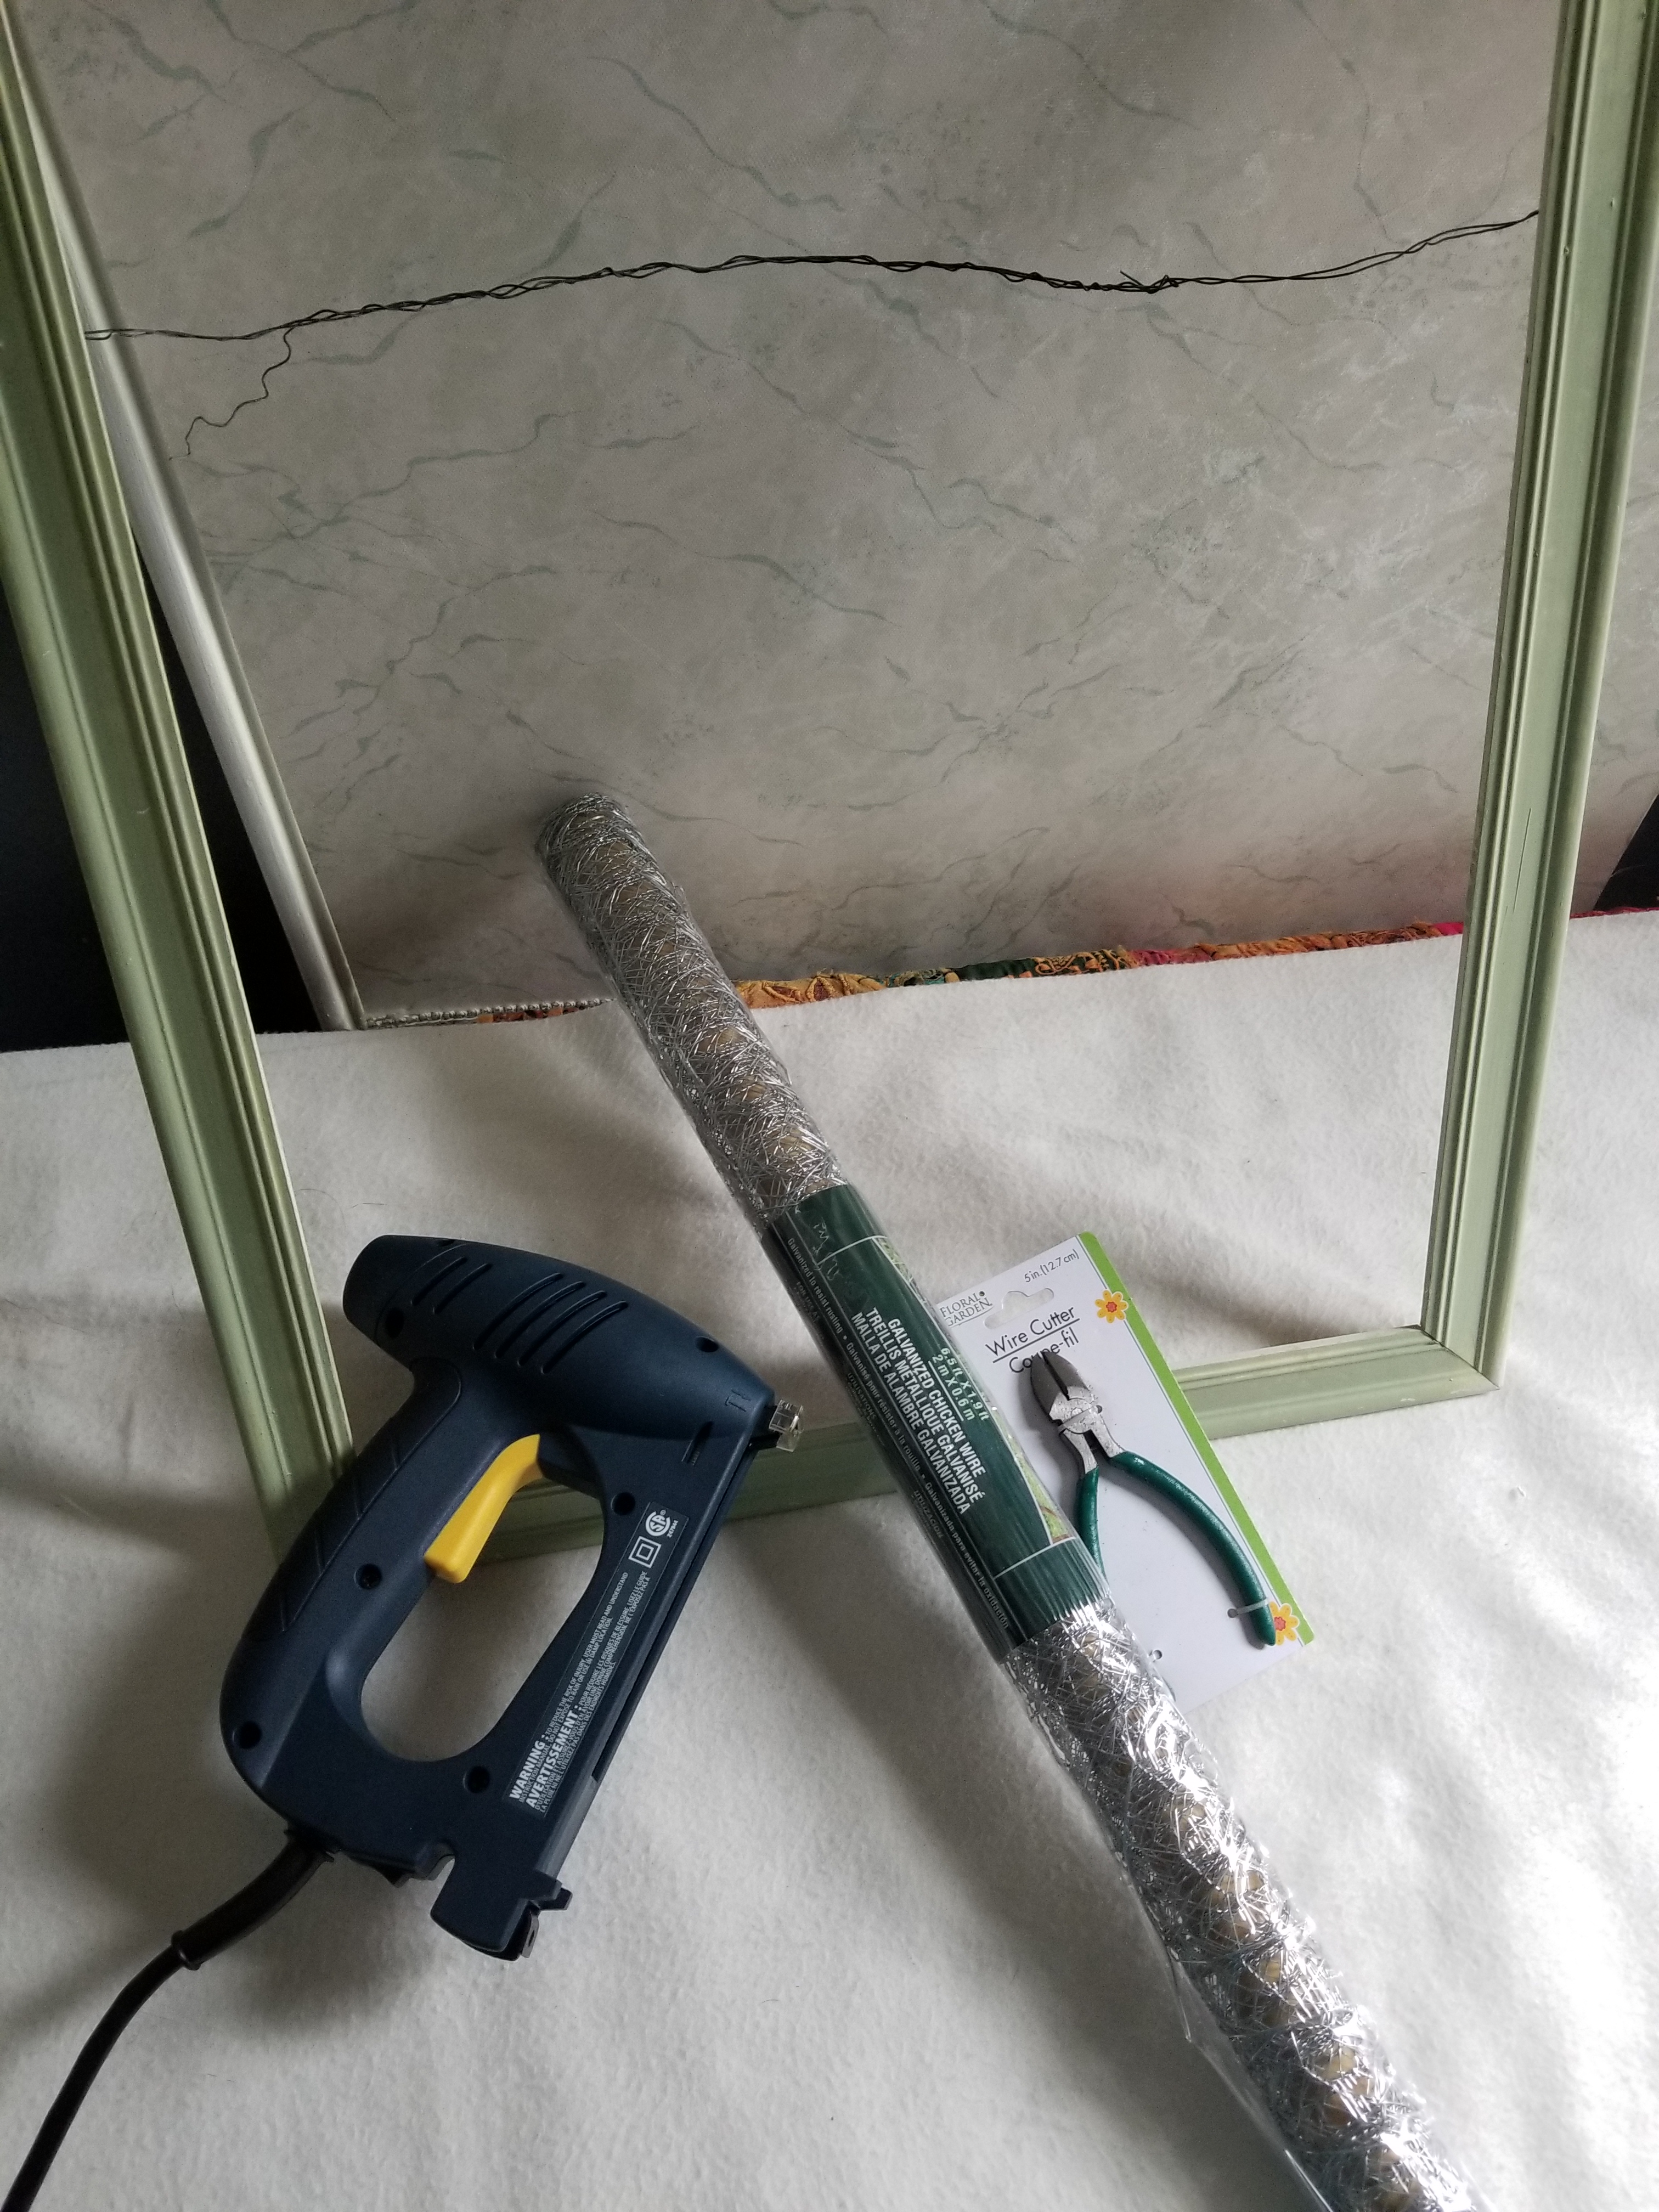
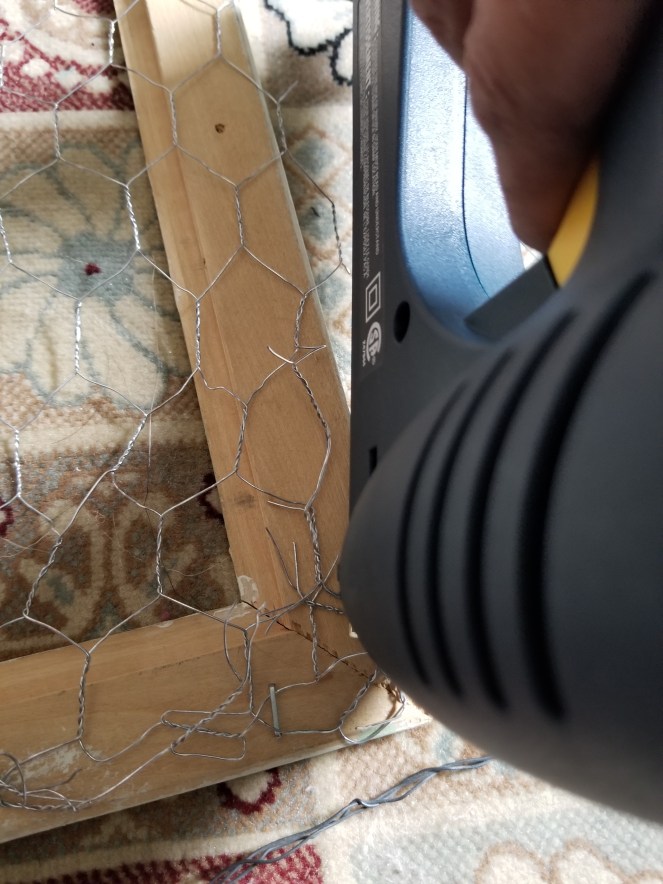 Make sure to twist the sharp edges and staple it down so that kids won’t hurt there tiny finger.
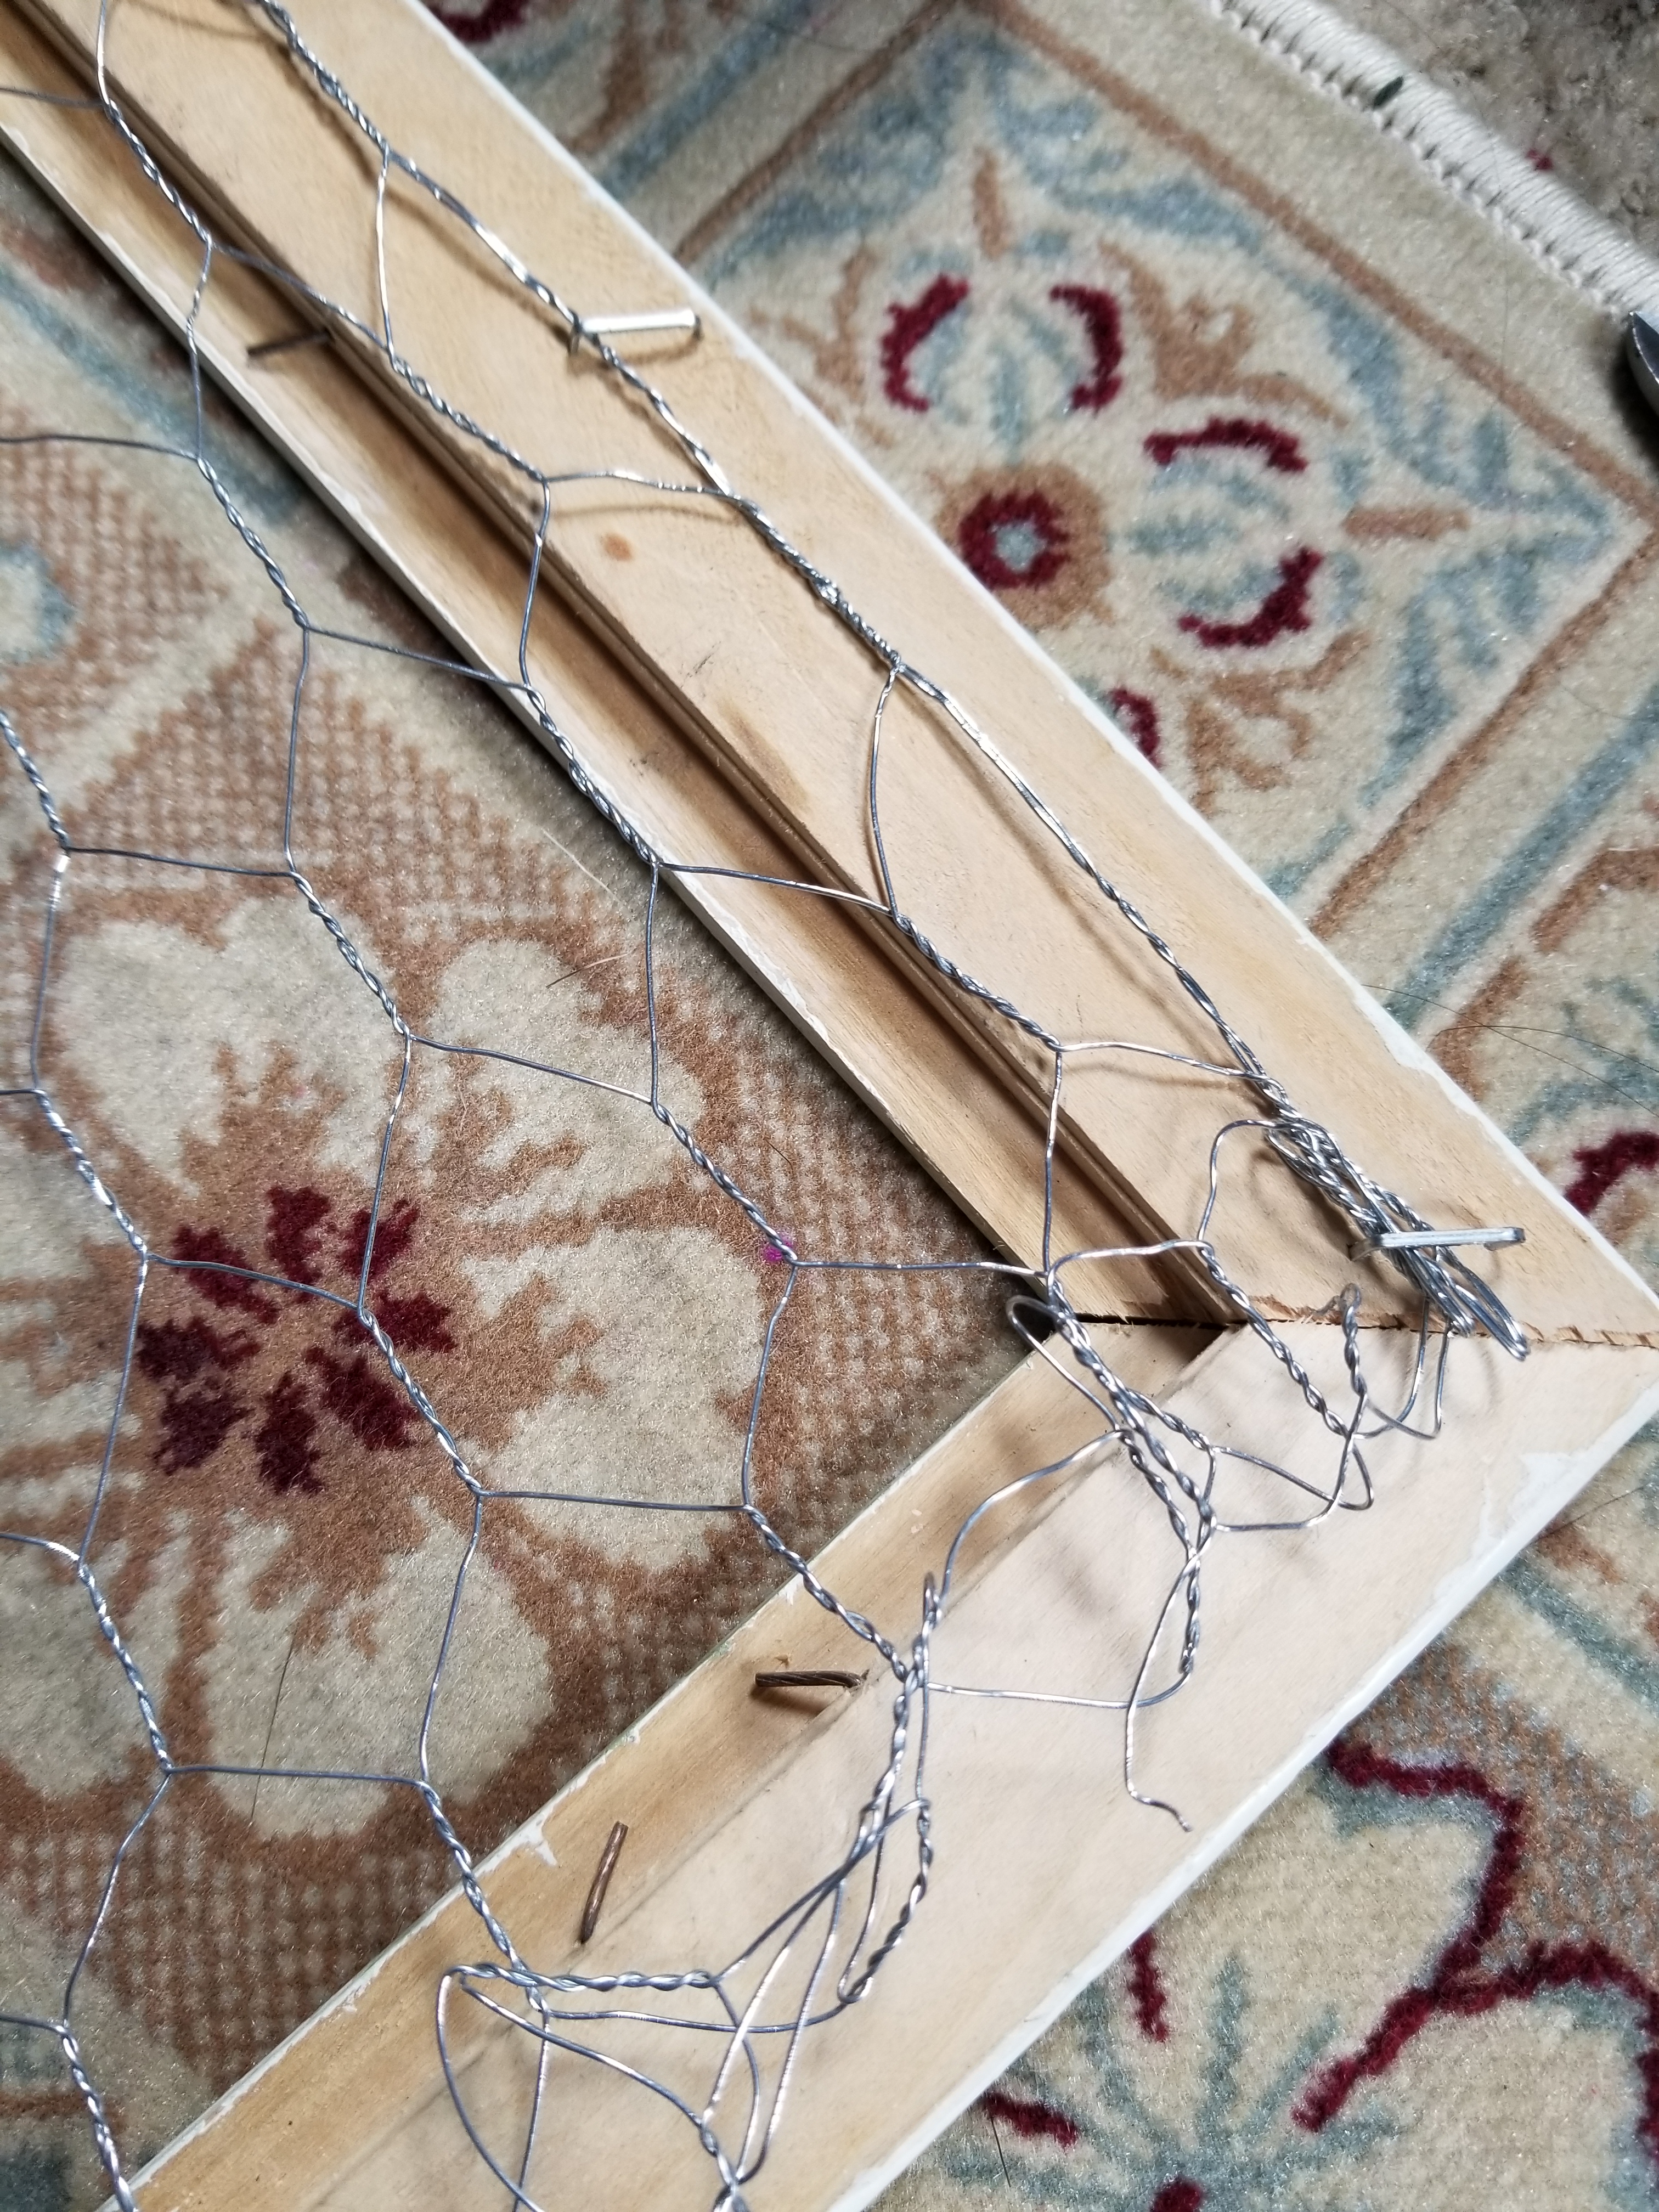


 Her size got change so often,I dont have any one younger (doll )who can use her beautiful dresses and feel some times(often) I spend too much on her clothes and she uses once and a while.I love this dress she got it as a gift from her khala (so its a kind of her sentimental asset )and she only used 2-3 times as its summer dresss and sadly we only have few months to use them.Every year I have tons of their clothes to recycle or donate,try my best not to waste any thing in anyways.I was dressing her bed up and I thought to use different pillows and cushion to make it accent.The lumber or body pillow is longer than average pillow and sleek rectangular in shape.


 If you are doing everything, my two cents advice…always start from countertop and floor than back splash and choose your cabinets accordingly after you done… Dont choose your cabinet color before your counter top or back splash….your back splash would look different after grouting is done.
 We (me + Husband) mutually loved the “Valensa 2×4 “Mosaic subway tiles at Lowe’s and we brought them rightway.Intially I wanted to DIY but it was so heavy and thick.It cant be cut without professional grade tile saw.Renting a saw worth more than I hire…this is the only thing we didnt DIY..once you choose your tiles,you need to buy grout.Its upto you to choose the shade of your grout ,went with the almost same/lighter shade called “Alabaster”.I removed this cabinet from the wall between window and walk out back yard.I had no idea about results.I was really scared but I love the results,this wall become focal point of my kitchen and needs a make over.

 If you like to know anything let me know,got so many questions about my DIY cabinet transformation.Details coming up very soon(Hopefully )!!


 I really love my kitchen,a big and bright walkout kitchen with lots of cabinet and a window above the sink .I didn’t touch and loved as it is more than five years ,now its time to do a make over.We updated our glass top stove 2 years ago to gas cooking range.This is the best decision I have ever made,I prefared to go for an upgraded model with a seperate bottom baking drawer for some quick baking and warming lunches.We choose GE profile,if you are tired of using glass top stove I would 100% suggest you to switch to gas stove(will share my experience soon).I desperately want to change the ugly black range hood which was intially white and I spray painted black as a temporary update (that last more than 4 years).


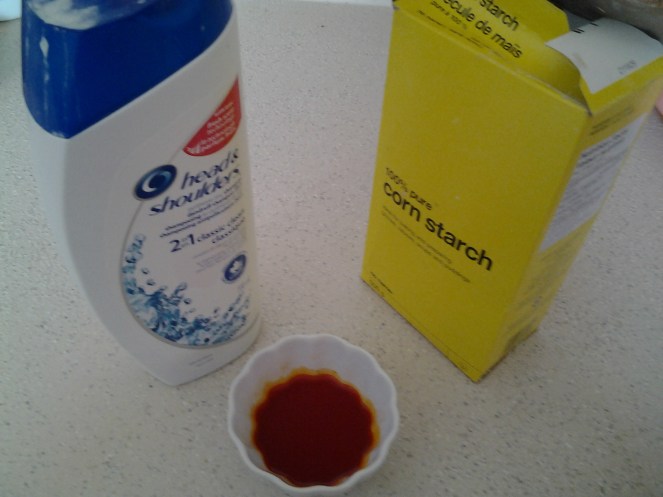
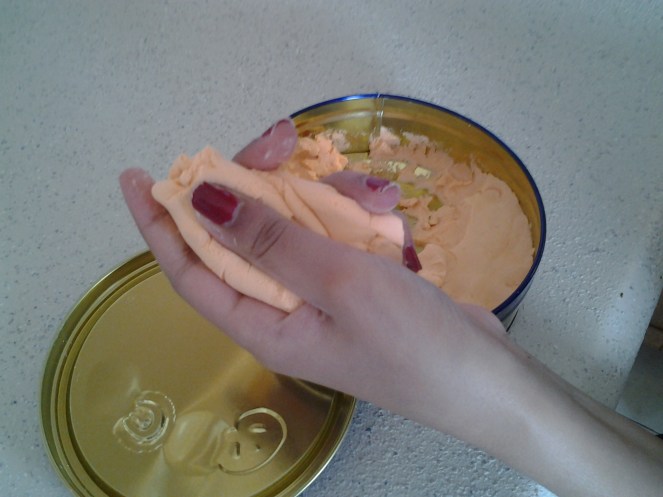 The dough is ready you can store it in a zip lock or tin /air tight container so it wont dry .We stored it in empty cookie tin .