Food & Recipes

Honey Chicken (Hakka Chinese)

Hi Everyone,

I love cooking and I do enjoy it(..everyday.???..yes I cook every day..).but cooking for picky eater is a challenging  task.Deciding what to cook harder than cooking itself…most of mom agree with me right?

Chinese food  is my family favorite..I am so sorry ,I don’t have any before / during pic.I was experimenting / creating it for very first time and I had absolutely no idea how it will turn out…If you have tasted recipes in hakka chinese restaurant  than you might know, how they used to make different taste/recipes by alternating same ingredients. You just need to have those taste buds. ..I am sharing a very easy restaurant style honey chicken you will love it I  am sure.I was really unsure but my food/taste inspector aka my husband  passed it so I thought , better write it down here before I too forget what Ingridents I used( it’s a fact) ,Normally I don’t use any measurements but I tried my best to approximate  it for you…I am a very casual cook, please dont take me seriously. …(forget lots of hashes and brackets)…..its funny ,lets start and enjoy it

Ingredients:

Chicken  boneless: 500 gms (cut in Julienne/strips)

For Marination:

Corn Flour :2 tbsp

All Purpose Flour :2 tbsp

Black Pepper:1/2 tsp

Egg : 1-2

Soya Sauce: 1 tsp

Salt: To  Taste

Combine above ingredients and marinate boneless chicken for 40 mins

For sauce:

Ketchup:1/2 cup

Soya Sauce:2 tsp

Worceshtershire Sauce :1 Tbs

Tomato Paste :2-3 tbsp

Chili / Hot Sauce:1 tsp

Honey: 3 tsp

Red Chilli Flakes 1-2 tsp

Garlic Chopped:2 tsp

Ginger Chopped:1 tsp

Chinese Salt:1 tsp

Black Pepper  :1 tsp

Vinegar :1 tsp

Chicken Broth  (optional but enhances the taste):1 cup

Sesame Seeds  : 1tsp ( optional )

Sesame  Oil: 1 tsp

Oil: As Required

Method:

Heat oil in a large wok , fry the marinated  chicken to golden brown and set a side the whole batch.In same oil,fry garlic first,saute it add Worcestershire sauce, ketch up and tomato sauce mixed it well.Add soya sauce and hot sauce.

Add spices now, chilli flakes, black pepper, chinese salt and salt, mixed well add chicken broth/water .cook it for 5 mins when sauce is ready add honey and vinegar. Now its time to add fried chicken stripes ,mixed well and coat it with sauce.Dry or gravy its up to you.We love saucy so I add more broth (and add 1 tsp corn flour mixed with water to thicken  sauce.)

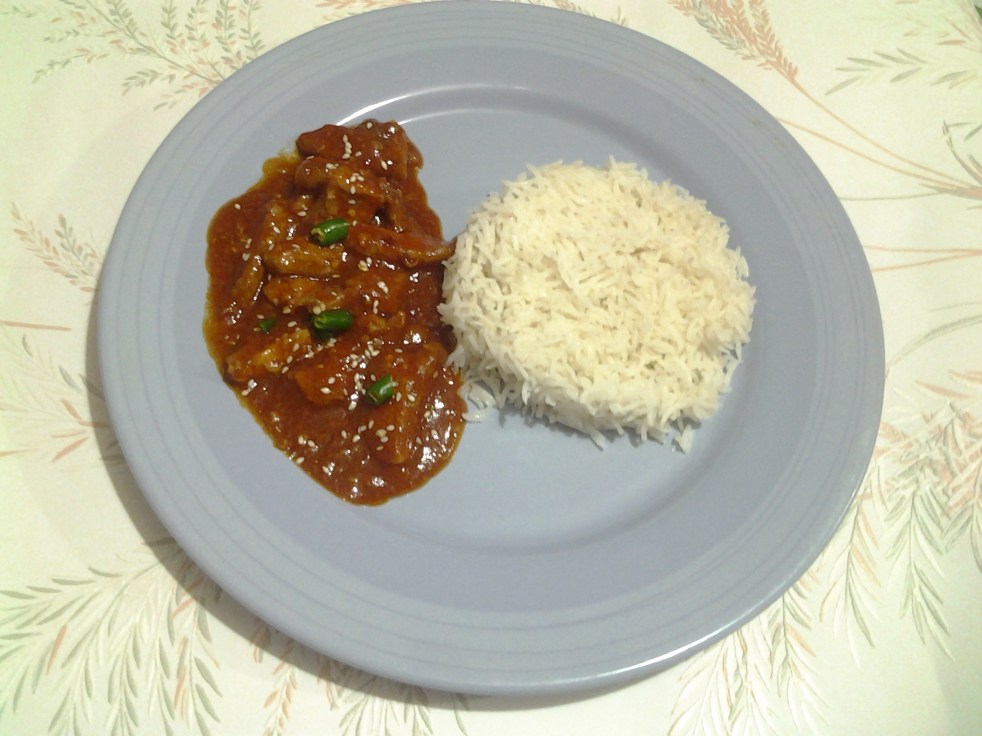
Cook chicken with sauce on medium heat for 10 min , add sesame seed and sesame oil and leave it on very low heat for another 10 mins.Dish out and enjoy with boiled/fried rice.I know someone personally  who  has sesame seed / oil allergy so please make sure before you use it ,it’s an optional ingredient.

20170127_204422

Do try it ,you will love it I am sure!!

Home Decor / DIY

Toys Organizer Reveal

Hi there,

I am so excited  to share this new piece with you guys.I was sorting  out my kid’s stuff/ toys and wanted a kid’s  accessible organizer for my basement .I searched  for a cube organizer at Ikea online and really liked some of their organizers but they sadly dont offer free shipping even at Ikea pick up centers and I don’t have any Ikea near my house .I also went  “Canadian Tire” but didn’t like anything there at all.I asked my  husband  to check Walmart  and finally find the one I was looking for.”Home Trends” 8 cube display shelf, the perfect color (Rustic Oak) and size for my basement. I grabbed it right away.

received_10154705590335791

It is really  heavy , we didn’t even imagine until we had to carry it in the shopping cart and all the way home.I asked my husband  to assemble  it,It took almost an hour to do it.I wanted legs to make it above from the ground but was so unsure about it since, it is not solid wood, there’s a risk factor to try it on .I thought why not try wheels . I brought wheels and wood screws from home depot.

received_10154705590475791

I   asked again my husband  to attach wheels to it . It was the most wise  decision( fearful ) I  have  ever made.Wheels not only make it movable  but also make it more attractive.Make sure these dresser units  are steady enough and safe.You can attach it to the brackets if you have any doubt,it’s always better to be safer than sorry,especially  if you have little kids.

I wanted to use specific sized bin and baskets for this unit  but those were $12 and I needed  6-8, it was not economical  for me at all.I got plain ones for $4 each ,I have a bad habit to customize  everything .I was thinking to paint those baskets,than I thought better   try stencil this time.I got stencil and  fabric paint from Micheal’s.

received_10154705590530791

I simply attached the stencil with frog tape and applied the paint with stancil/foam brush.Its really very simple and can be done under 5 mins.

received_10154705590420791

I hang a long sport organizer for my elder son Abdullah’s  sporty items.I put his hockey sticks,base-ball bat ,his gloves and knee pads etc. I don’t have  a before pic but It was not messy but not organized either.I used big tote and bins for toys etc.I am doing some more things around that area ,will post soon.

received_10154705590330791.jpeg

Its  time to  organize my cube organizer .My little one has tons of cars ,Thomas and friends and train tracks .I wanted to use tags to label it but I was so excited to share with you guys,  I couldn’t   wait.I used  some of other bins too since the toys come along with that he knows the blocks belong to that bucket,so it easy to clean up after.

received_10154705590350791.jpeg

My kids toys are  now organized.I really feel so good,just ate my chocolate  bar…what you guys do when you are happy?

Home Decor / DIY

Home Organizing Tips and Tricks

Hi there,

I am back, was busy with kids, organizing home and doing some reno’s around my house.I am still in between and to be very honest some of them aren’t even started yet……will post when once I am done…taking my time with many breaks.

My crafty soul doesn’t allow me to throw anything but its time to donate that’s  a better option.Here are some useful tips I followed, sharing with you guys randomly.Sorting out clothes, jackets, accessories and other stuff is a time taking process.Try to do one closet at a time, move to another one after.Follow the same rule for everything.

A “guest” attack sometime give me a panic attack because my kids play mostly right on the main floor, making that area clutter-free and spotless within five mins if I know where I need to put all that things back.Storage ottoman and baskets minimize the mess.Try to keep toys in a basket and teach your child to clean up after.

Ask your kids to be part of it. Sounds weird I know, they probably want everything and will say they gonna use it. Give that thing to them and believe me after two mins they will throw it in donating bin by themselves.Its better they know and you should explain to them why and how donation makes someone happy.If they give it happily, treat them like King/Queen.

I have learned, your child’s involvement is very important, whatever you doing try them to be part of it.Take it as a project, assigned them different task and it not only gives them the sense of responsibility but also give some moral values.You need lots of patients (I don’t   have much ) as the kid may losses his interest after making a mess and more likely in between, but still he/ she learning.

20170106_114024

Don’t keep things you’re not using. Kids clothes /shoes are top of the list since they grow so fast.Don’t keep it, until and unless you have another child who can use it.I do save my elder son clothes for his younger brother if they are like new and gently used.Put in a box and labeled it with age etc and store in storage/ garage.If you don’t have similar gender kids, donate it people might put in a good use.If you want to sell, lots of Facebook selling groups are up.Don’t save it.

Sort out winter and summer stuff.Wash them and store in boxes or in suitcases if you have storage room.During winter my home gets messier especially when kids get home after school. Make sure you have a proper place or basket for hats and mittens.Sort out your summer shoes and sandals.You may not be able to use until 4-5 months.Make space for your winter boots and jackets, these items take a lot of space.Try to put rubber mat and tray for snow boots, mostly wet shoes make more mess.

Donate your own outdated stuff including shoes, bag and other accessories that you are not using much or your size or sense of style got changed. Thrift store and shelters are best places to donate.Even you can ask some “kids charitable “organizations who offer and gladly pick up right from your door.

20170106_114031.jpg

Sort out toys or other baby / outgrown toys, throw broken items in garbage and other kids item that are not your kid’s appropriate age anymore, give away or sell it.Ask your friend who can use for kids otherwise daycare centers gladly accepted gently used toy and books.

Check your kitchen and washroom for unused utensils and crockery or beauty and cleaning supplies.If they are chipped or expired garbage it right away. Rest you can donate.If you are intending to buy new furniture try to sell out the old one first.You may repurpose it if you have space.

Keep things in boxes and baskets. That not only organize your place but also you have things handy.Labelled your boxes as much you can.Keep your important documents filed and properly placed.Discard your unwanted mail and bills, you may scan these documents and save a softcopy if you think you might need after.

Don’t rush, take your time. If you do it in a rush, believe me, you will put most of the things back. You will feel really good plus your home will be actually clear from an unwanted item.I shared some DIY for clutter-free kitchen counter on my Facebook page…http://grillo-designs.com/declutter-kitchen-counters-ideas/….These are so simple and easy , I am going to make some of them too.

Home Decor / DIY

DIY Message Board

Hi everyone,

I am going to share a simple DIY message/white board , its so easy even your 10 years old can make it( my daughter helped me & wrote down blog name too..!! sweet💕)

You will  need just two things to make it,

1.Picture frame that has glass (any  size)

2.Decorative /hard gift paper.20161230_123403.jpg
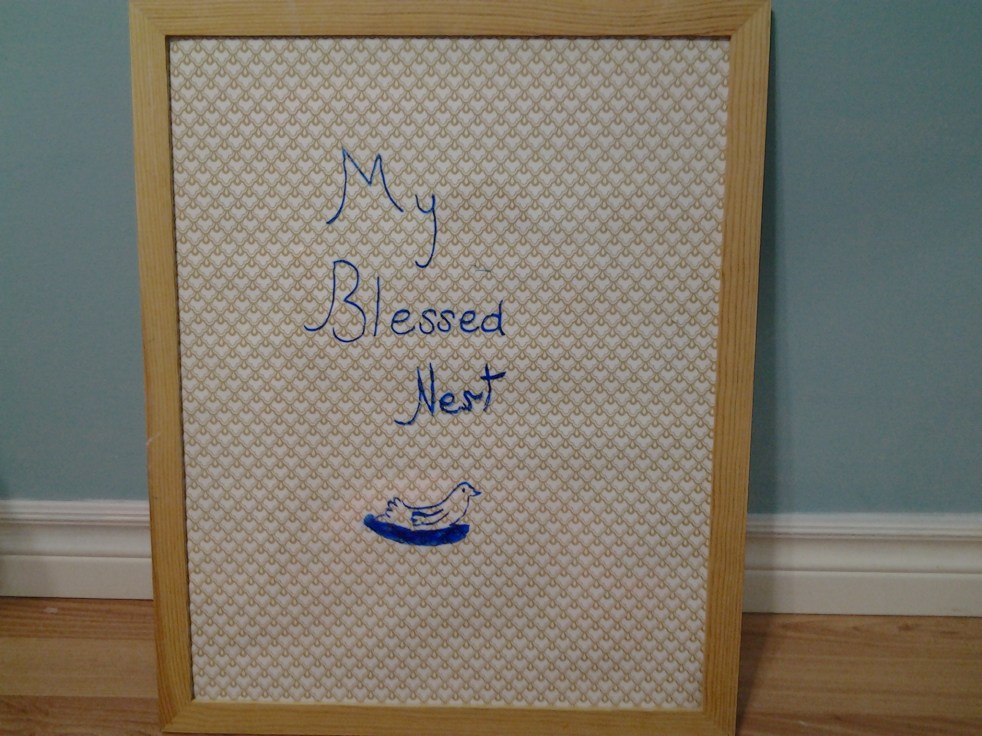
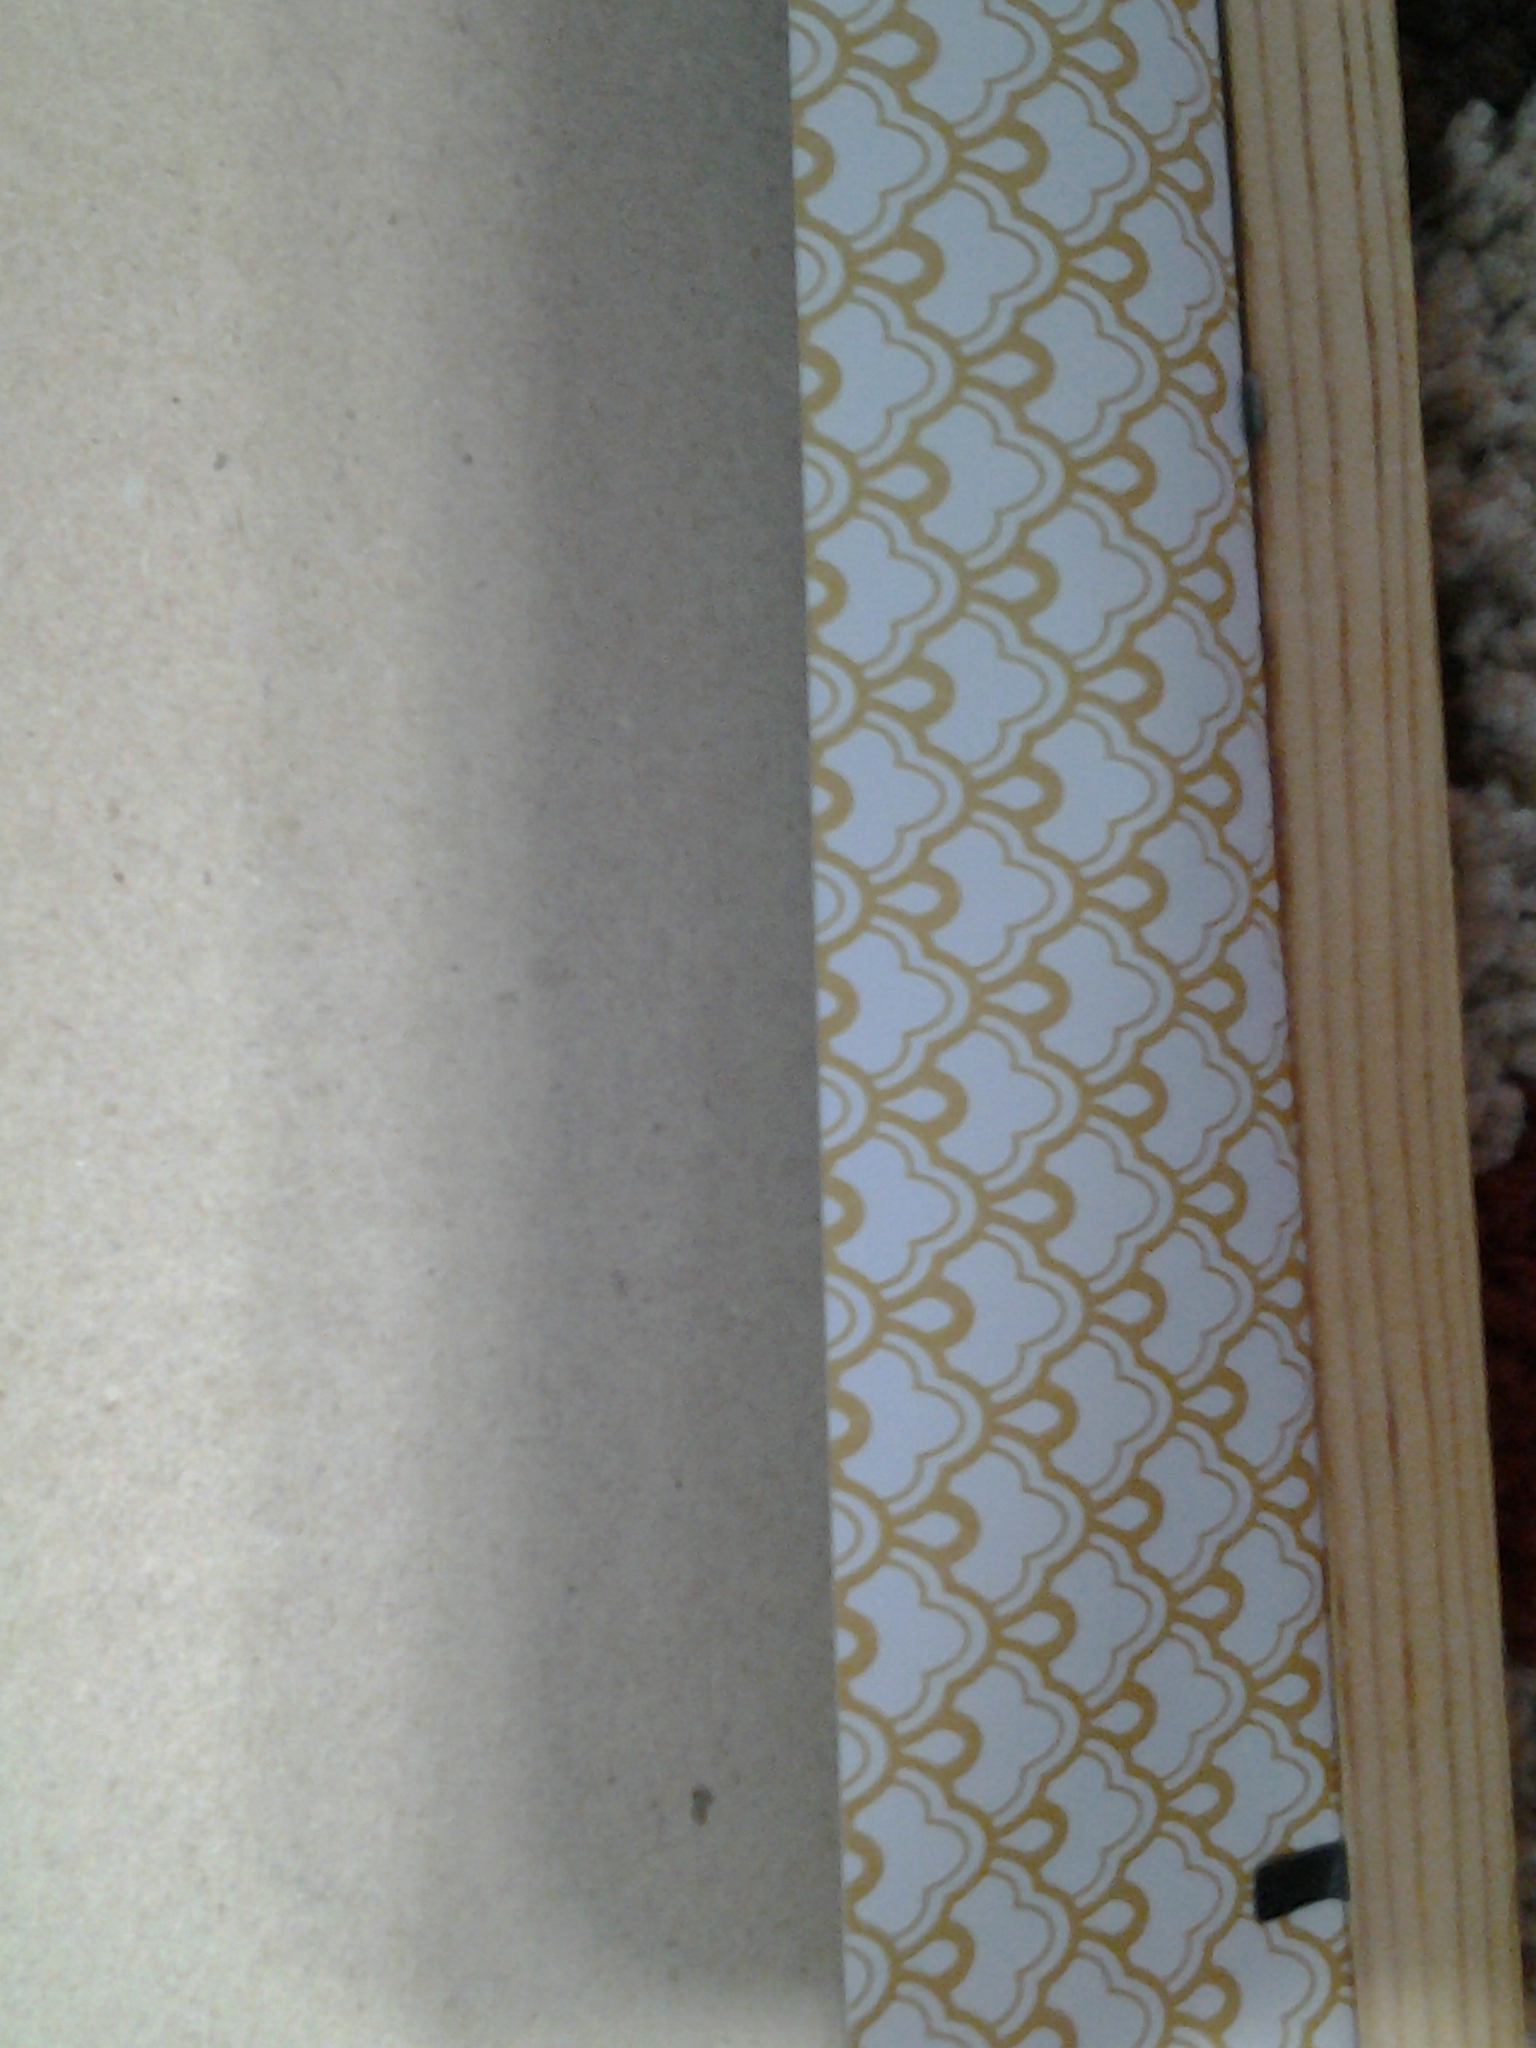
I have this IKEA picture frame  and I  got this decorative paper from Walmart.

20161230_123610Simply open the frame ,cut the desire size of decorative paper and attach it on the back of the board (comes with frame). You can use tape or glue.

20161230_123743.jpg

Place the glass first and attach the decorative board with frame clips …Taraaa!!! Its ready to hang and write.You can write down on glass with any marker and wipe it down.20161230_124321