Home Decor / DIY

DIY Stove Simmer


If you are a person like me who loves scents around your home, this DIY is something you will love for sure.I promised!This simmer is so good, just fill the pot with water and add some natural ingredients from your kitchen and it fills your home with a divine scent in few minute or at least no more strong masala smell of your desi cooking roam around, it will absorb everything.


20171230_173626

This is the best thing you could do for a quick and cheap from your kitchen.

You will need

  • Cranberries
  • Oranges
  • Apple
  • Rosemary
  • Cinnamon sticks
  • Cloves

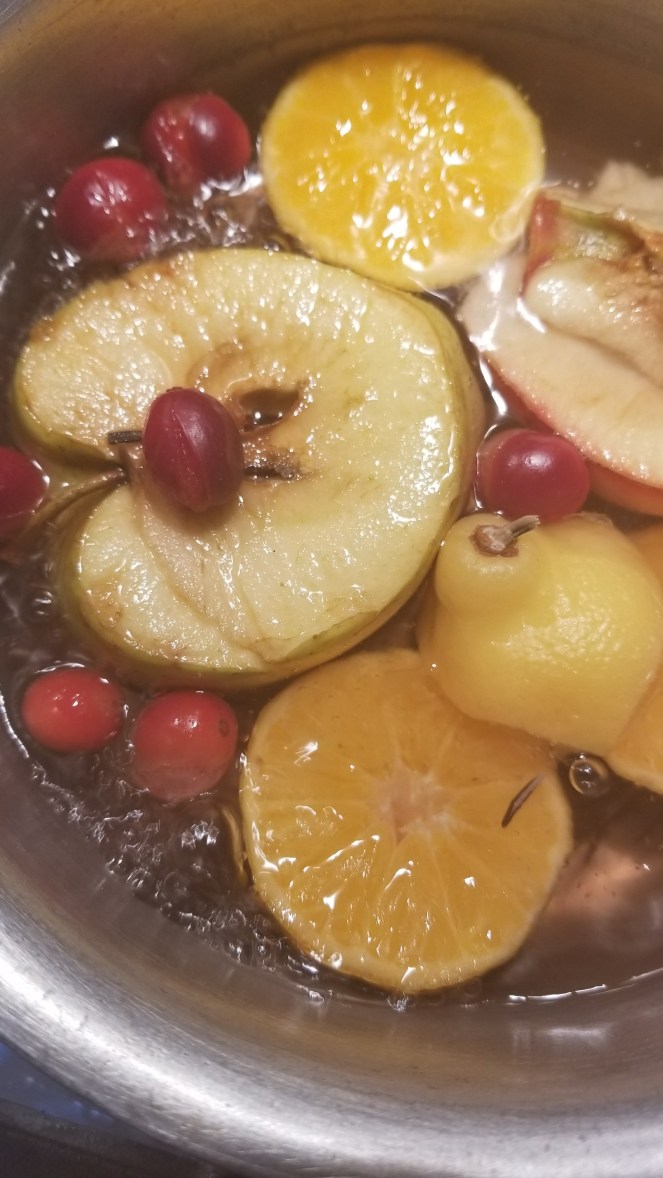
Take 2 cups of water, add all above ingredients and keep the flame Medium high, bring it to boil. Leave it to medium-low and simmer it.
20171230_173626


You can use it for a couple of days, just add water and simmer it.I always have it, especially when my guest over.It smells sweet and natural.You may freeze these dry ingredients (I always make extra) in a zip lock for a quick and handy as I do always.Take it out, add water and simmer.ENJOY!!

20171230_192050


You may change or add other ingredients like Bay leaves,Lemon, grapefruit or even Mint Leaves.Simmer your favorite ingredients and enjoy your very own natural diffuser. If You like I have Shared  DIY pot Pourri, check this out Here.


Home Decor / DIY

DIY PepperMint Bath Salt

I am obsessed with Bath Bombs and Bath salts nowadays.I love making them especially when my kids home and help.Its so easy and take only 15 mins to DIY.I used essential oil to make bath salt more soothing and relaxing.

20180105_221557

If you are following my blog and have plans to make Hand Made Bath Bombs than this DIY Bath salt recipe has almost same ingredients. Let’s start!

20180105_163705.jpg

Ingredients.

Epsom salt: 1 cup

Sea Salt: 1 cup

Baking soda : 1/4 cup

Olive oil (Any oil ): 1 Tbs

Peppermint Essential Oil: 15-20 drops

Food color and a glass jar.

20180105_163916

  • Mix Epsom salt and sea salt together, add baking soda.
  • Mix olive oil, whisk it to remove any lumps. Add essential oil and food color and mix well.
  • Use funnel and store in a glass jar, You can use it up to 6 months.

20180105_165841

You can transform your bathtub into a tranquil spa with these DIY PepperMint bath salts.soaking in these beautifully scented salt with the essential oil will leave your body feeling rejuvenated and skin soft and moisturized.

20180105_221550

If you are tired or have back pain.Sprinkle a generous amount of bath salt into warm running water and allow to dissolve.step into the bath and Enjoy!!

20180105_221505.jpg

This bath salt will give you a relief especially after postpartum and helps in healing if you have stitches.

Home Decor / DIY

DIY Wall Hanging

20171219_142843

Yarn love continues….Yes, I admit, I wanted to knit like my mom and I tried and got failed. After, I thought( or should I say wanted )to make/ DIY a wall hanging or tapestry with the yarn I already have!!

20171218_101515

It’s cheap and easy but a time taking project.Let’s start!!

I used,

A Dowel(From any craft / Home Hardware store)

Yarn of your choice colors( I used off-white, Orange, and Green)

Brass Rings.

Scissors

20171218_101840

Start with the base color I used off-white and cut it to the desired size. Now fold 4 equal lengths in half and drape it over the dowel.Pull the knot and make it tighten /secured.I made almost 26 equal lengths of base colored yarn.

20171219_100650

Step 2 is little tricky, I used two gold ring and hang it with a string of yarn in the middle.I used orange yarn and tied the same four strings of (shorter ) length and make a knot with the same I did with base color.

20171219_111857.jpg

Make a side knot to attach both rings and continue till You fill the space.I used almost same 10 knots with same (4×2)method.

20171219_122508

I Finished the project by using Green yarn, cut the excess length. You can even cut diagonal, not a hard and fast measuring rule.

20171219_122448.jpg

Viola!!!love how it turns out.I used the yarn according to my decor, you can use colors of your choice.It easy and affordable but definitely a statement piece in my living room.

Home Decor / DIY · life style

From Drab to Fab!

Winter brings dry fruits, dry skin and sweaters.I don’t like Canadian winter much but  love sweaters,shawls and cardigans. I am OK to go for neutral and warm tones for myself but for kids, A Big NO!!!I always want bright and fun colors for them, but it’s really hard to find winter stuff if your kid is tween.

24174334_10155633859695791_3573478765061482084_n

This Turtle neck sweater was so boring and dull for a Tween girl..I thought to give it a quick lift and make it trendy.You can update your outdated boring outfit/ sweatshirt by adding some colorful pom-pom in just 10 minutes.so You can say its a “10 minute Challenge”…so Get ,set and GO!!

24058718_10155633859760791_2740486922320138587_n (1)

If you remember I used these pom-pom here.I thought lets give this boring turtle neck sweater into fun and colorful make over.


24174509_10155633859830791_2935555558223773409_n

It’s so easy ,I would suggest you to stitch them.You may use glue but personally I don’t waste time that comes out after a use.Her sleeves were little bit bigger than her size so I folded and over lapped it.Now stitch a pompom with matching needle and thread.Make a pattern and that’s it!!


24131374_10155638903005791_8948612698328682613_n

Isn’t it so easy ,make a pattern of your choice .Use some funky or sober or even fluorescent pom-pom , make to love it more.

Home Decor / DIY

Laundry Folder (DIY)

I always used to hate laundry when I  was back home.Here, we have automatic machines fortunately but still…I am lazy….. folding and ironing both are time taking tasks.A family with three active kids, My laundry basket is always full even a minute after I finished my last load.

I was looking for the laundry folder but couldn’t find in store anywhere affordable.I checked online and it’s almost $20 plus shipping. After watching some tutorials online, I made one…A simple and cheap…Let’s start!

20171117_112248

I got sink Mats from the dollar store and make one under 10 (Less).I bought 6 sink mats and duct tape.The size of the mat is approximately 9 inches x 12 inches.

20171117_113443.jpg

Place sink mats in order to 2×3, I attached the duct tape in order like the picture below.Make sure you tape individually so the mat can be foldable, follow the number and directions.

23905645_10155616280630791_4817123211244701827_n
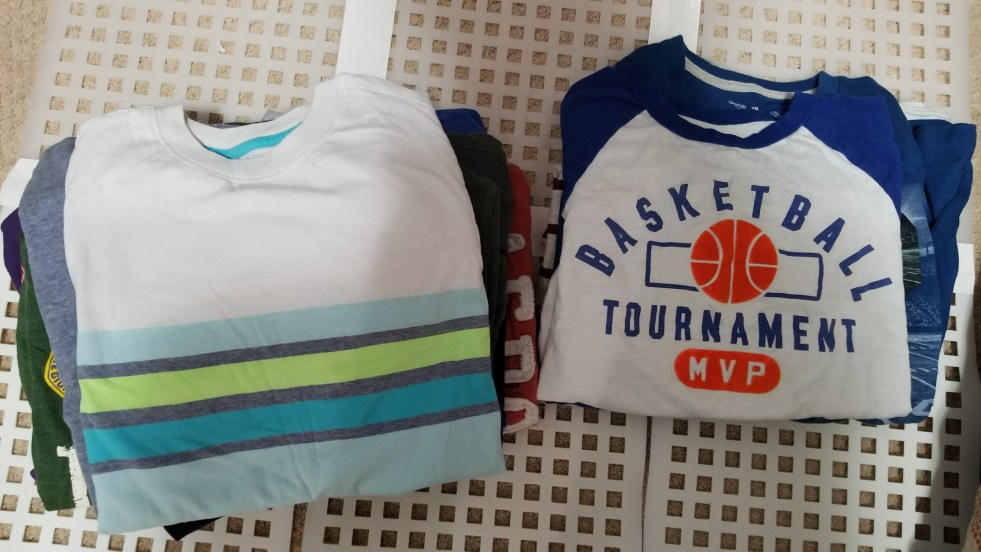
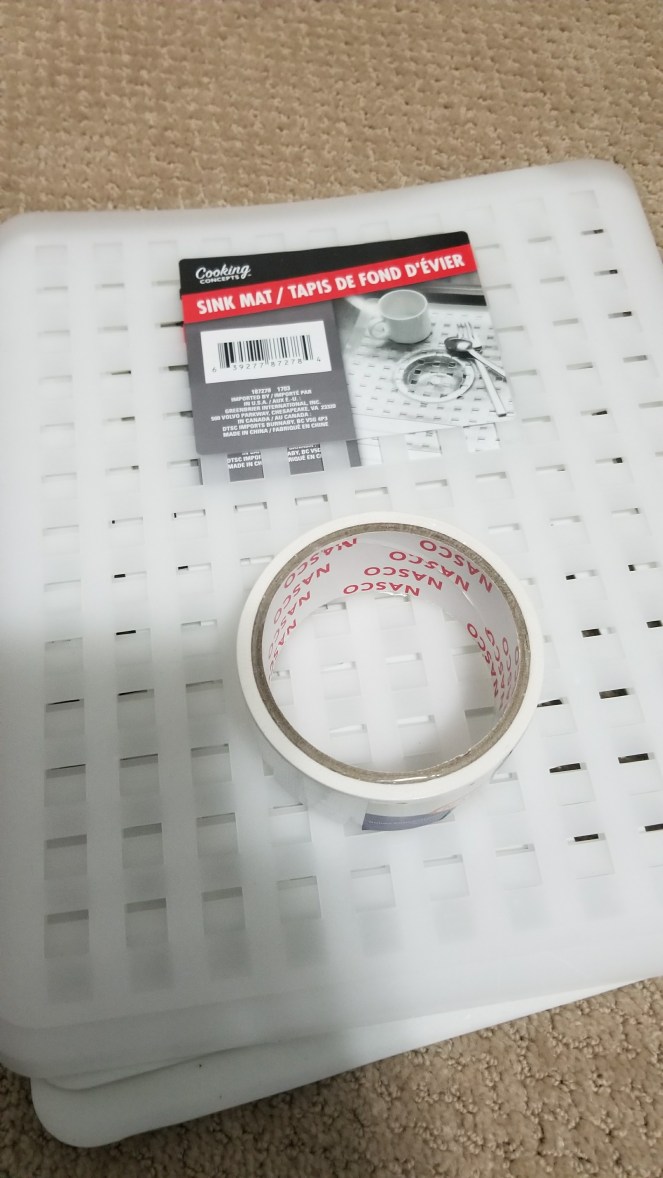
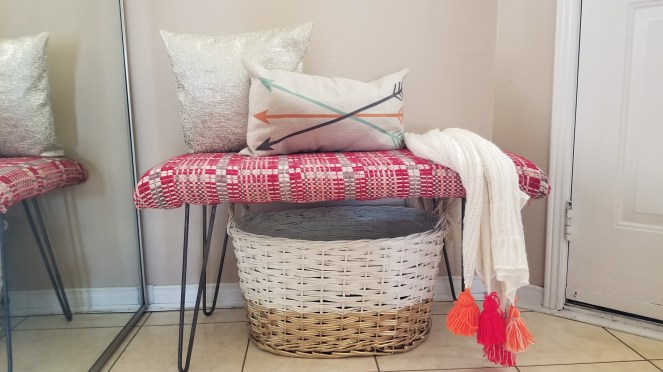
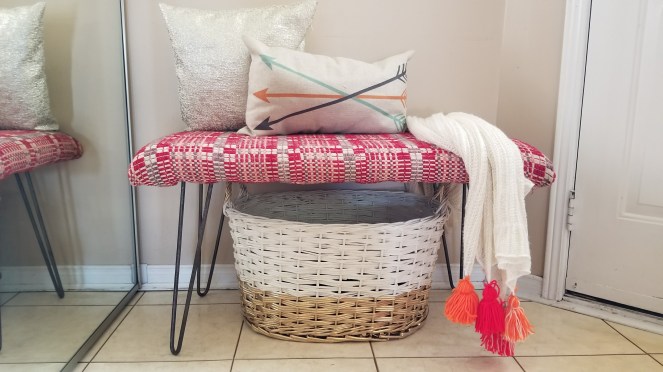
It’s really easy to make, just use a strong tape and that’s it, your very own laundry folder is ready.


Place shirt in the middle of the mat, then fold right side first. Now flip the left side, and finally the 5th mat to complete the fold.Its so easy even your kids can do it.My 5-year-old Bilal love to help.

You can make with card boxes, you need 6 same sized cardboards.Cut the desired equal size and that’s it.

20171121_133840.jpg

See how easy to fold shirts in seconds, It took almost less than half time I normally spent without it.Make one and ask your kids to fold their own.20171121_133910.jpg
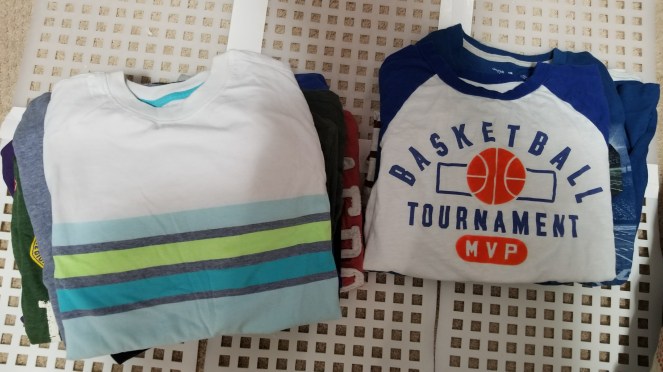
I am sure you will love and have a huge relief after.Make one and Enjoy your most hated chores (Like me).

Home Decor / DIY

Tie & Dyed Tangerine Cushion

I admit It was one of my wish to have a “Tie and Dyed” custom piece in my home.I had so many Tie and Dyed dupattas even Saree in my Jehaz and I just love to have them.It was done by professional  Rungraz back home (sadly we don’t have such services here).I couldn’t wear plain Dupatay/ scarf, and no clue why I am like that!

I am so excited! I’ve made my very own Tie and Dyed cushion, and yes it is a great success!! Are you ready!!

20171118_130336.jpg
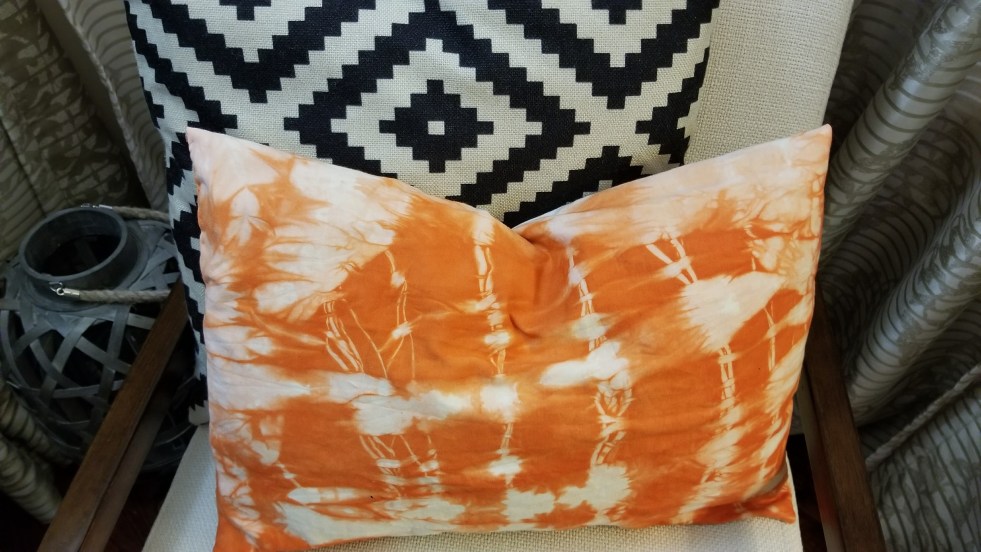
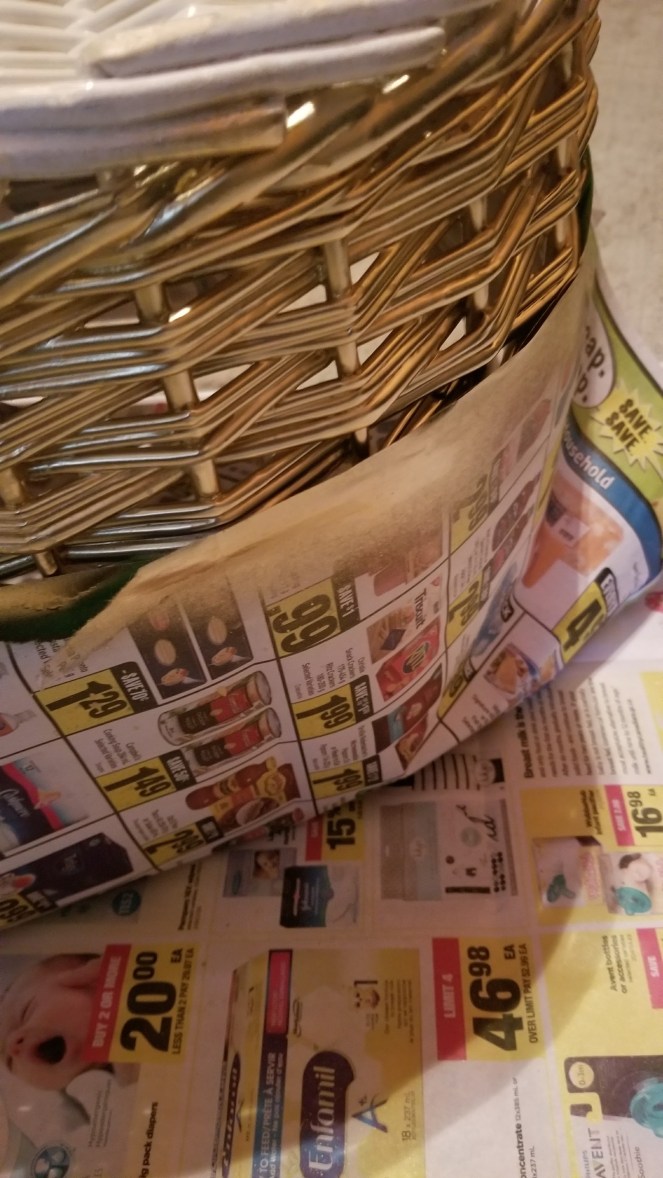
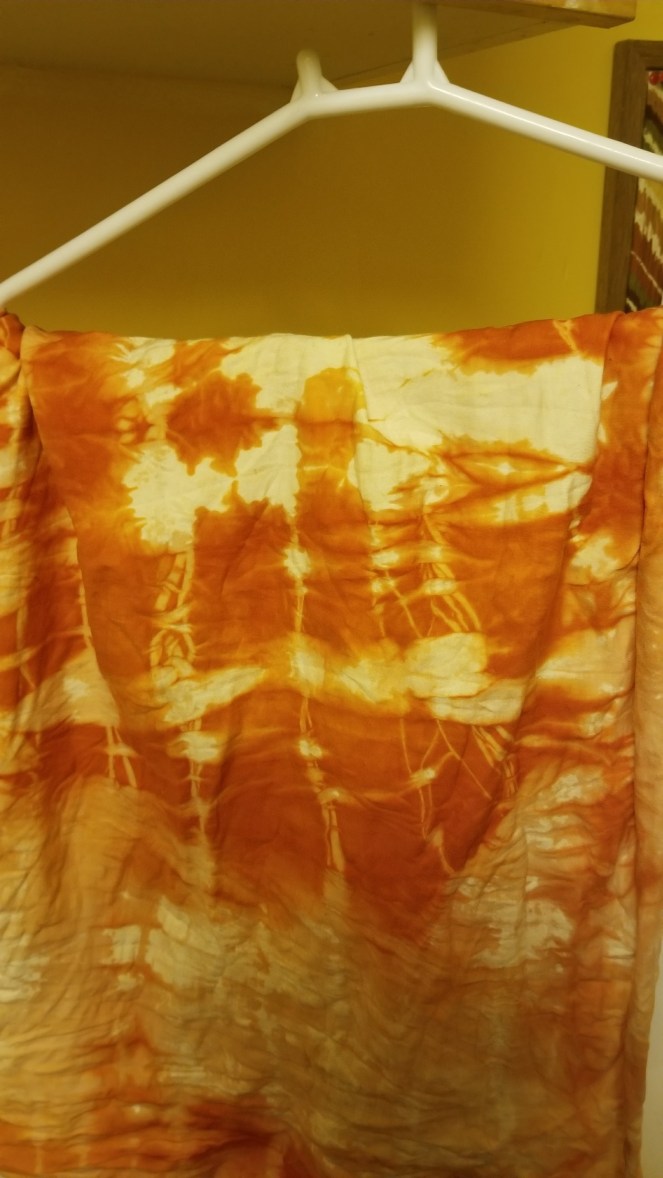
I used powdered Dye in “Tangerine Orange”, it’s a small pack of 50 gm.Liquid dye is easy to use but it’s expensive so I thought let’s try this small packet first if it gets fail I will stop dreaming about it…make sense right!

let’s start!

20171116_105143.jpg

Fabric Dye (Liquid /powdered)

Fabric( cotton/canvas )

Stainless steel Bowl/Bucket

Rubber Bands

Gloves

Salt

Prepare your fabric first, I was making two 12×20 pillows so I cut the fabric accordingly.Fold the fabric and start tying it with a rubber band.Tie and until the end of the fabric.

20171116_112504.jpg
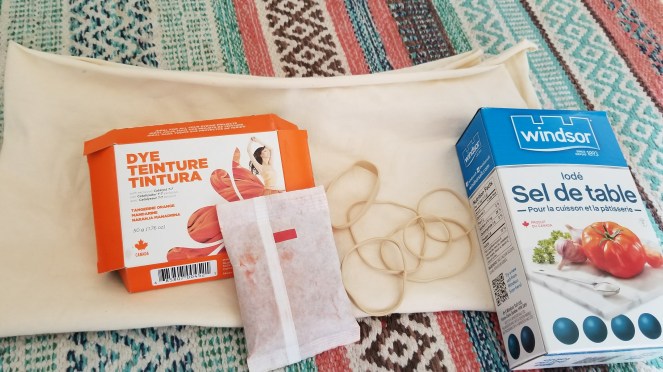
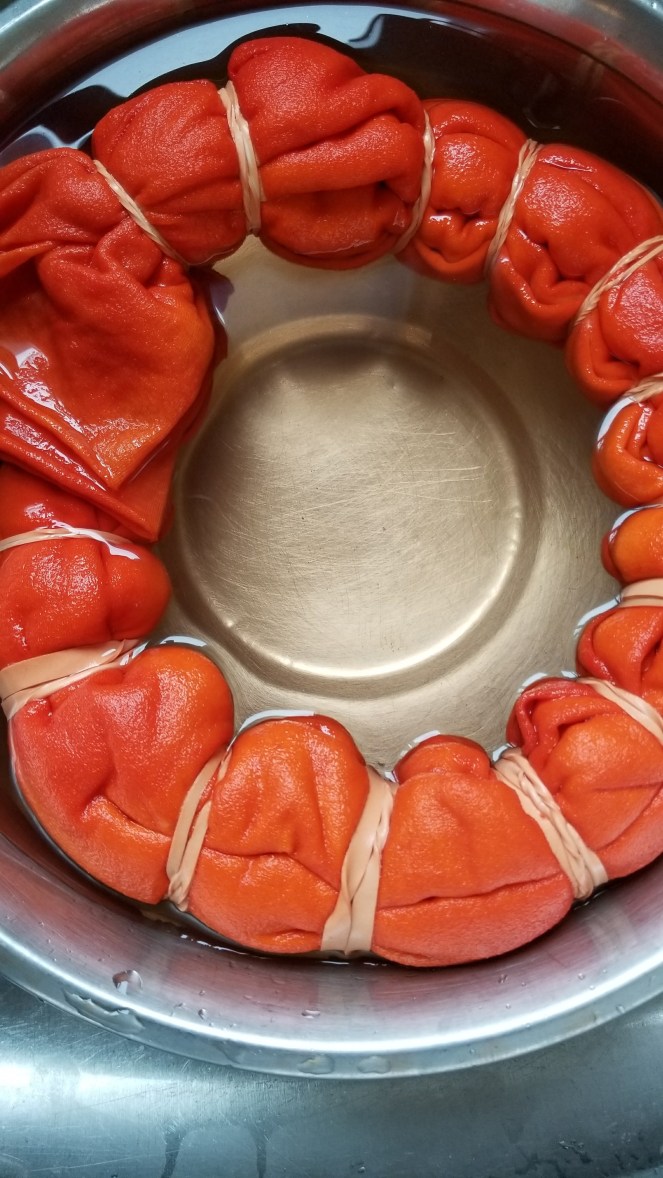
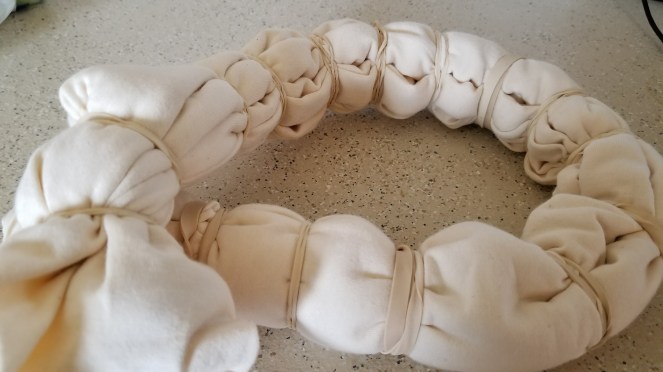
wear your gloves and cover the surface.Boil water now pour the hottest water to any stainless(spare) steel bowl Since the dye is not food grade so you won’t be able to use it for food after. Mix hand full of salt, I would say about 3-4 Tbs and Dye powder to water mix well.

20171116_115222

Now Dip the tied fabric into the Dye and dip it with the help of a tong.Leave fabric about 40 mins, rotate fabric in meantime.

20171116_122819

Rinse fabric until the water clears out, now add salt to cold water and dip this fabric for 20 mins to fix the dye.Now untie the fabric and remove the rubber band.

20171117_004852

Let it air dry it, It was so cold outside that’s why I hang fabric in my laundry room overnight.I ironed it and made cushions similar to this one.Its simple and required basic sewing skills.

20171118_125725

This Tie and Dyed cushions are perfect for  Accent chairs I bought recently from Target USA for my living room.

20171118_130408

Isn’t look good? It’s so easy and so much fun DIY. Now I am more confident to try some new things/Projects… Stay tuned!!

Home Decor / DIY

DIY Pom-Pom Bracelet

20171115_164023.jpg

I have a crush on pom-pom and tussles nowadays, I made and used them around my house.I bought ready-made assorted sized pom-pom(You can also DIY them from yarn) from the craft store for Bilal for his JK activities.

20171108_174118

I am going share this cute DIY bracelet and It brings me back to my teenage life… I wish I did the video tutorial or go live.It’s really hard to explain but I captured everything so you will see how easy it is, so be ready for lots of pictures.

Let’s start!!

20171115_140457.jpg

You will need

Gold /Silver chain

Pom-Pom(I used small-sized)

Eye-Pins/Thread

Pillars

20171115_101657

I opened the chain and cut the desired size( almost 18 cm) out and add Jump/End ring .Now separate few segments from the chain.


Take a pom-pom and insert an Eye-pin and carefully lock it down from the sharp side with the help of pillars.

20171115_104936

Attach the Pom-pom with the help of chain segment to that(inserted) Eye-pin.Use any color or pattern.I used some funky colored pom-pom.You can always mix and match.

20171115_143028

It’s so much fun to wear it, I would definitely make more for my self and to give as a gift.If you don’t find Eye-pins, You can easily attach it to matching color thread.


I did one to explain to you how to with thread.All you need to stitch /attach the segment with help of thread to the pom-pom and then attach that segment to the chain.

23622541_10155606181935791_1325191977201688875_n.jpg

Isn’t simple and cute DIY that can be shared with your Best Friend.Make two identical and give one to your BFF/Sister etc (I made one for Aleeza as well ).It’s so much fun to DIY and I love wearing it, reminds me I am still young..brings back to me in my student’s life…lol

Home Decor / DIY

Coffee Vanilla Sugar Scrub

20171106_180827
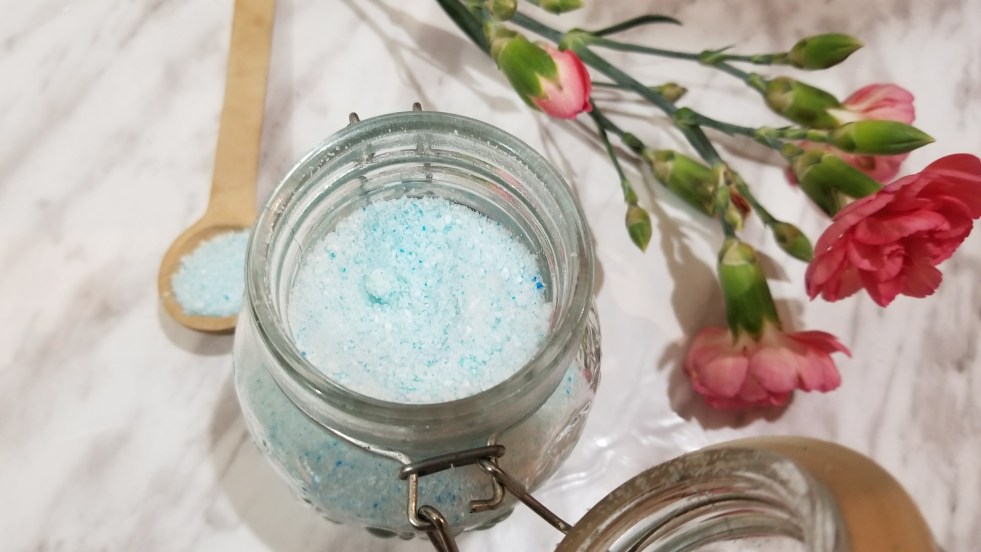
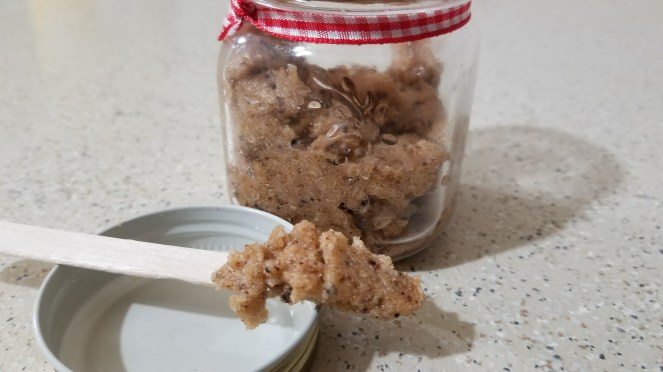
I have normal skin but it gets dry during winter.We have to turn our heating on over 6 months that means no fresh air and it makes the skin so dry.I need to moisturize every time I wash my hands and feet. I showed you guys the body butter, I got from Winner’s but I need to use a scrub to get rid dead skin especially during my bath.I made my own sugar scrub and I  highly recommended you to make one for your self.It exfoliates dead cells and you feel the difference after a single use.

20171106_180026

You Will Need!

White Cane Sugar:1/2 cup

Brown or Golden sugar:1/2 cup

Coconut oil: 5-6 Tbs

Grounded Coffee: 1/4 cup

Vanilla Essence:1 Tbs

Cinnamon: 1 Stick (Optional )

Glass Jars

20171106_180749.jpg

Mix white and golden sugar together, Add coconut oil gradually and check the consistency of the scrub.Coconut oil should be at room temperature, so it should be combined with sugar and give a rich buttery texture.Add coffee and Vanilla essence, Don’t  add too much coffee.Mix everything well, add cinnamon grated or powder.


20171106_175137.jpg

I didn’t melt coconut oil and Mix everything well and store in a glass jar.You can store up to 8 weeks at room temperature or up to three months if you keep in the fridge . If you scoop it up, you will feel the sugar grain.Rub the scrub on your skin even on your face, it will remove dead skin and give you a glow.(Azmaiyash shart hy ).

20171106_185457.jpg

I love using it during my shower and love the warm smell of coffee and Vanilla.Its very easy, A must try DIY that will not only exfoliate and but also moisturize your skin.

Home Decor / DIY

Hand Made Bath Bombs

It’s doesn’t matter how old are you but everyone wants a spa kinda bathe.Epecially If you are a mom of  little babies or toddlers and you get hardly 15 mins to enjoy your bath than this easy DIY bath bombs are perfect for you to enjoy your ten minutes “Mommy Me Time”.

received_10155568565895791

If you don’t want to DIY it’s easily available everywhere even dollar store but I made with kids on weekend to keep them busy and they enjoyed to use their very own hand-made fizzy bath bomb while taking their bath.

You will need:

Baking Soda:1 cup

Citric Acid:1/2 cup

Corn Starch/Flour :1/2 cup

Epsom salt:1/4 cup

Coconut Oil : 2 Tbs

Essential Oil : 1Tsp

Food Colour: 1 Tsp

Molds/ice-cube Tray

Mix first four dry ingredients in any glass bowl and remove all lumps.Melt coconut oil in microwave and mix it slowly  with the help of fork.Now add any essential oil (I used lavender essential oil)and food color,mix well.Now add water but Dont use water so quickly ,it will start fizzing.

received_10155568565900791
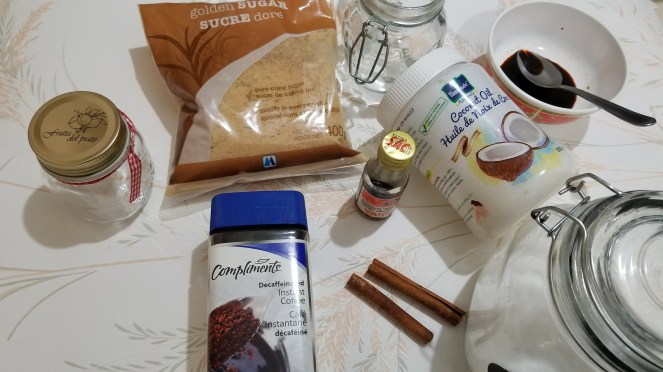
Take a bath bomb or an ice-cube mold, press the mixture on one half and then do the same with other half now join the mold and leave it over night .Making a bath bomb in  a mold is little tricky as it can crack when you open ,if it does !!rub oil on your palm and shape with the hand.Its more easy to use to use ice cube mold tray.Gently press the mixture and leave it over night or 6-8 hours.

20171028_155136
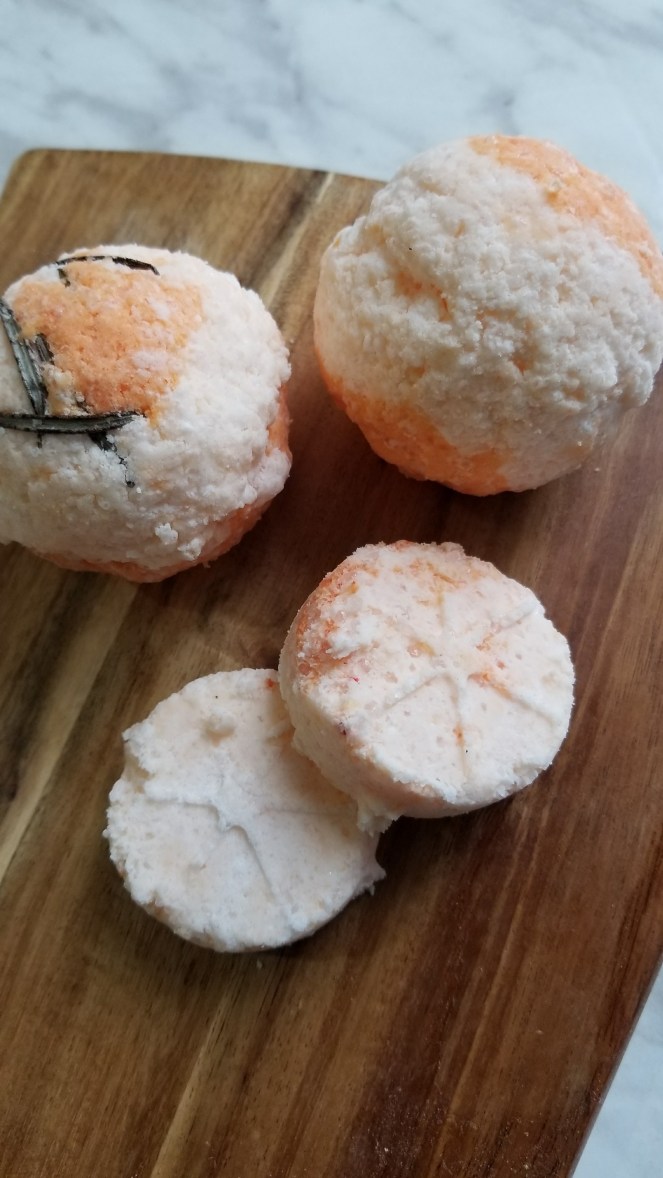
I bet !!!! You will be addicted once you start making it.These orange bath bombs , I made   ( first time ) a week ago when I didn’t have food colors.I used Zarda rung  (Yellow/Orange food color)and it was so good. I added dried Rosemary leaves inside the mold,it makes a divine aroma with lavender essential oil  (My kids asked me not to use Rosemary leaves,So no more herbs inside ).

20171028_155158If You have everything handy ,you must try this and ask your kids to do this activity to enjoy  the fizzy refreshing bath after.


Home Decor / DIY

DIY Gold & White Basket

22861718_10155551252135791_4697476998440994468_o
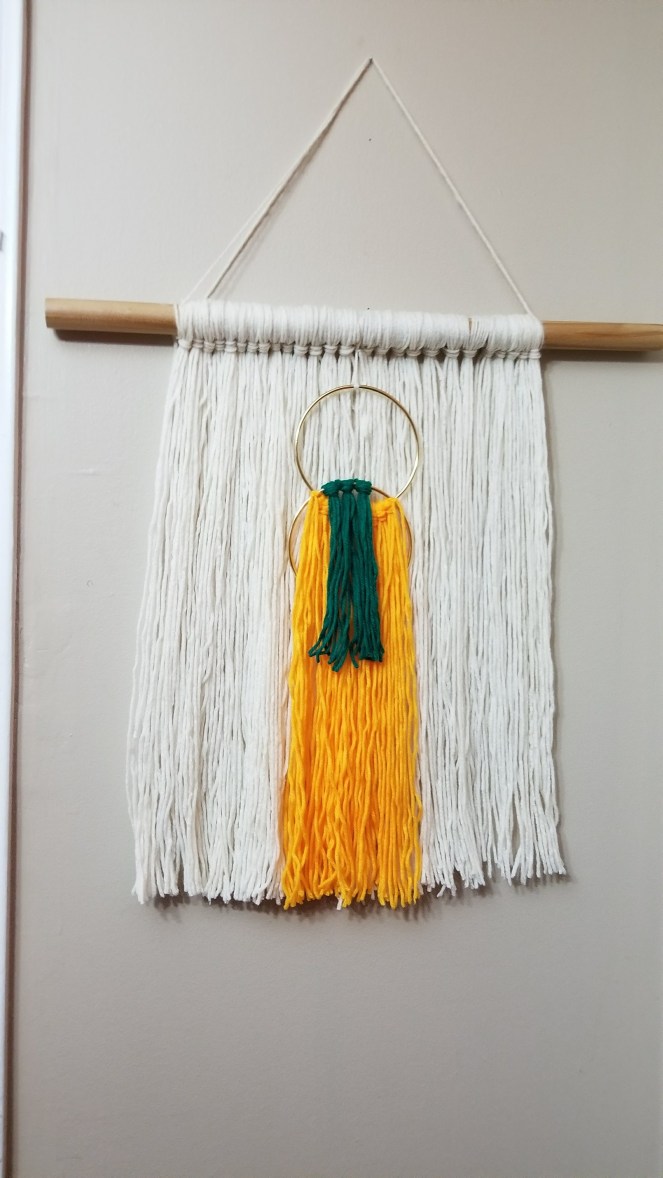
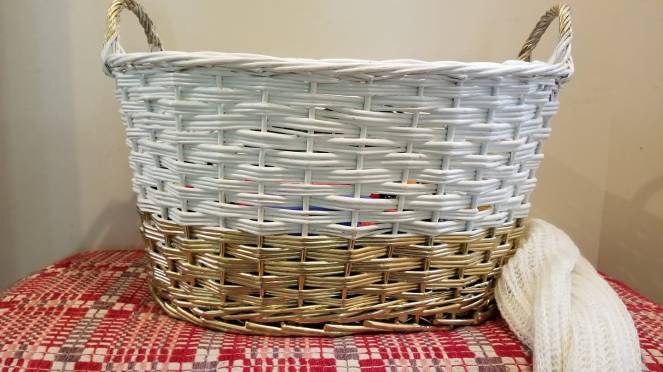
If I say  I love spray paints,it’s so so true just because I want instant results (I am Be-sabari soul..lol).It’s so simple and easy,Just hold a spray paint and get an entirely new look.

20171017_135309

Few days ago,I showed you guys my Hair pin legs bench and you can see entire post Here. I promised to tell you guys about the white Rattan basket that I got from a local consignment store(You can take your old ones too) and I love the shape and you know what, its brand new and tag were still on.

20171013_132216

Honestly speaking,It was plain and Boring and I didn’t like “as it  was”much.I wanted to do something different that give a lift. I  love the gold metallic spray paint ,just shake and use it . It has primer so you don’t need anything to use before or even after.

20171013_134131.jpg

I wanted to paint the lower portion so I taped the upper half and covered it with newspaper.I always cover the floor or surface with a plastic sheet or newspaper /flyers whenever I use paints.Give a good shake and spray from distance of approx 10-15 cm for a good coverage.

20171013_135350.jpg

Leave it for an hour or so and do another coat if required.I left it over night and let it dry completely.Oh yes!! I forgot to tell you I painted the handles as well.

20171017_135317

Its big enough to hold my kids toys or even blankets and extra cushions .I love spray paints and you don’t even need any skills(advanced) for this technique.Let me know if I missed something!